Cut Flower Gardening for Beginners: How to Grow a Garden Full of Bouquets

A beginner’s guide to cut flower gardening. Learn what to plant, how to grow and harvest, and how to enjoy beautiful homegrown bouquets.
Cut flower gardening focuses on growing plants specifically for harvesting blooms rather than leaving them in the landscape. Beginners have the most success starting with fast-growing annual flowers that produce abundant stems all season long.
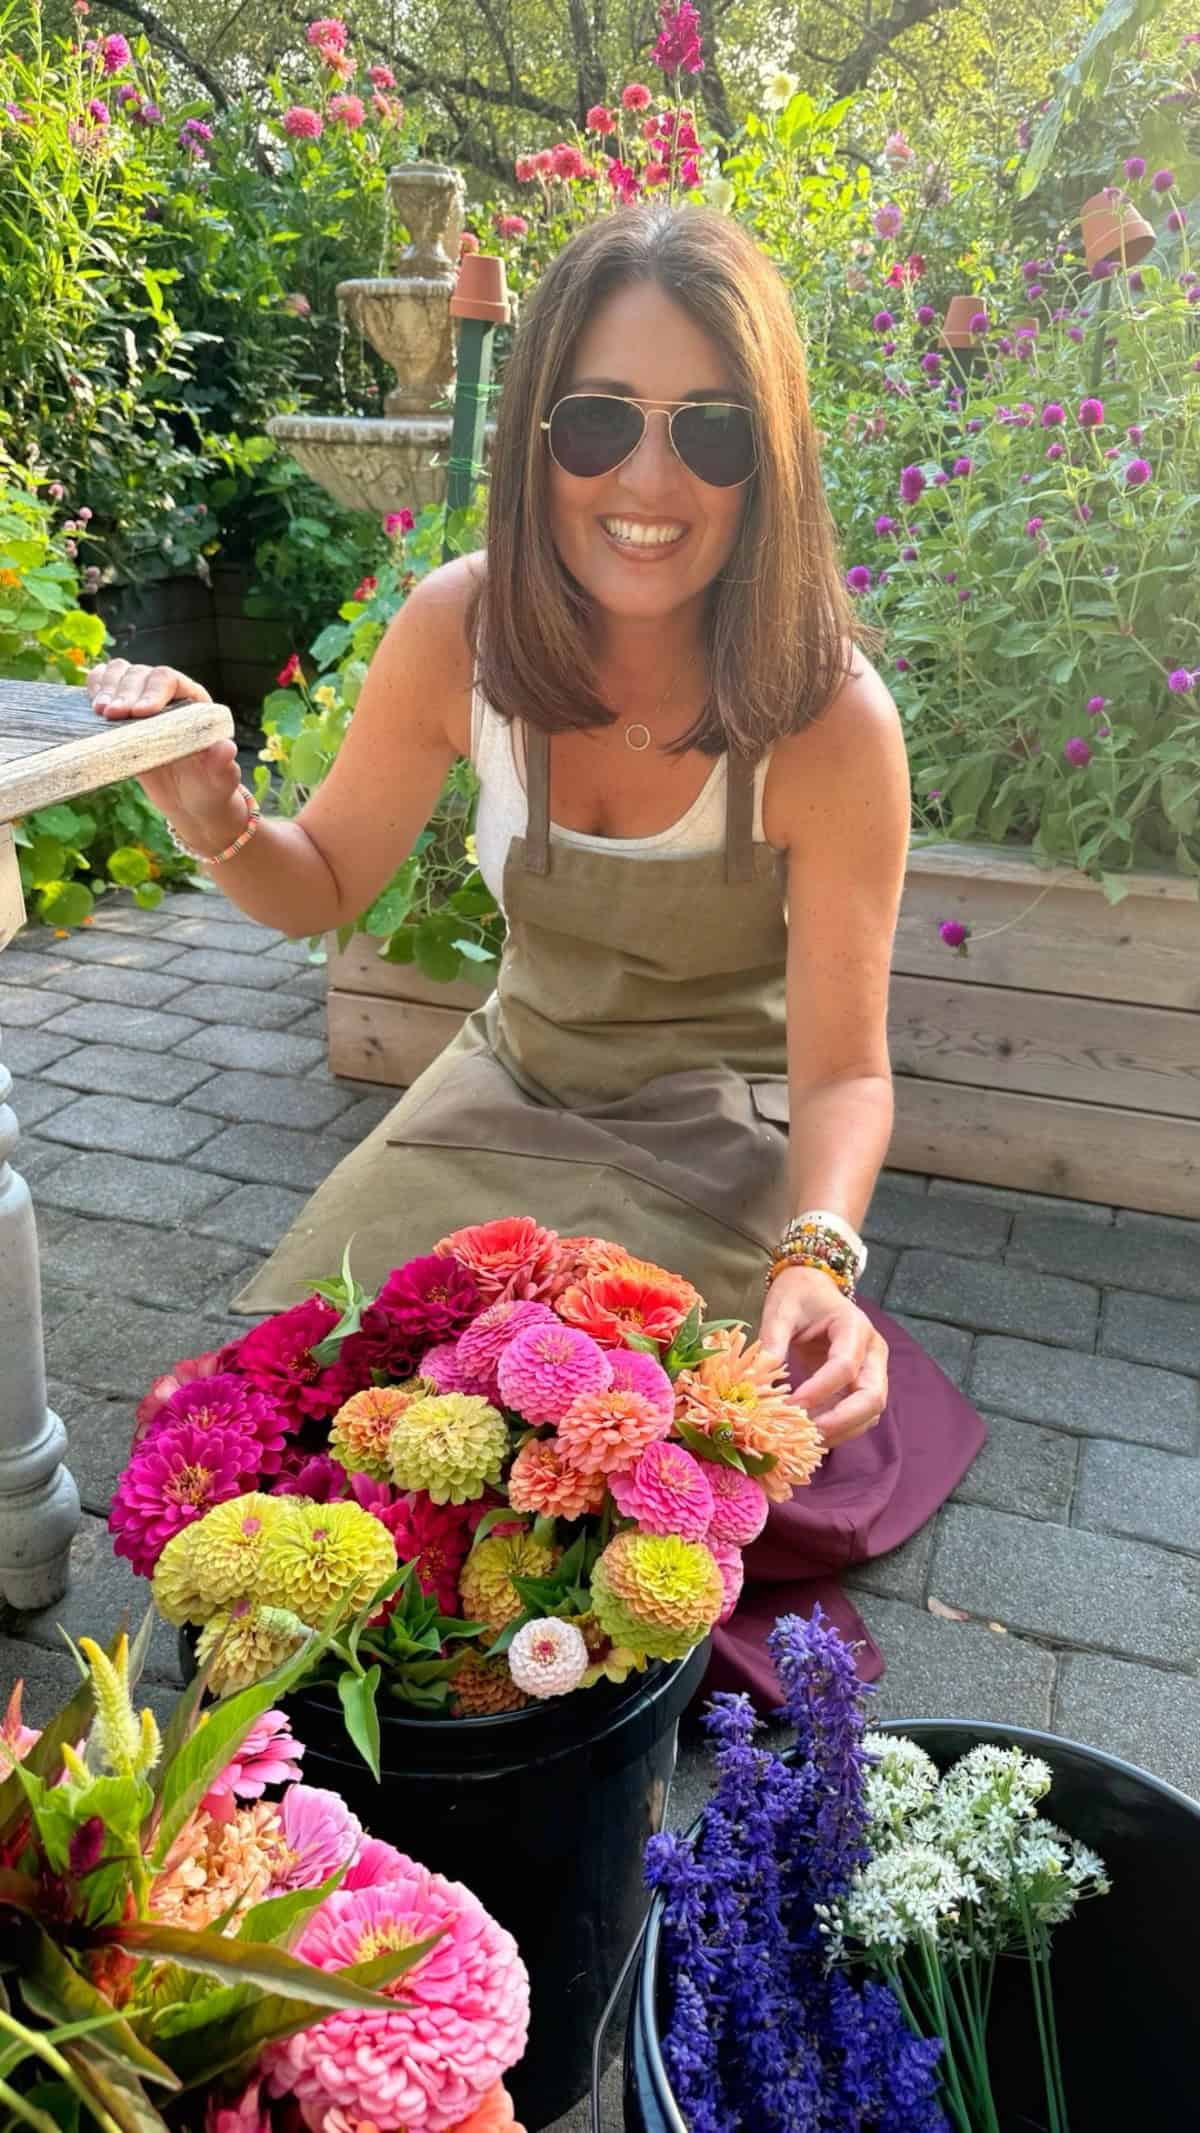
Hi, I’m Stacy Ling, a trained Master Gardener gardening in USDA Zone 6b with nearly thirty years of experience growing flowers for cutting. Over the years, I’ve trialed countless varieties, from easy annuals like zinnias and cosmos to more advanced blooms like dahlias and stock, so I understand exactly what beginners need to start a successful cut flower garden.
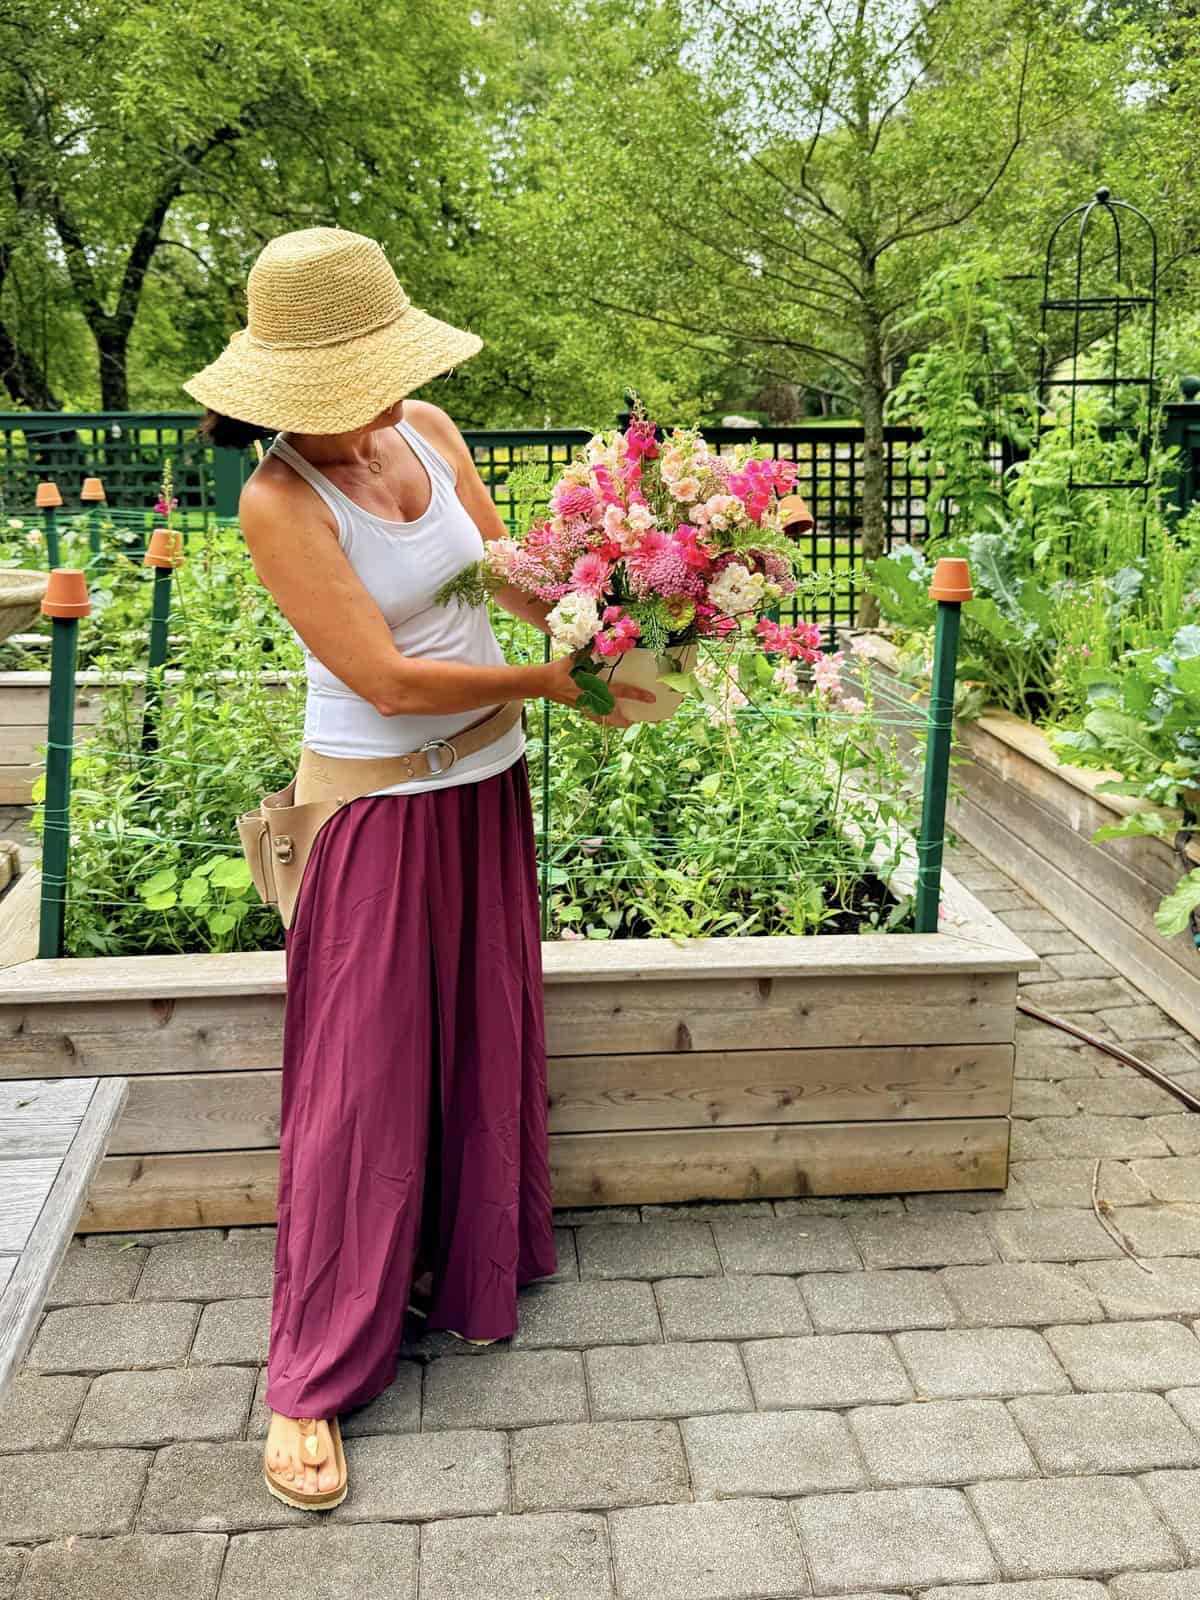
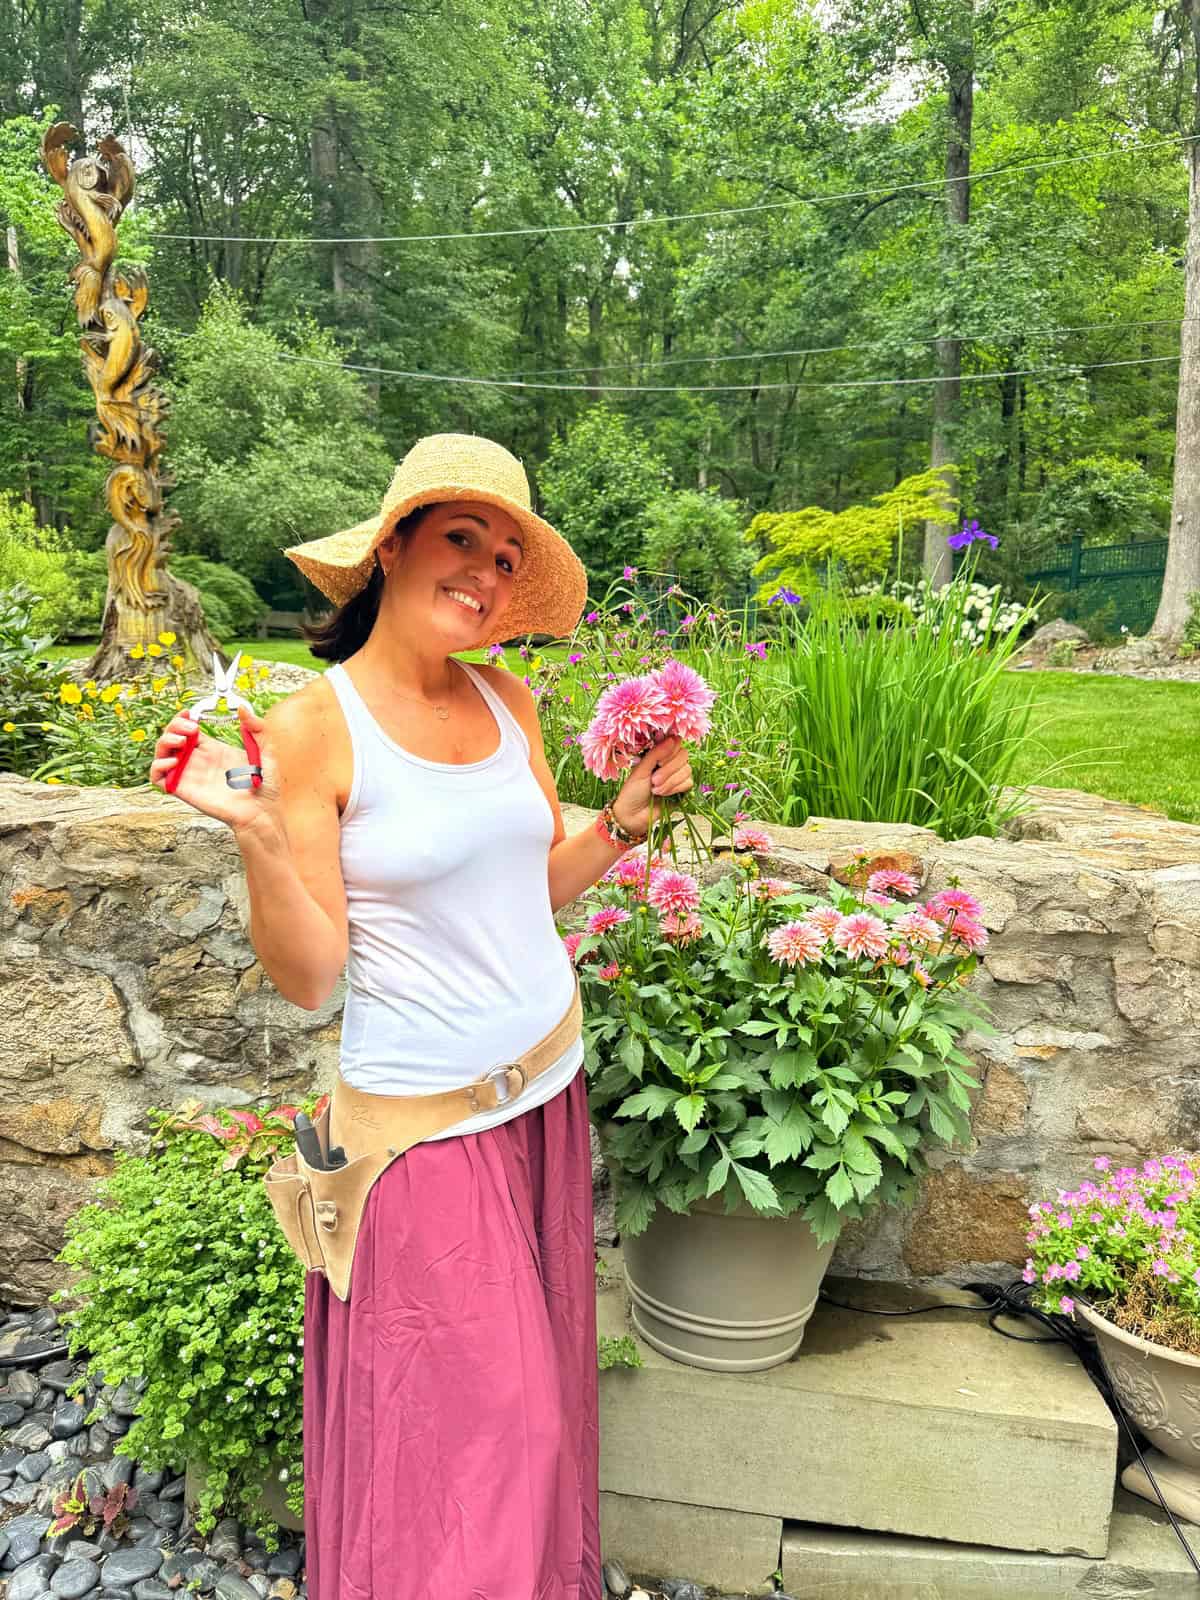
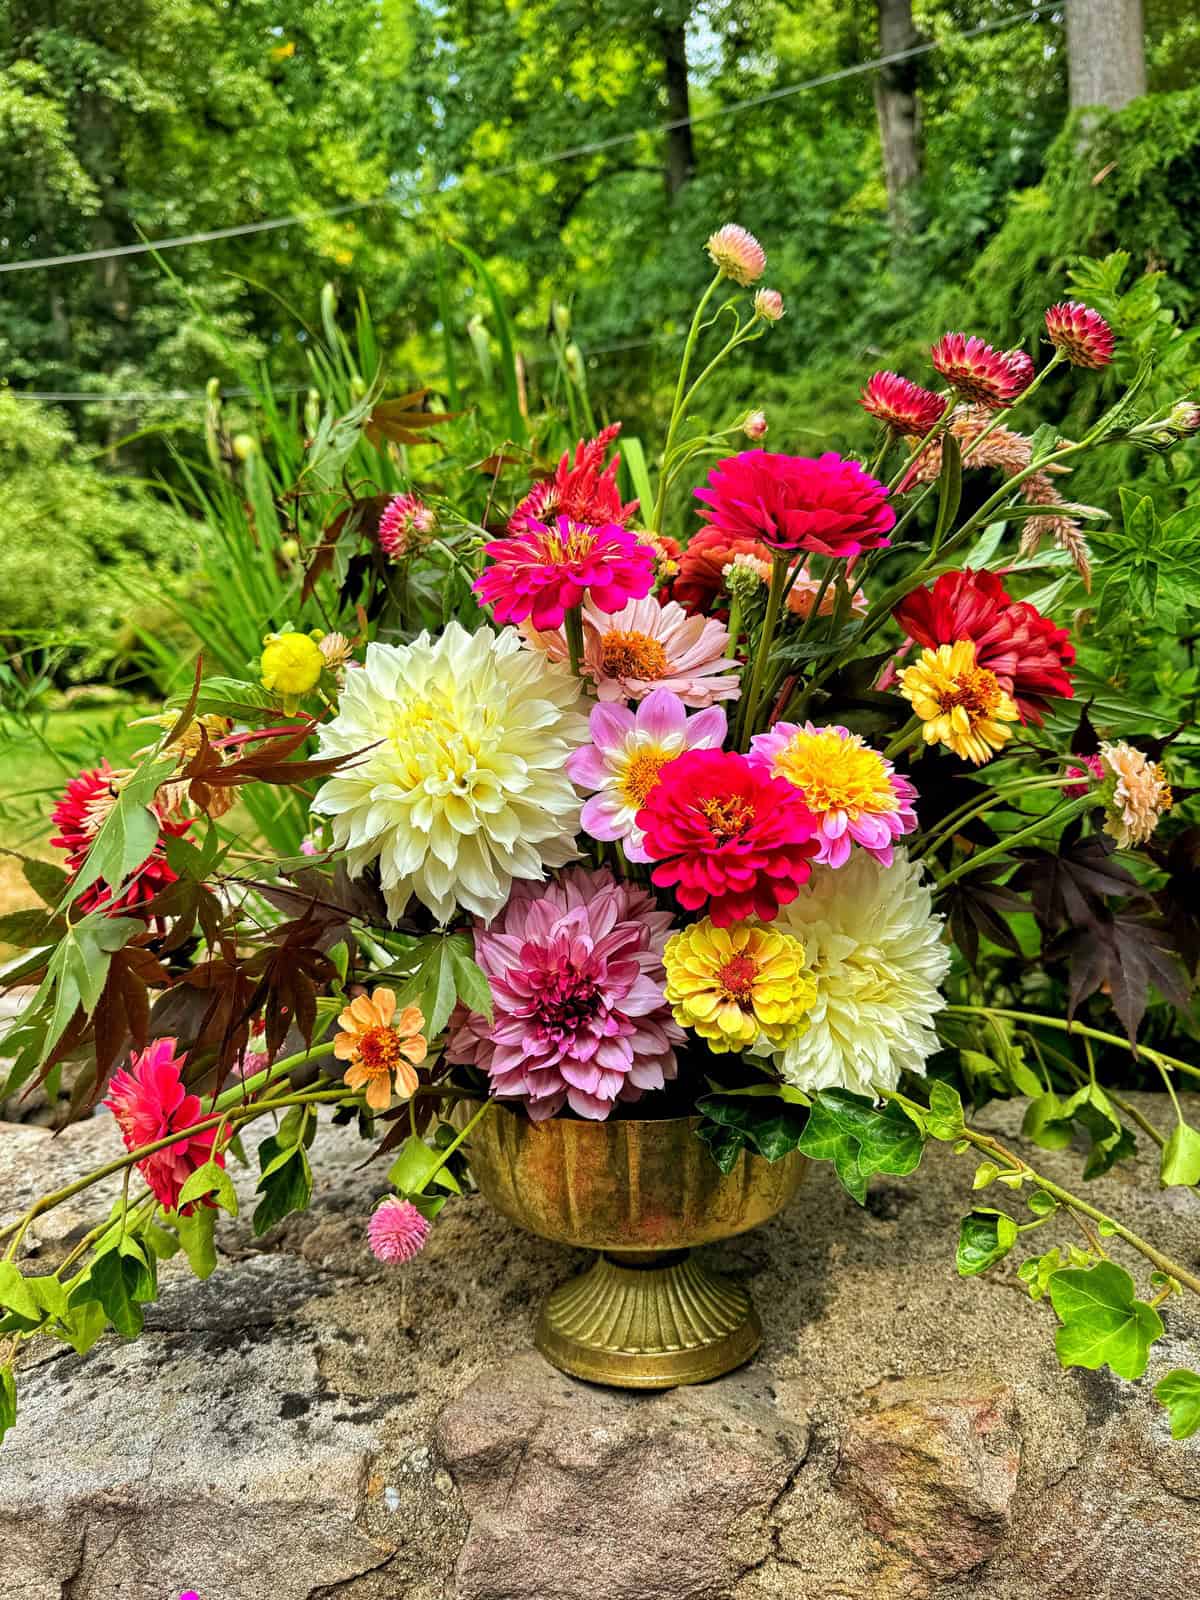
Cut flower gardening is one of the most rewarding ways to grow because you’re not just planting a garden… you’re growing armloads of bouquets you can enjoy indoors or share with friends. I LOVE making fresh arrangements from my garden, and now I often invite friends and family over to cut blooms so they can bring home a little joy, too.
When I first started gardening, many of the flowers I wanted for bouquets weren’t available locally, so I began starting them indoors from seed. That experience opened up an entirely new world of possibilities and showed me how EASY it is to grow unique, long-lasting cut flowers at home with no professional experience required.
If you’re ready to grow your own beautiful bouquets from seed to vase, this beginner-friendly guide will walk you through everything you need to know: what to plant, how to grow, how to harvest, and how to keep your homegrown cut flowers looking their best.
(Posts on stacyling.com may contain affiliate links. Click HERE for full disclosure.)

Getting Started With Cut Flower Gardening
When I first started growing flowers for cutting, I wished I had a simple overview of how it all worked together. In this video, I share how I approach cut flower gardening in my own garden and what beginners should focus on first.

What Is Cut Flower Gardening?
Cut flower gardening is the practice of growing flowers specifically to cut, arrange, and enjoy indoors, not just to admire in the landscape. Unlike ornamental gardening, where blooms stay on the plant for curb appeal, a cut flower garden is designed to produce a steady supply of long-stemmed, vase-worthy flowers you can harvest all season long.
In a cut flower garden, the focus is on:
- Productivity — plants that bloom continuously when harvested
- Stem length — varieties with tall, strong stems for arranging
- Vase life — flowers that hold up well after cutting
- Ease of regrowth — plants that rebound quickly after each cut
Because of this, cut flower gardening uses different planting methods, spacing, and plant choices than a typical ornamental bed. You’re growing for production, not just aesthetics.
Many beginners confuse cut flower gardening with cut flower garden design. They are related, but not the same. If you want ideas for bed layout or planning a dedicated cutting space, be sure to check out my Cut Flower Garden Design Guide. But this post focuses on the gardening side: choosing the right varieties, improving soil health, succession planting, harvesting, and getting the longest vase life from your blooms.
Whether you want a few jars of zinnias on your kitchen counter or enough dahlias to share bouquets with friends, cut flower gardening is a joyful, deeply rewarding way to grow.

Why Start a Cut Flower Garden?
Growing a cut flower garden is one of the most satisfying ways to enjoy your outdoor space because the beauty doesn’t stay outside—you get to bring it indoors and share it with others. Unlike traditional flower beds that are meant to be left untouched, a cut flower garden is designed to be harvested from again and again. Every snip encourages more blooms, turning your garden into a steady source of joy, color, and creativity.
Cut flower gardening is also an incredible way to:
Grow your own bouquets for pennies
Store-bought flowers are expensive and often have a short vase life. When you grow your own, you can enjoy armloads of zinnias, dahlias, sunflowers, snapdragons, and more for a fraction of the cost—and they stay fresh much longer because they’re cut at the perfect stage.
Enjoy gardening as a form of therapy
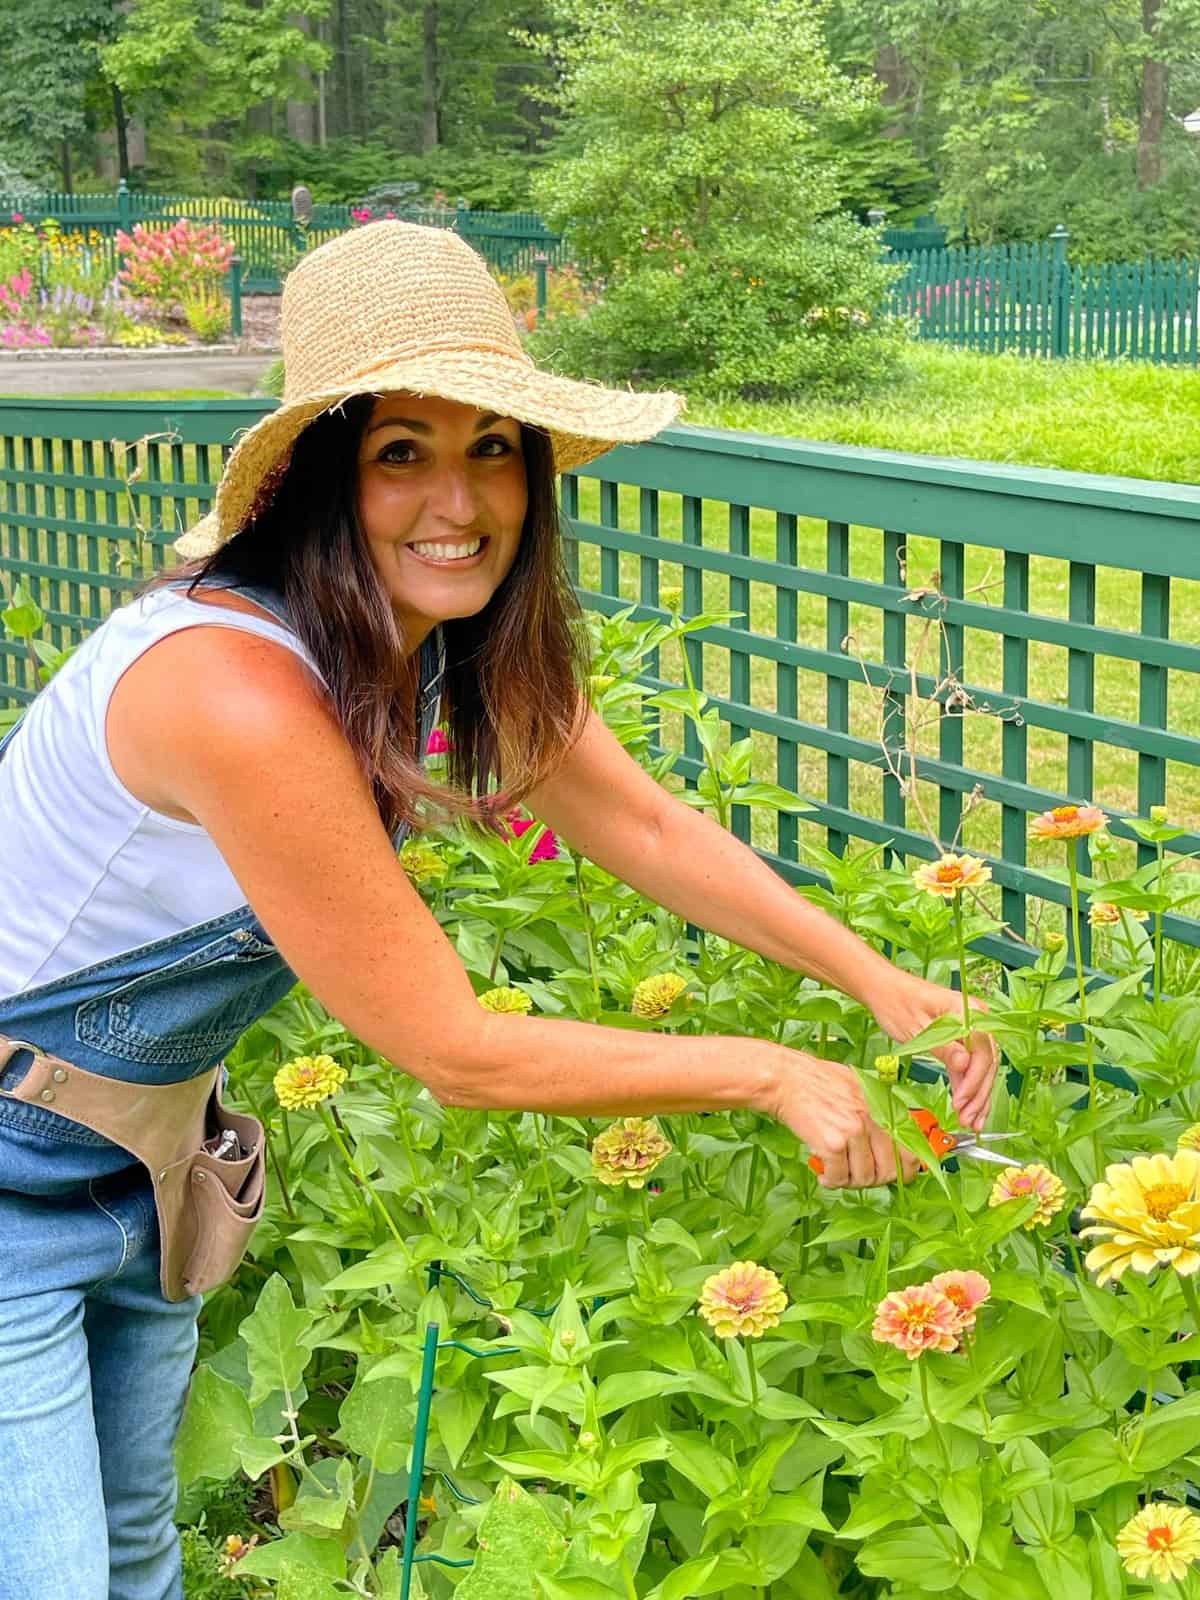
There’s something magical about walking out to your garden in the morning, scissors in hand, to gather blooms for your home. Gardening truly is therapy for the body and soul, and cut flower gardening adds an extra layer of joy because you’re creating something beautiful and useful.

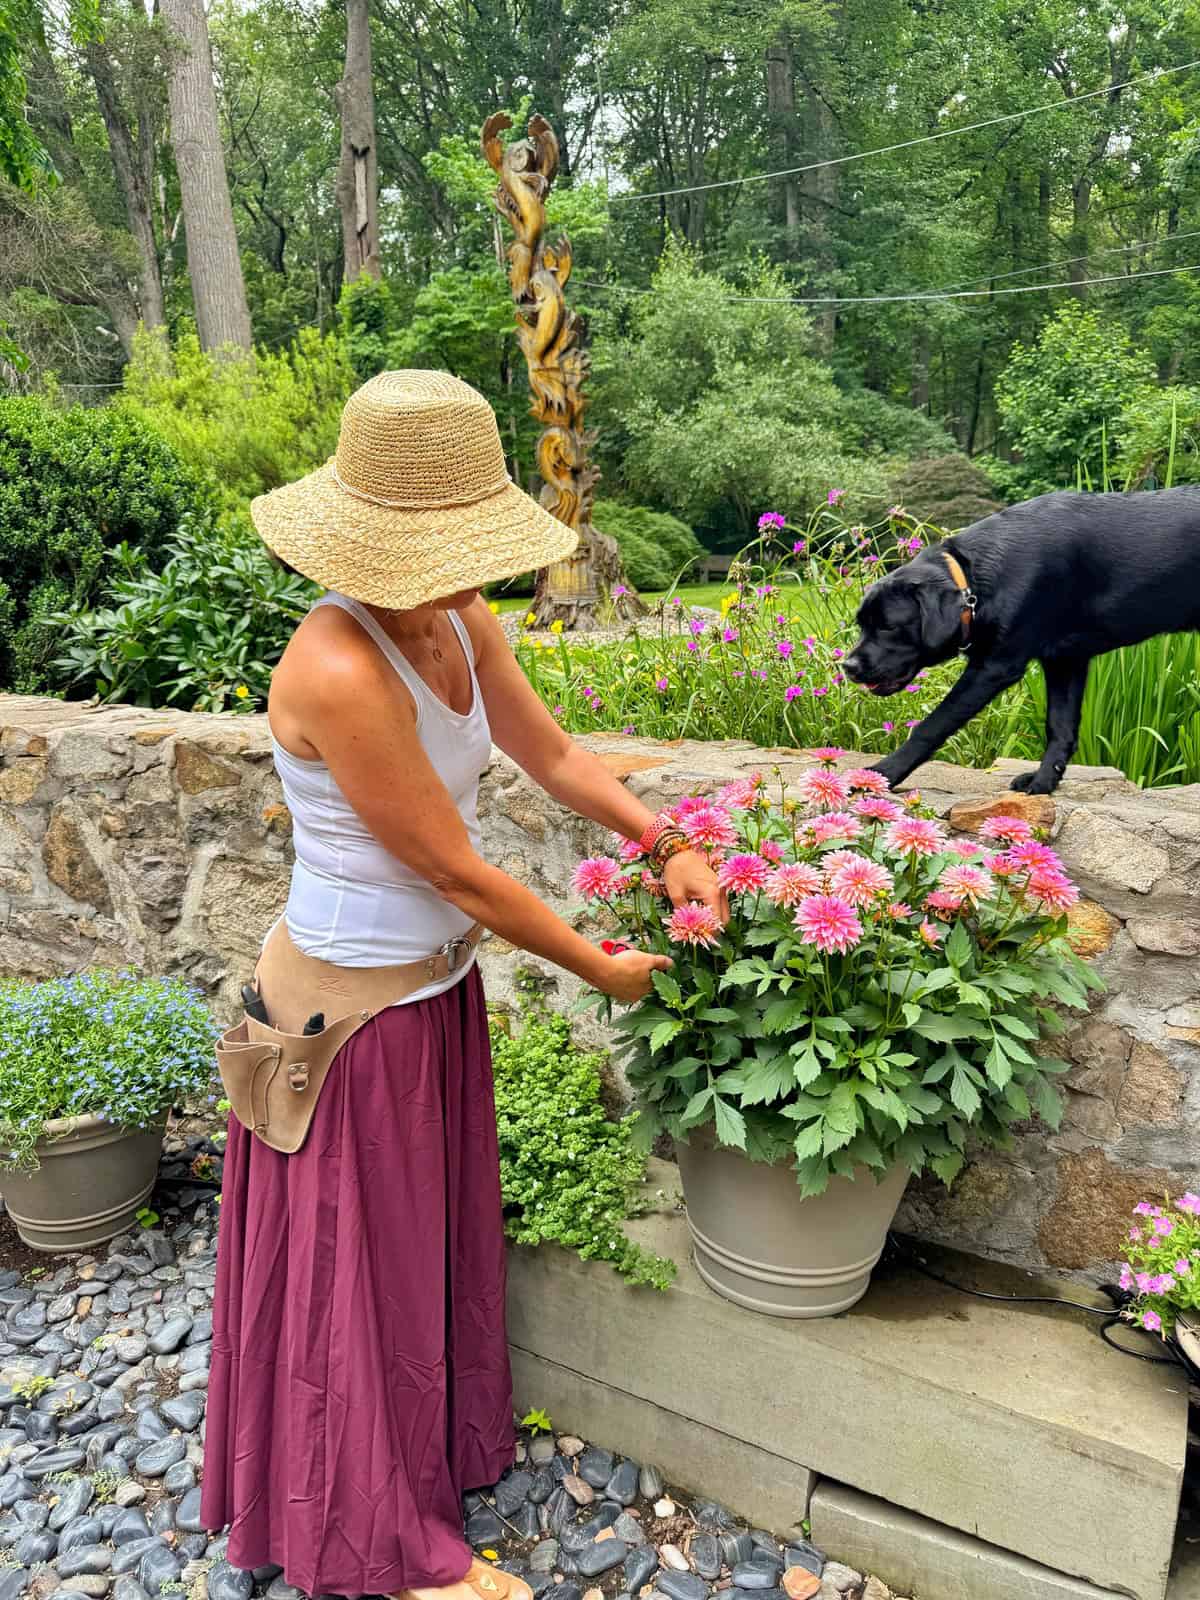
Share beauty with friends and family
One of my favorite parts of growing a cutting garden is inviting friends to come over and cut flowers right from the garden. There’s nothing like watching someone light up when they take home a bouquet you grew together.
Experiment with new flower varieties
Cut flower gardening introduces you to dozens of beautiful varieties you’ll never find at a local nursery. Starting seeds at home opens the door to unique colors, shapes, and long-stemmed varieties perfect for arranging.
Enjoy continuous blooms all season long
A well-planned cut flower garden produces fresh flowers from early summer until frost. Once you learn how to pinch, succession plant, and harvest at the right time, you’ll have a constant supply of bouquets.
Cut flower gardening isn’t just a hobby; it’s a lifestyle that blends creativity, beauty, and the simple pleasure of growing something with your own hands.


Best Flowers for Beginner Cut Flower Gardeners
One of my favorite things about cut flower gardening is how many different varieties you can grow, from simple, beginner-friendly blooms to more advanced flowers that reward you with showstopping bouquets. After growing thousands of stems each season, these are the varieties I return to year after year because they are reliable, productive, and offer incredible vase life.
To make it easier for beginners, I’ve grouped them by difficulty level based on my own experience growing in Zone 6b.
Easiest Annuals for Beginners (High Success, Fast Blooms)
These flowers are extremely forgiving, bloom quickly, and keep producing as long as you keep cutting them. They’re perfect if you’re just getting started.
Zinnias
One of the very best cut flowers for beginners. They love heat, bloom nonstop, and offer endless color options. Read my growing guide here → How to Grow Zinnias

Cosmos
Airy, whimsical, and incredibly easy to grow from seed. They thrive on neglect and bloom all summer. Read my growing guide here → How to Grow Cosmos

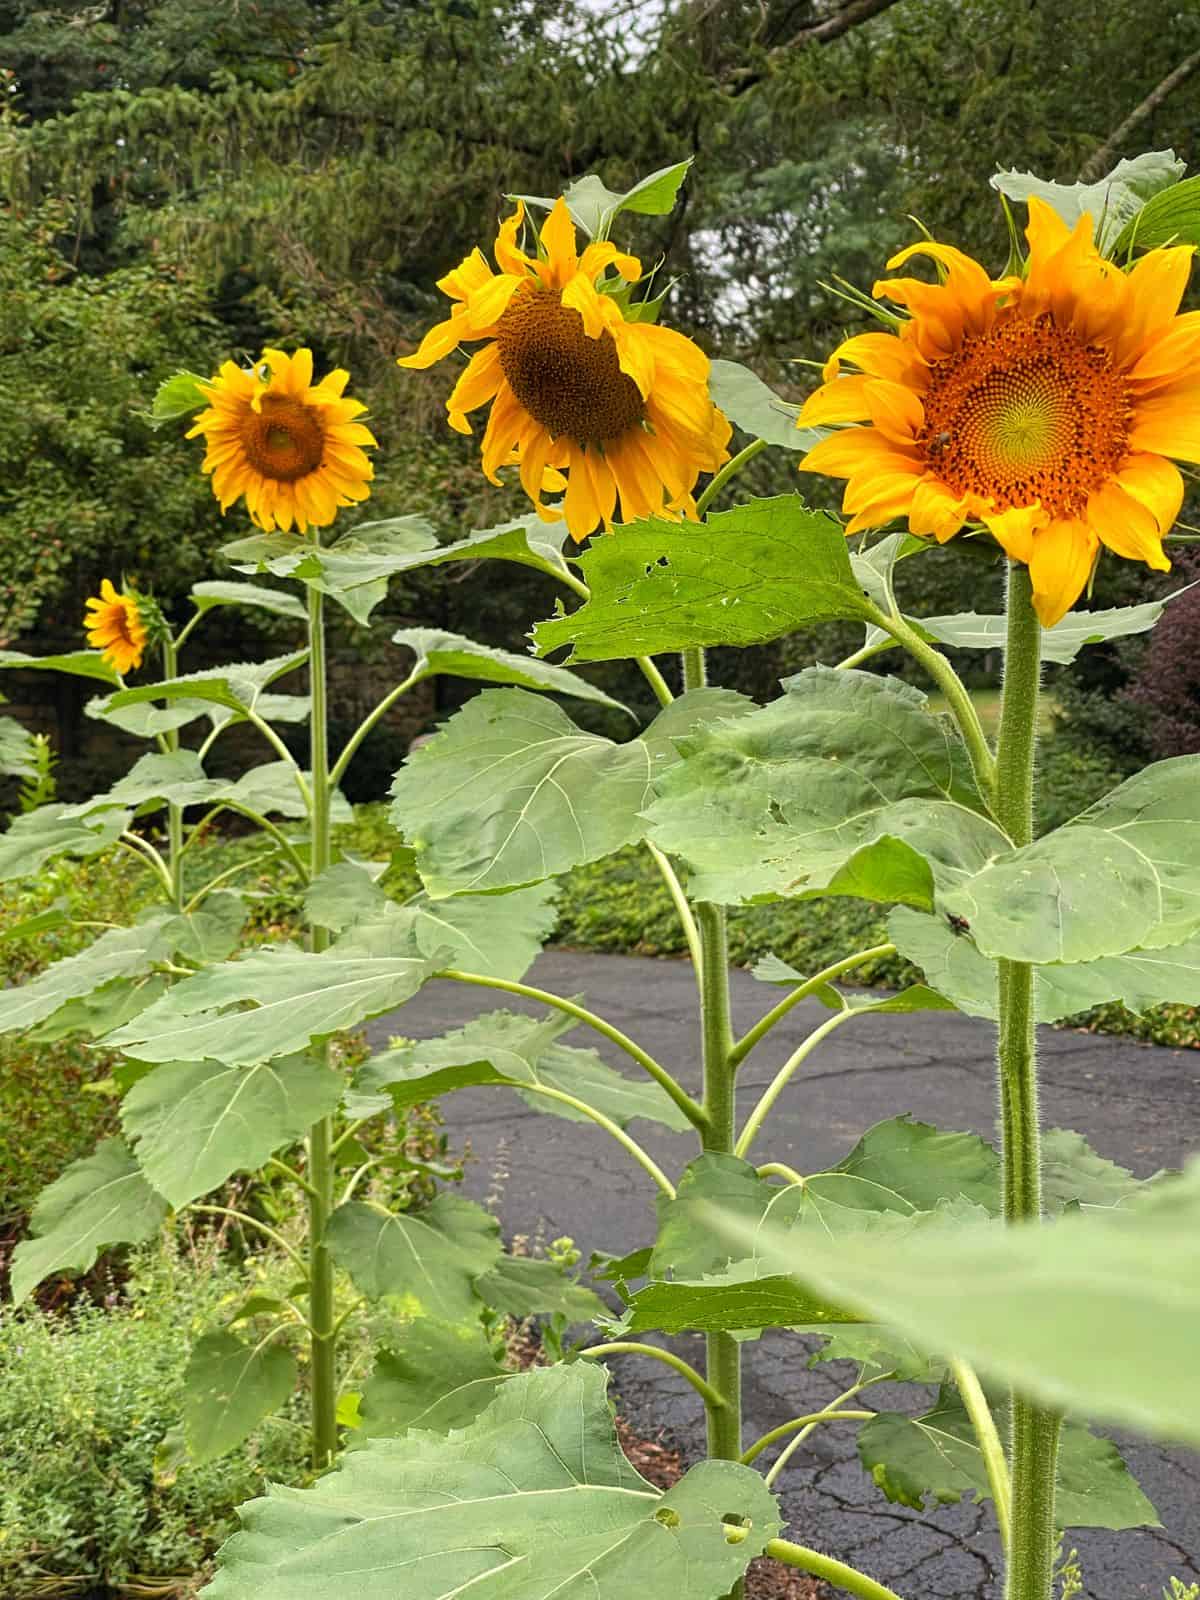
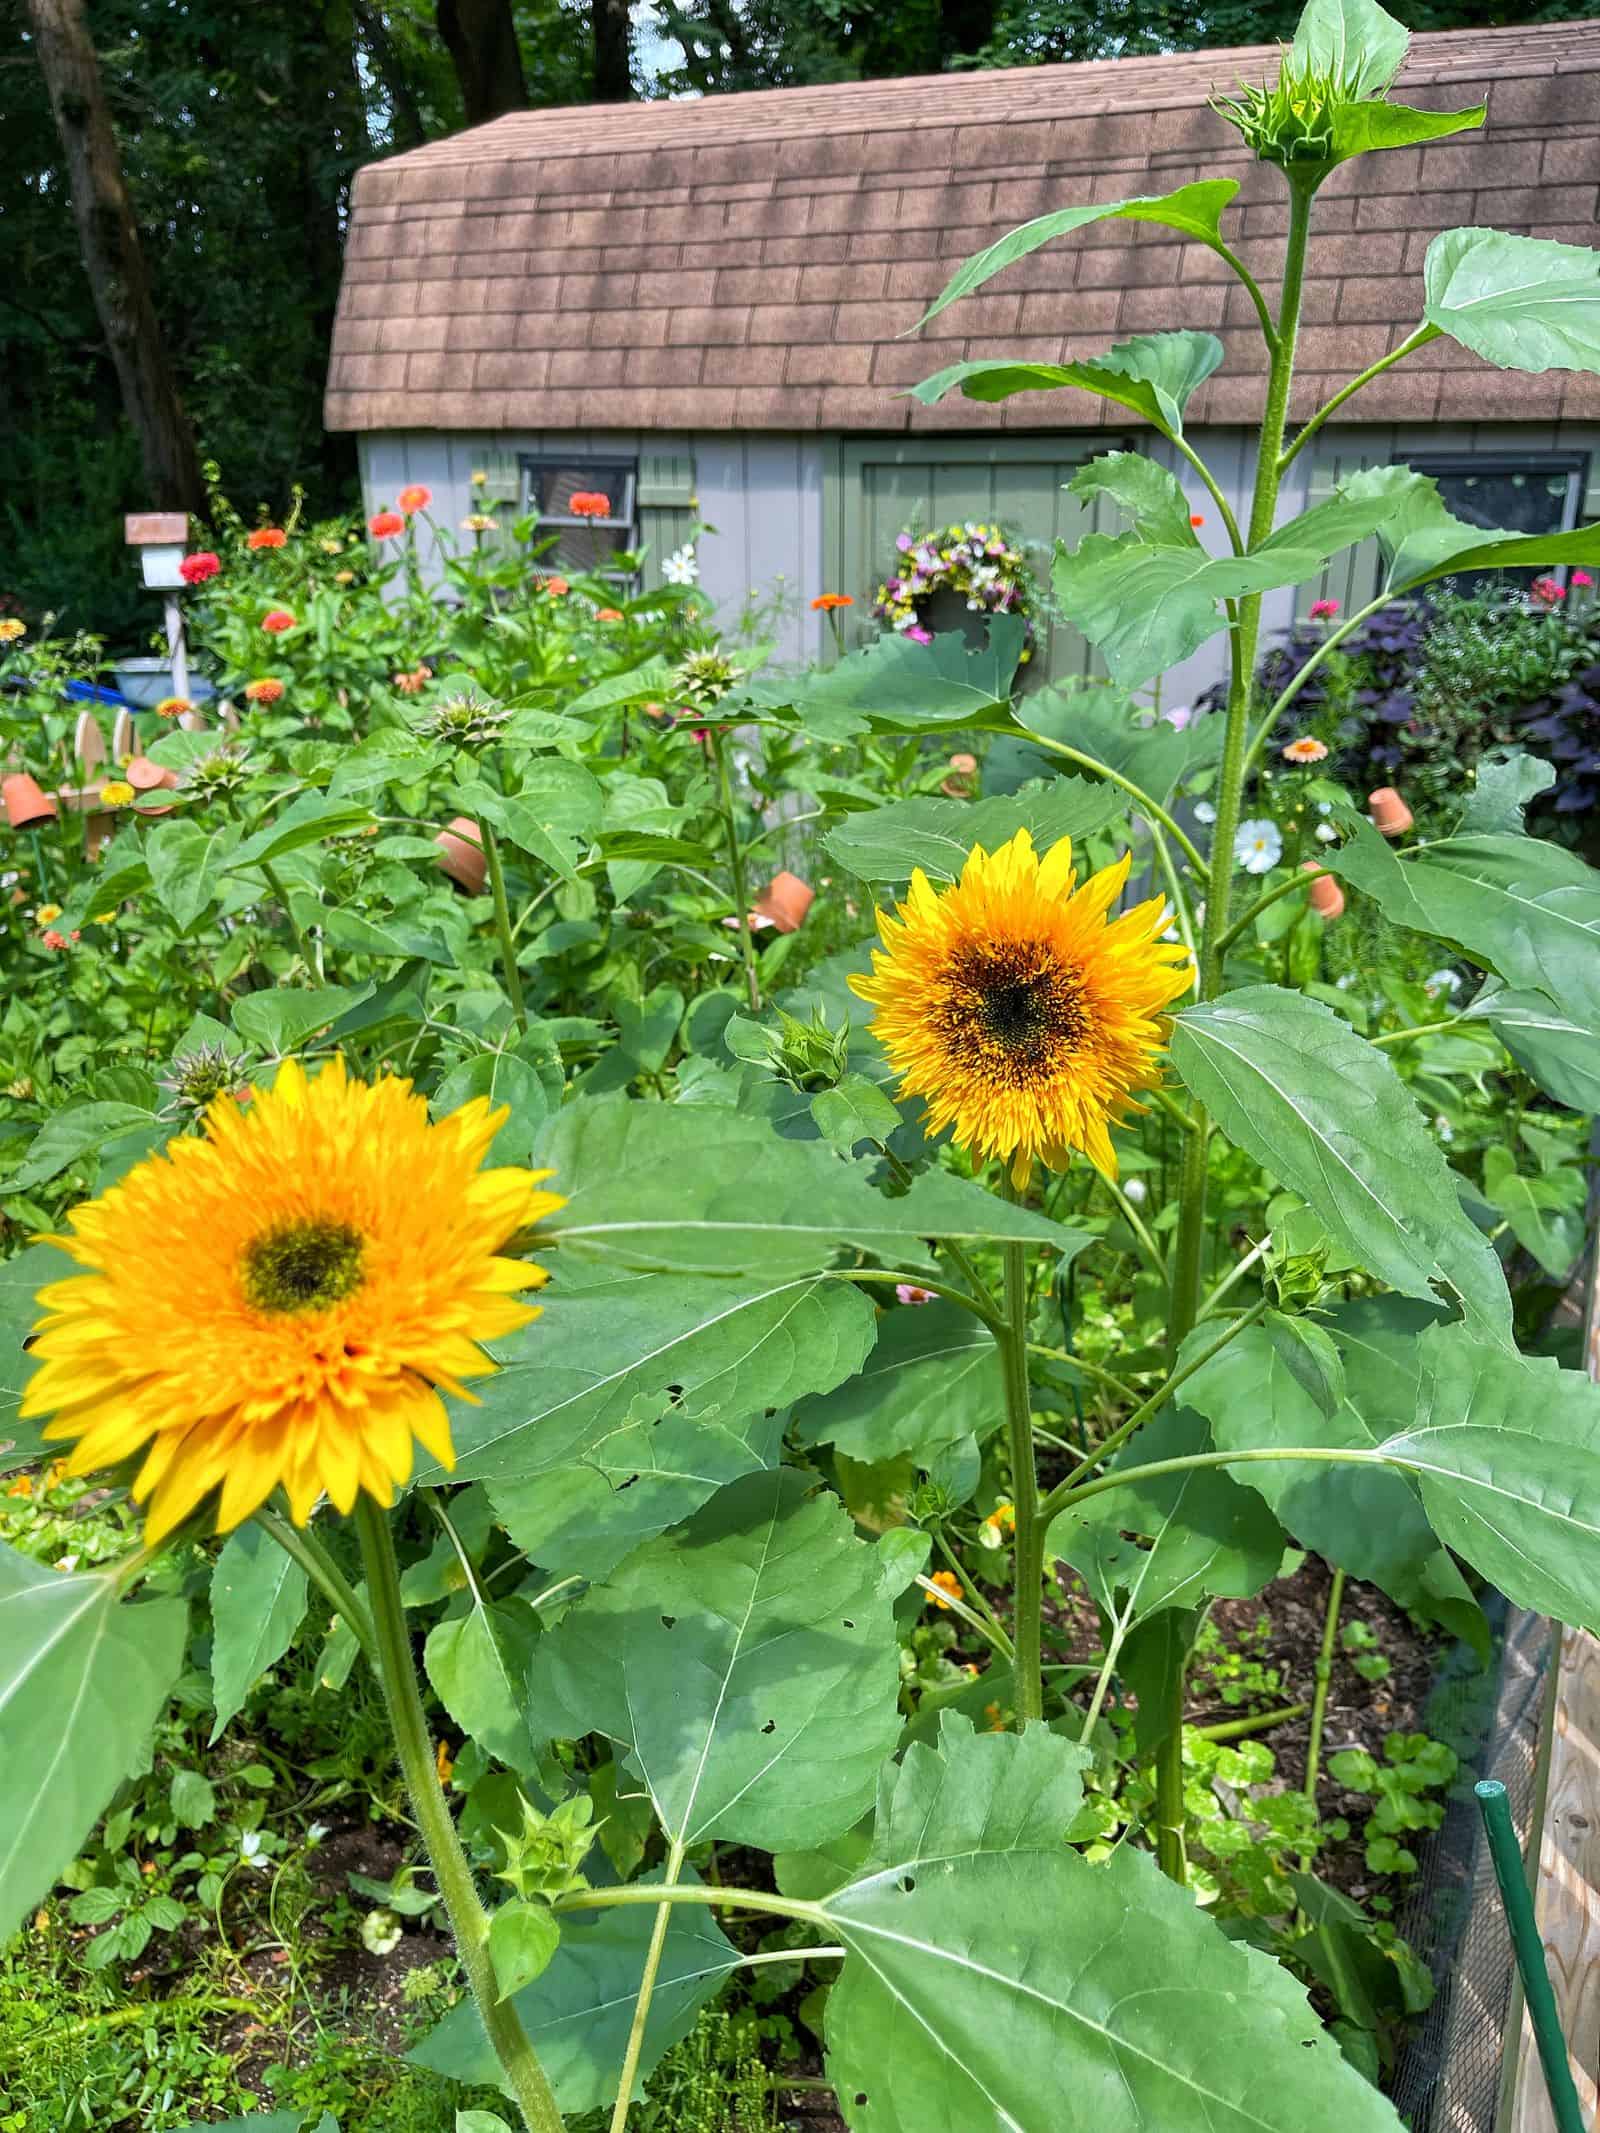
Sunflowers
Fast-growing, cheerful, and perfect for bouquets. Plant successions every 2 weeks for armloads of blooms. Read my growing guide here → How to Grow Sunflowers

Calendula
Cool-season annual that produces bright, cheerful blooms with a long vase life. Great for early spring and fall cuts. Learn how to grow here → How to Grow Calendula

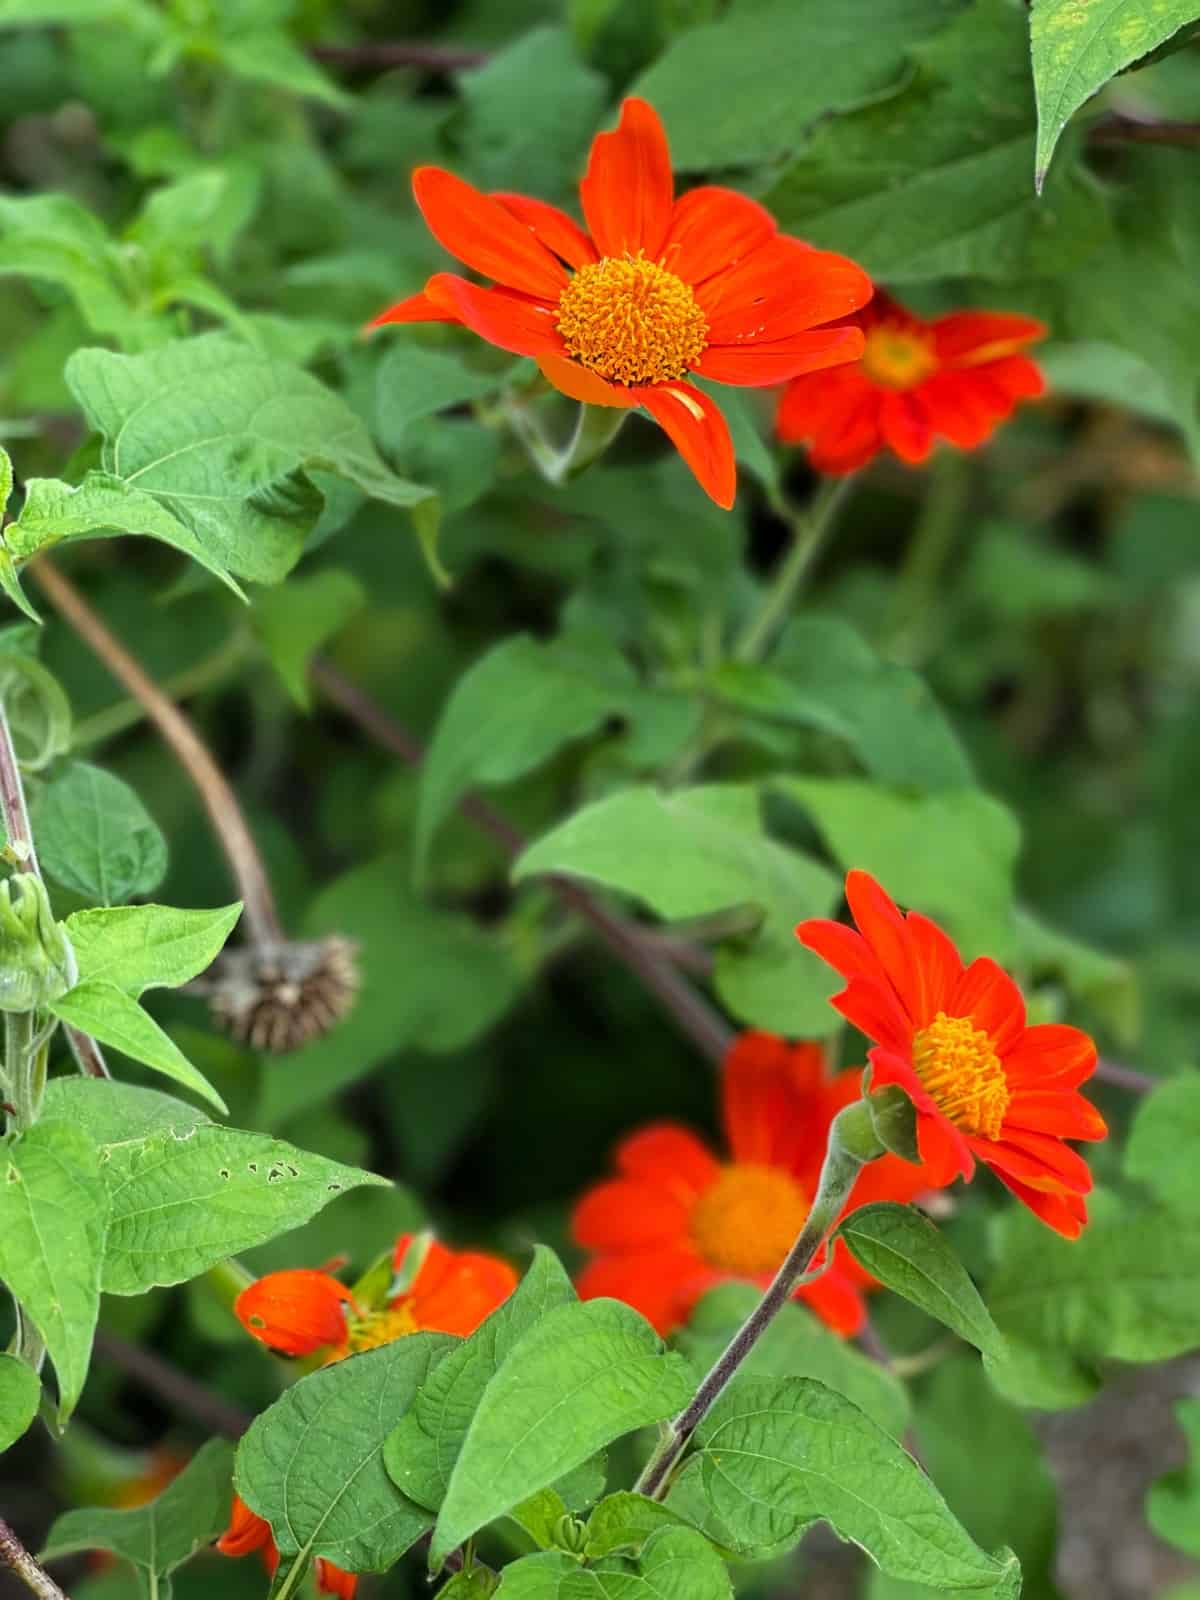
Tithonia (Mexican Sunflower)
Tall, vibrant, and pollinator-friendly. Excellent for bold, bright summer arrangements.
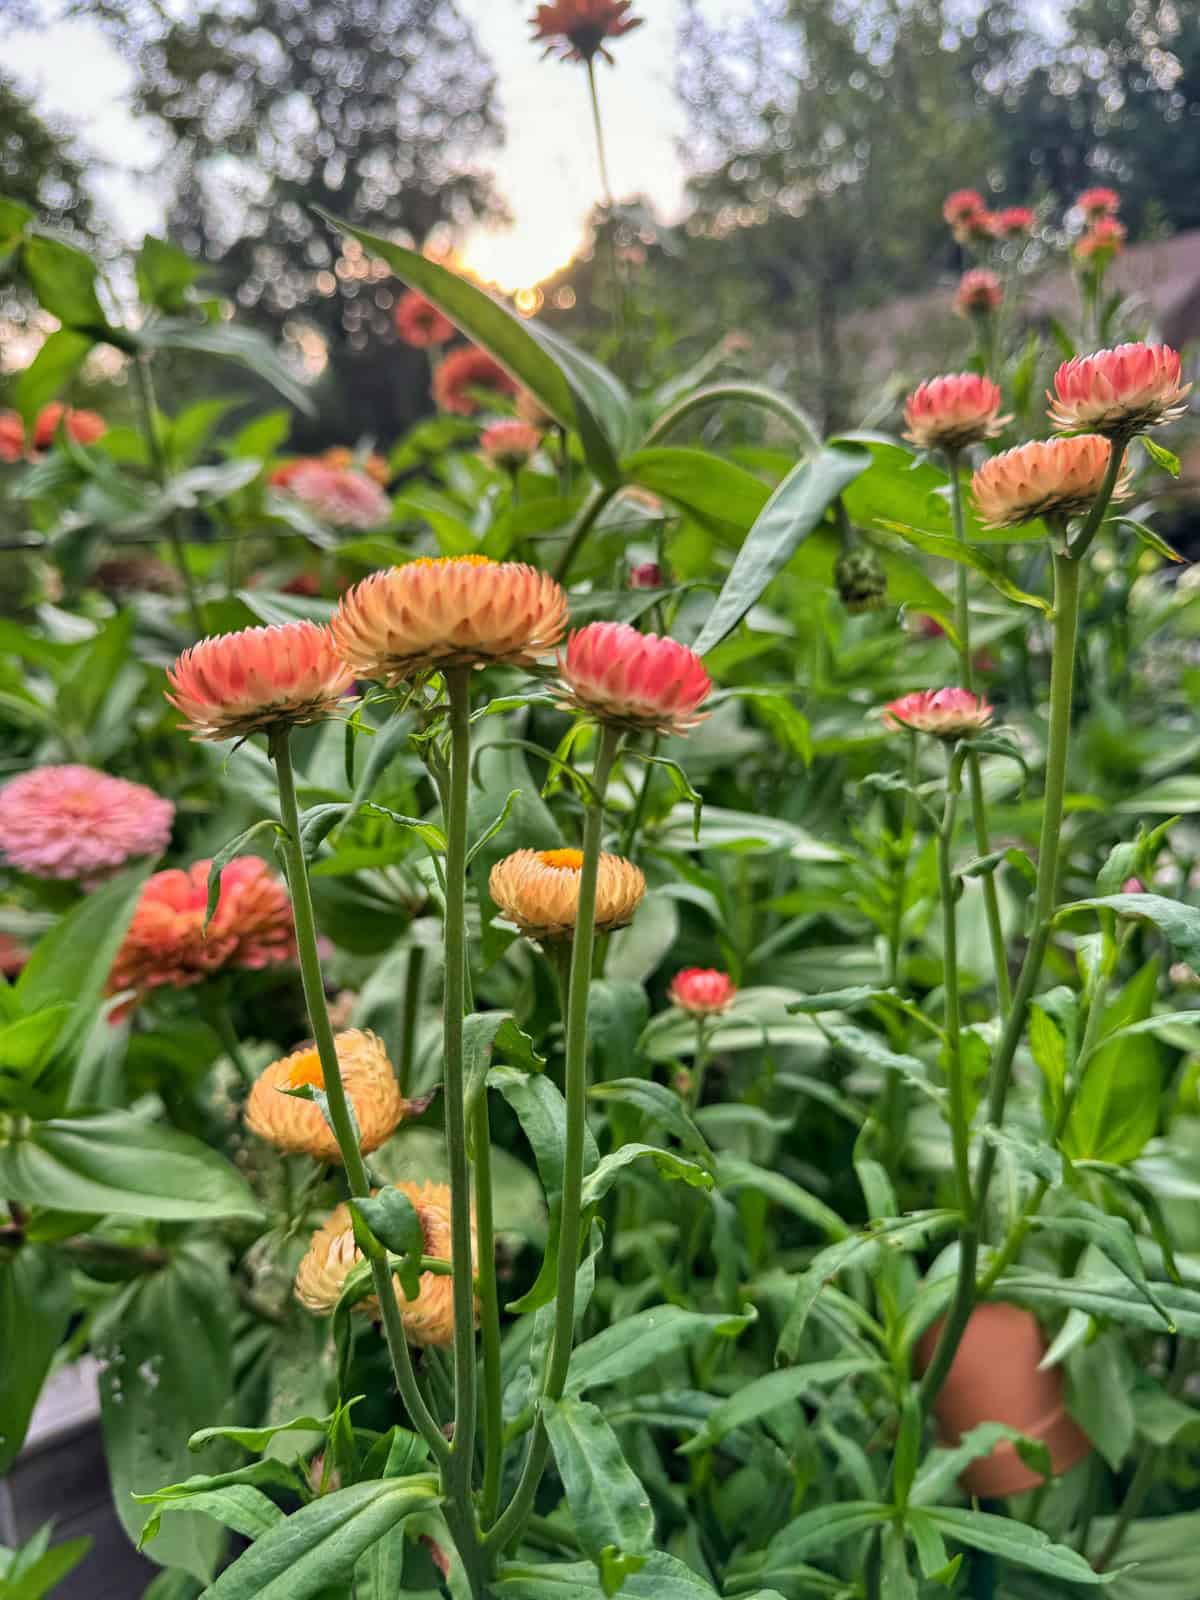
Strawflower
Papery, everlasting blooms that dry beautifully. Easy to grow and surprisingly productive. One of my favorites to grow. Learn how to care for it here → How to Grow Strawflowers
Celosia
A favorite in my garden for its unique textures with plumes, spikes, and brain-like crests that hold beautifully in a vase. While it is an annual here in my zone 6b garden, it returns like a perennial every year. Learn how to care for it here → How to Grow Celosia

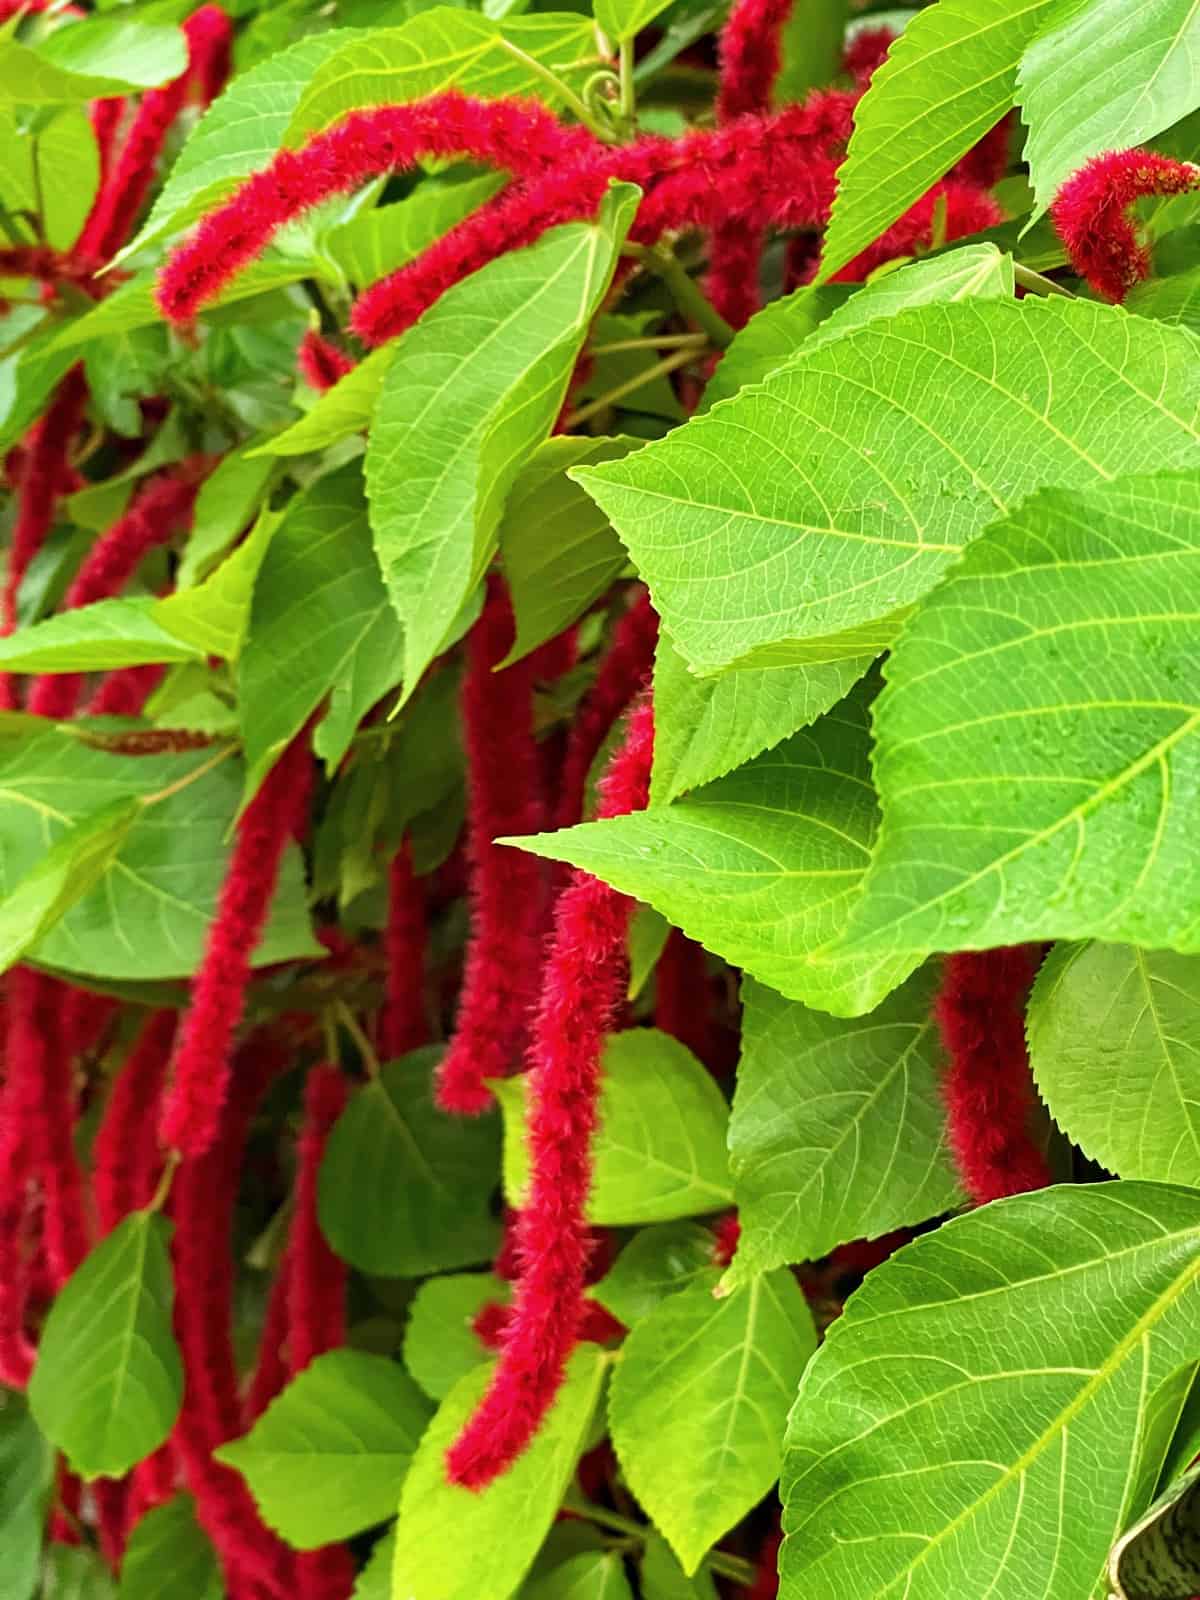
Amaranth
Adds dramatic trailing texture to bouquets. Easy from seed and very prolific.
Best Perennials and Shrubs for Cut Flower Beginners (Low Maintenance, Long-Lasting)
Perennials and flowering shrubs return each year, making them a great investment for any cutting garden while adding low-maintenance blooms to your garden.
Hydrangeas
One of my all-time favorite cut flowers thanks to their large, dramatic blooms and excellent vase performance when conditioned properly. To learn my best tips for growing these must-have shrubs, read more here → Hydrangea Care Guide

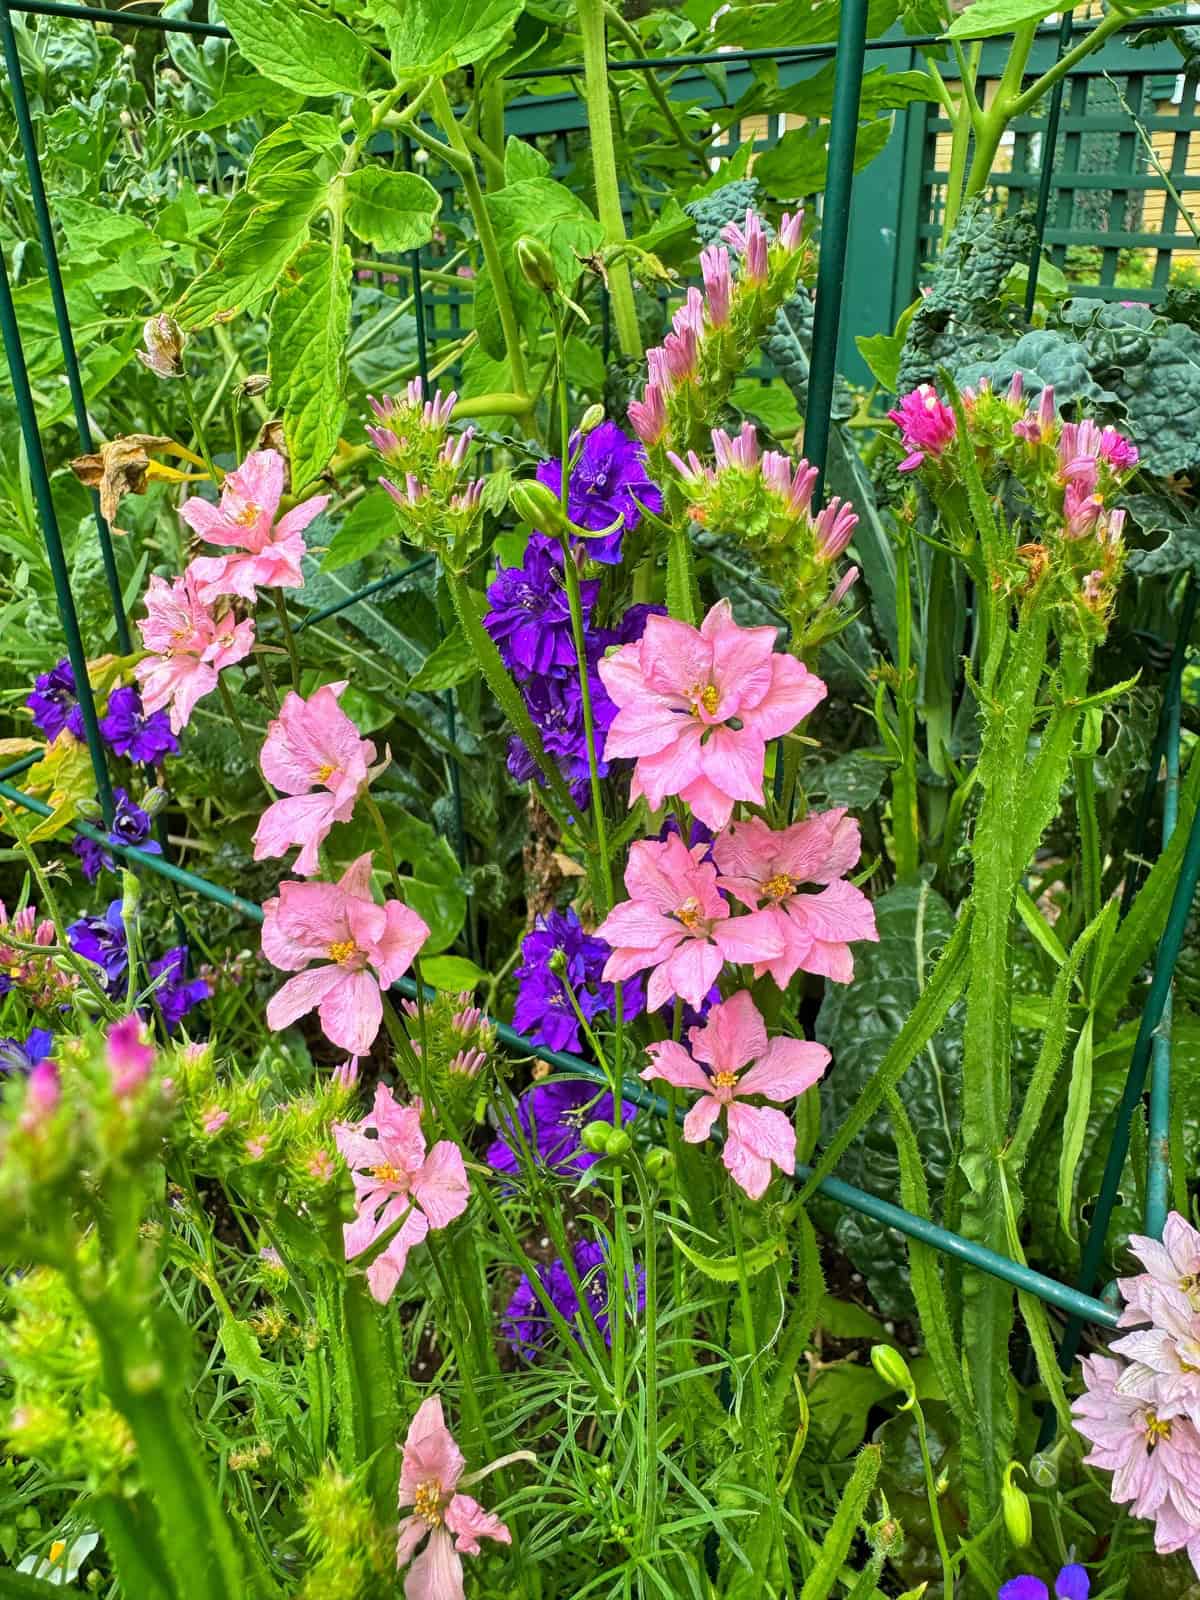
Delphinium
Tall spikes of blue, purple, pink, or white flowers. Stunning in arrangements, especially early summer.

Larkspur
A cool-season annual that behaves almost like a perennial in structure. Fantastic for vertical interest in bouquets and super easy to grow from seed. Learn my best tips for growing it here → How to Grow Larkspur
There are lots of other great perennials that work well in a cut flower garden. You can check out my entire list here → Top Perennials for a Cutting Garden

High-Reward Flowers for Intermediate Gardeners
These flowers require a little more attention but deliver incredible results. If you’re ready for the next level, these are worth growing.
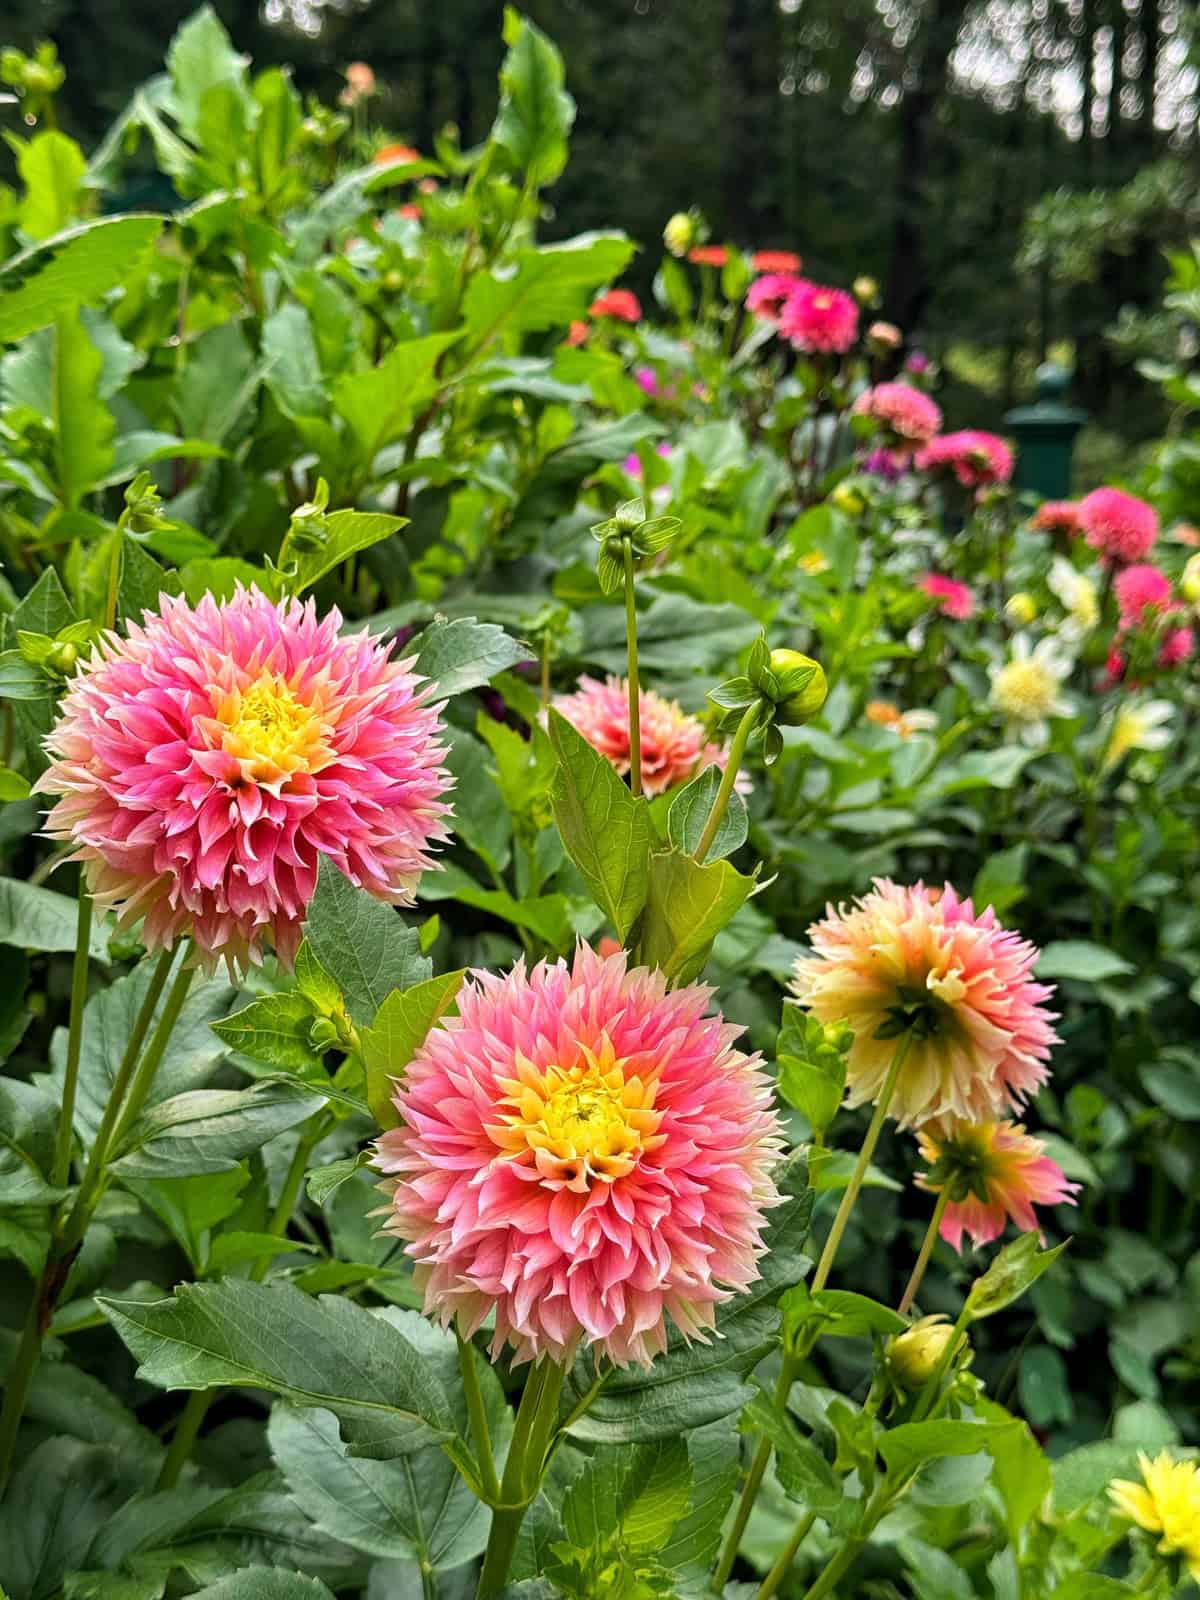
Dahlias
My absolute favorite flower to grow for cutting. Dahlias offer unmatched variety, color, and bloom shape, and they reward you with tons of stems during peak season. To learn my best tips for growing these gorgeous blooms, please visit these posts.
→ How to Grow Dahlias
→ Growing Dahlias in Pots
→ Planting Dahlia Tubers

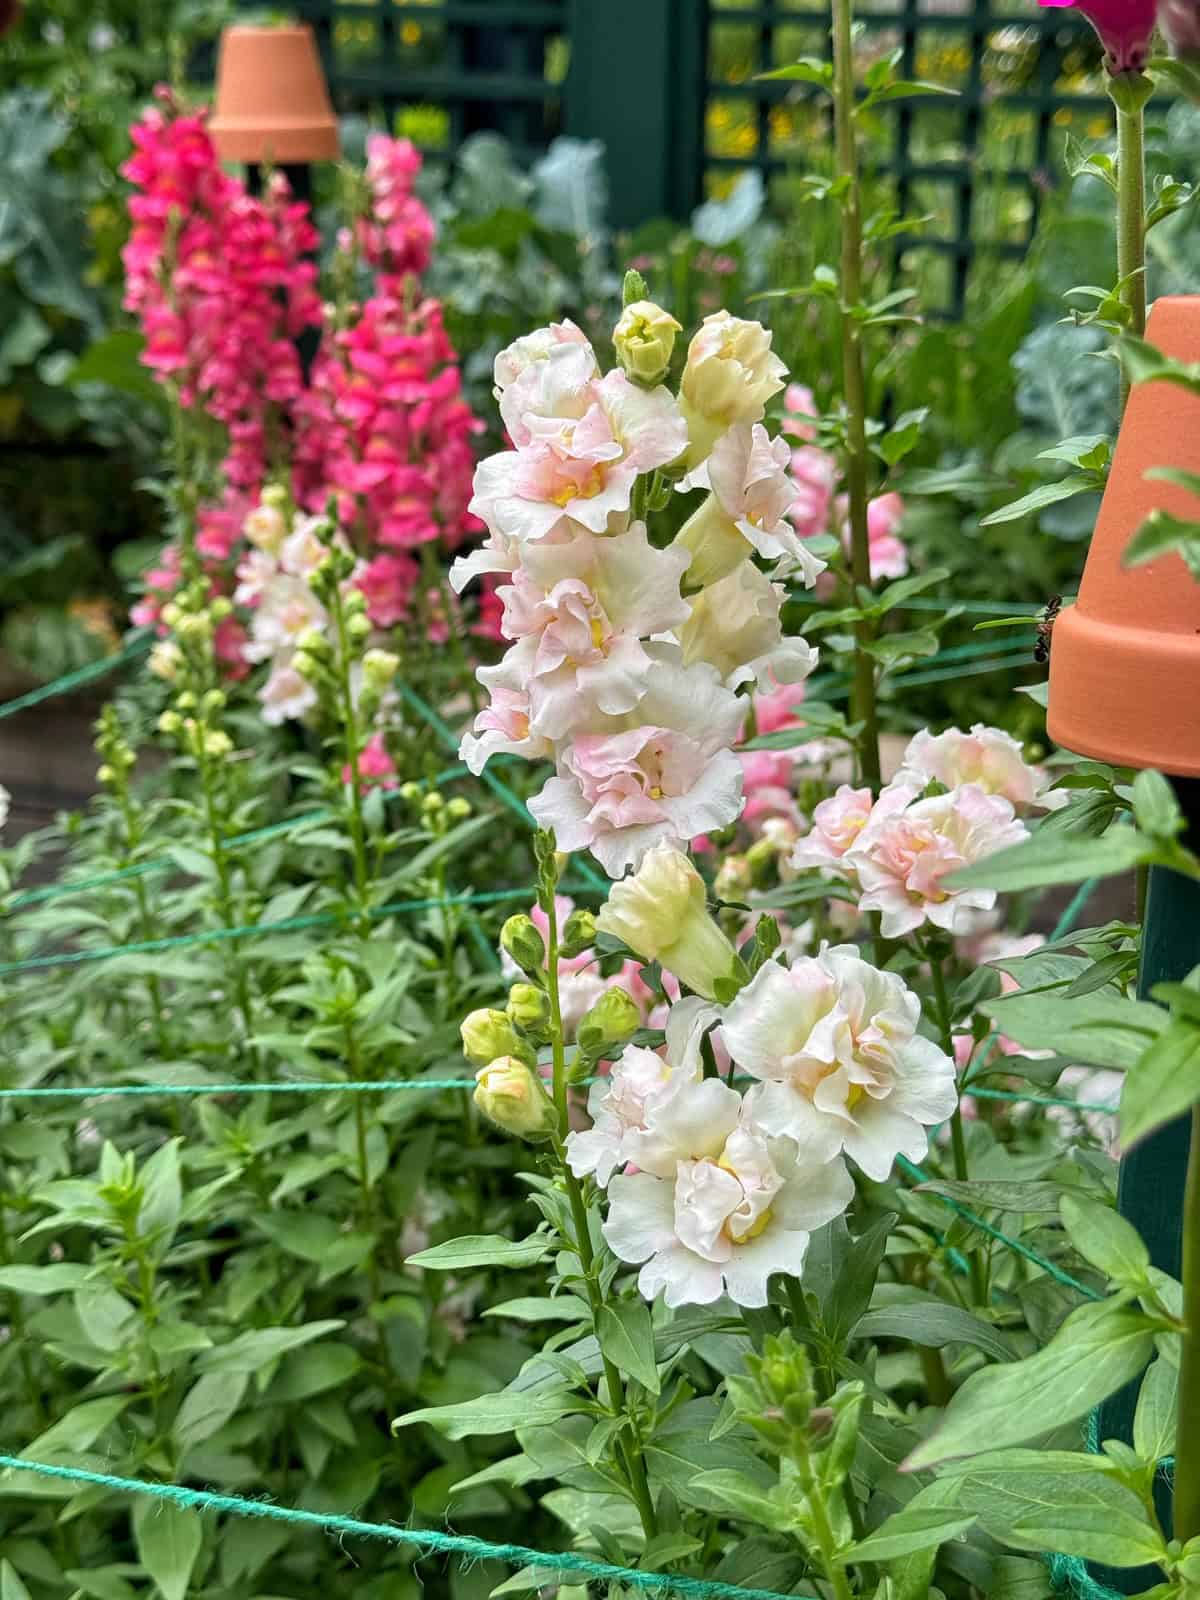
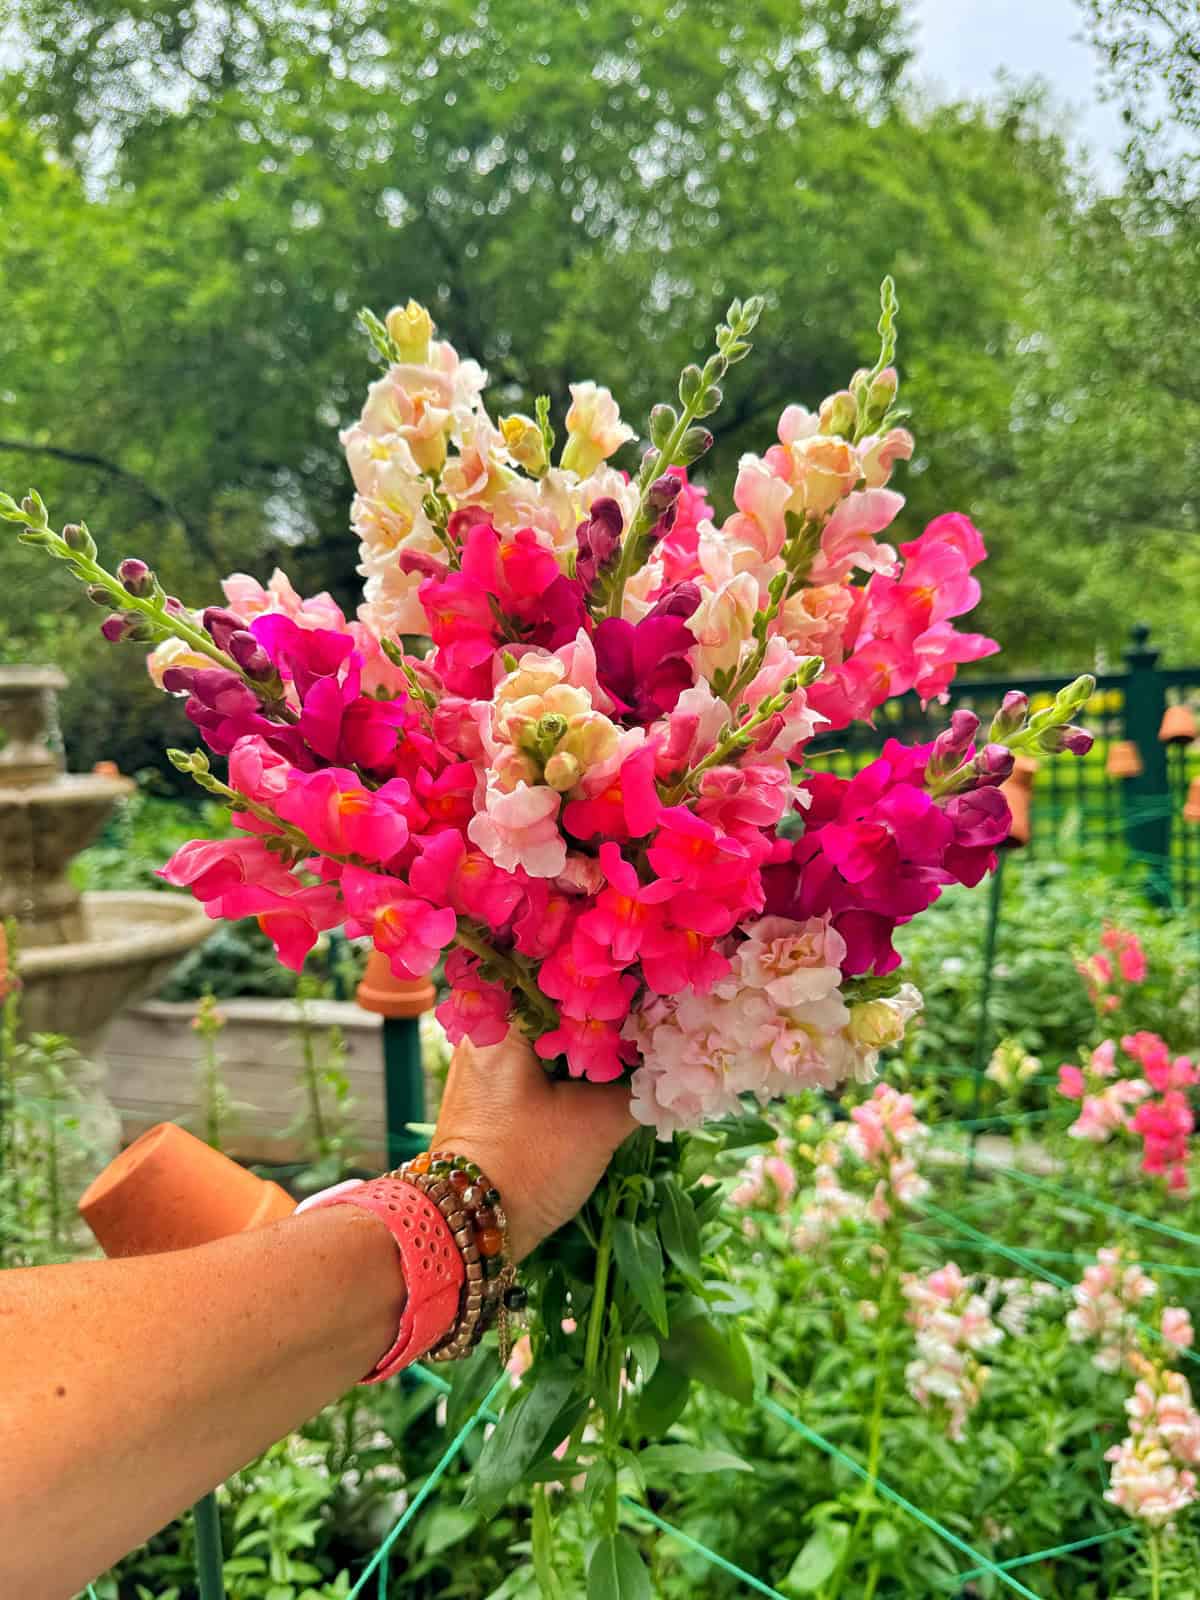
Snapdragons
A staple in my cutting garden for early-season stems, height, and beautiful colors. Their vase life is excellent. To learn more about how I grow them in my gardens, please visit this post → How to Grow Snapdragons
Sweet Peas
Fragrant, delicate, and incredibly rewarding. They need cool temperatures and support but produce magical spring bouquets. To learn my best tips for starting sweet peas from seed, please visit this post → How to Grow Sweet Peas
Stacy’s Tip: Over the years, I’ve trialed many varieties within each of these categories, different colors of dahlias, types of zinnias, branching vs single-stem sunflowers, heirloom sweet peas, and more. While every garden is unique, these flowers consistently perform well for me in Zone 6b and offer the best balance of beauty, productivity, and vase life for beginners.
There’s so much more, but these are just a few of the best cut flowers that I enjoy growing in my cutting garden.

How to Get Started With a Cut Flower Garden
There are several ways to start a cut flower garden, and the best method depends on the flowers you want to grow, your budget, and the time of year. In my Zone 6b garden, I use all of these methods: direct sowing, indoor seed starting, winter sowing, planting tubers, buying small nursery plants, and growing perennials, because each one has its advantages.
Here’s a simple, beginner-friendly overview of each method so you can choose the right approach for your space and skill level.
Start by Choosing the Right Location
A productive cut flower garden needs:
- Full sun (at least 6–8 hours a day)
- Good drainage
- Easy access to water
- Airflow to help prevent disease
If you’re planting in containers or raised beds, you’ll have even more control over soil quality and drainage. Read more about how to get started here → Container Gardening for Beginners and Raised Bed Gardening for Beginners.
(For bed shapes, planning, or garden maps, you may find this post helpful: Cut Flower Garden Design Guide.)

Preparing the Soil for Cut Flowers
Healthy soil is the foundation of a productive cutting garden. Before planting, I always:
- Add compost for nutrients
- Loosen the soil to improve drainage
- Remove weeds
- Mix in organic fertilizer when needed
Most cut flowers prefer fertile, well-drained soil, and preparing your beds early will set you up for months of bloom production.

Choosing and Ordering Seeds for Your Cut Flower Garden
One of the most exciting parts of starting a cut flower garden is choosing which varieties to grow. Because I grow so many flowers from seed each year, I’ve learned that ordering early is the key to getting the best selection, especially if you’re eyeing specialty varieties.
Most seed companies begin releasing their new season inventory in December and January, and the most popular cut-flower varieties sell out fast. If there’s a specific zinnia color, cosmos strain, or dahlia-like sunflower you want, ordering early ensures you don’t miss out.
Here’s what I recommend when planning your seed order:
Choose High-Quality Seed Sources
Over the years, I’ve had the best germination rates and plant performance from reputable seed companies. Two of my go-to favorites are:
- Floret Flower Farm – known for specialty cut-flower varieties and beautiful color palettes
- Johnny’s Selected Seeds – excellent for reliable, productive varieties and detailed growing info

Think About Bloom Times & Colors
Before you hit checkout, think about:
- Bloom windows (cool vs warm season)
- Height (so taller stems don’t shade shorter ones)
- Color palette (pinks + peaches, brights, whites + greens, etc.)
- Texture (spikes, disks, fluff, fillers)
Consider How You’ll Use the Flowers
Do you want:
- Big statement blooms like dahlias and sunflowers?
- Delicate fillers like ammi and feverfew?
- Early spring flowers like sweet peas, larkspur, and snapdragons?
- Heat lovers for late summer zinnias, celosia, and gomphrena?
Each one fills a different role in your bouquets so thinking about it before you begin is a smart strategy for long-term-success.
Order Extras for Succession Planting
Because I succession plant single stem sunflowers every 2 weeks, I always order several packets of my favorite varieties so I don’t run out mid-season.

Know Your Last Frost Date (It Controls Your Entire Planting Schedule)
Once you’ve chosen your seeds, the next step is understanding when to start them. Nearly every flower variety has its own preferred planting window, and your last frost date will determine the right timing. (If you aren’t sure when that is, you can check it here for your locality)
For most beginners, this date is the anchor for your entire cut flower garden planning.
Your last frost date tells you:
- When to start indoor seeds
- When to sow cool-season flowers like larkspur or sweet peas
- When it’s safe to transplant seedlings outside
- When to direct sow warm-season flowers
- When to plant tender tubers like dahlias
You can look up your local frost dates based on your ZIP code, but as a Zone 6b gardener, my last frost usually falls in mid-May. Adjust based on your climate.
Seed Packets Are Your Best Guide
Always check your seed packet for specific instructions. Not all seeds germinate in the same way.
- “Start indoors X weeks before last frost”
- “Direct sow after last frost”
- “Requires cold stratification”
- “Pre-soak before planting”
- “Needs light to germinate”
These details matter, and seed companies include them for a reason.
A Few Examples From My Zone 6b Garden
- Larkspur needs a cold period before germination and is best winter sown or sown very early.
- Sweet peas benefit from soaking and should be started 10–12 weeks before last frost.
- Warm-season annuals like zinnias and sunflowers should be planted after frost danger has passed.
- Snapdragon seedlings like cooler temps and can be transplanted earlier in the season.
To learn more about how I start seeds in my zone 6b New Jersey gardens, please visit these posts:
→ Indoor Seed Starting Guide
→ Direct Sowing Guide
→ Winter Sowing Guide
If You’ve Never Started Seeds Before
Don’t worry—sowing seeds is incredibly simple once you understand the timing. I walk through the whole process step-by-step in my Indoor Seed Starting Guide, but the basic principles remain the same across most cut flowers.
Direct Sowing Cut Flowers (Easiest for Beginners)
Many of the most beginner-friendly cut flowers can be planted directly in the garden once the soil warms up. In fact, my zinnias, cosmos, sunflowers, calendula, and amaranth are almost always direct sown.
Direct sowing works best for:
- Zinnias
- Cosmos
- Sunflowers
- Calendula
- Tithonia
- Amaranth
- Strawflower (in mild climates)
It’s cost-effective, fast, and allows you to succession plant throughout the summer. If you’re not sure how to go about it, please visit my Direct Sowing Guide that goes into great detail.
As an aside, I succession sow single stem sunflowers every 2–3 weeks so I always have fresh stems for bouquets.

Starting Seeds Indoors (More Variety, Better Control)
Indoor seed starting lets you grow unique varieties not found in nurseries which is why it’s one of my favorite parts of cut flower gardening.
This method is ideal for:
- Snapdragons
- Lisianthus (advanced)
- Sweet peas
- Cosmos (early start optional)
- Strawflower
- Celosia
- Amaranth
- Specialty zinnias
- Cut-flower fillers like statice or bupleurum
You control:
- Light
- Temperature
- Germination timing
- Stem strength
To learn more about how I start seed inside my home, you may find this post helpful → Indoor Seed Starting Guide
And I have to say, that after nearly 30 years of growing flowers, I still get excited when I see that first tray of seedlings pop. Starting seeds indoors opens up varieties you’ll never find at the garden center and helps beat the winter blahs here in New Jersey!

Winter Sowing (Low Effort + High Reward)
Winter sowing is a simple, low-maintenance way to start cool-season flowers outdoors using recycled containers. I use it every year for hardy annuals.
Best flowers for winter sowing:
- Larkspur
- Delphinium
- Sweet peas
- Calendula
- Bachelor’s buttons
- Poppies (not cut flowers for everyone, optional inclusion)
For more specific details about how to winter sow, you may find this post helpful → Winter Sowing Guide
This method gives you strong, weather-hardened seedlings without the need for grow lights.

Planting Tubers for Big, Beautiful Blooms
Some of the best cut flowers grow from tubers. Dahlias are the shining star here, and they’re a major part of my cutting garden every year.
Tubers are ideal for:
- Dahlias
- Ranunculus (corms, not tubers, but similar process)
- Anemones (corms)
Here are a few posts about growing dahlias that you may find helpful.
→ Planting Dahlia Tubers
→ How to Grow Dahlias
→ Growing Dahlias in Pots
Tubers give you large, productive plants with an extended bloom season. I’ve grown hundreds of dahlias over the years, and they are hands-down one of the most rewarding flowers for bouquets.
One thing about growing ranunculus. They are often recommended for cutting gardens, but they don’t always perform well in every climate. Here’s what happened when I grew them in mine: Why I stopped growing ranunculus.
Buying Small Plants From the Nursery (Instant Head Start)
Not ready for seed starting? Nurseries offer plenty of starter plants that are perfect for cut flower gardens. The only drawback is the limitation on what they offer.
- Stock
- Marigolds
- Celosia
- Cosmos
- Zinnias (sometimes)
This method saves time and gives beginners confidence because you skip over all the seed starting drama and get to the good stuff.
To learn more about planting flowers in your garden, read this post that shares some of my best tips → Flower Gardening for Beginners
I often mix nursery plants with seedlings I’ve started to stagger bloom times and fill in the empty spaces until my seedlings mature and bloom.

Adding Perennials and Flowering Shrubs for Long-Term Beauty
While annuals give you fast color and abundant blooms, adding a few perennials and flowering shrubs creates a more established, long-lasting cutting garden. These plants return every year, giving you reliable stems and beautiful structure in the landscape.
Great options for a cut flower garden include:
Hydrangeas (flowering shrub)
Hydrangeas are one of my all-time favorite shrubs for cutting. Their large, dramatic blooms add instant fullness to any bouquet, and they offer an extended vase life when properly conditioned. If you need tips on how to grow, you may find this post helpul → Hydrangea Care Guide

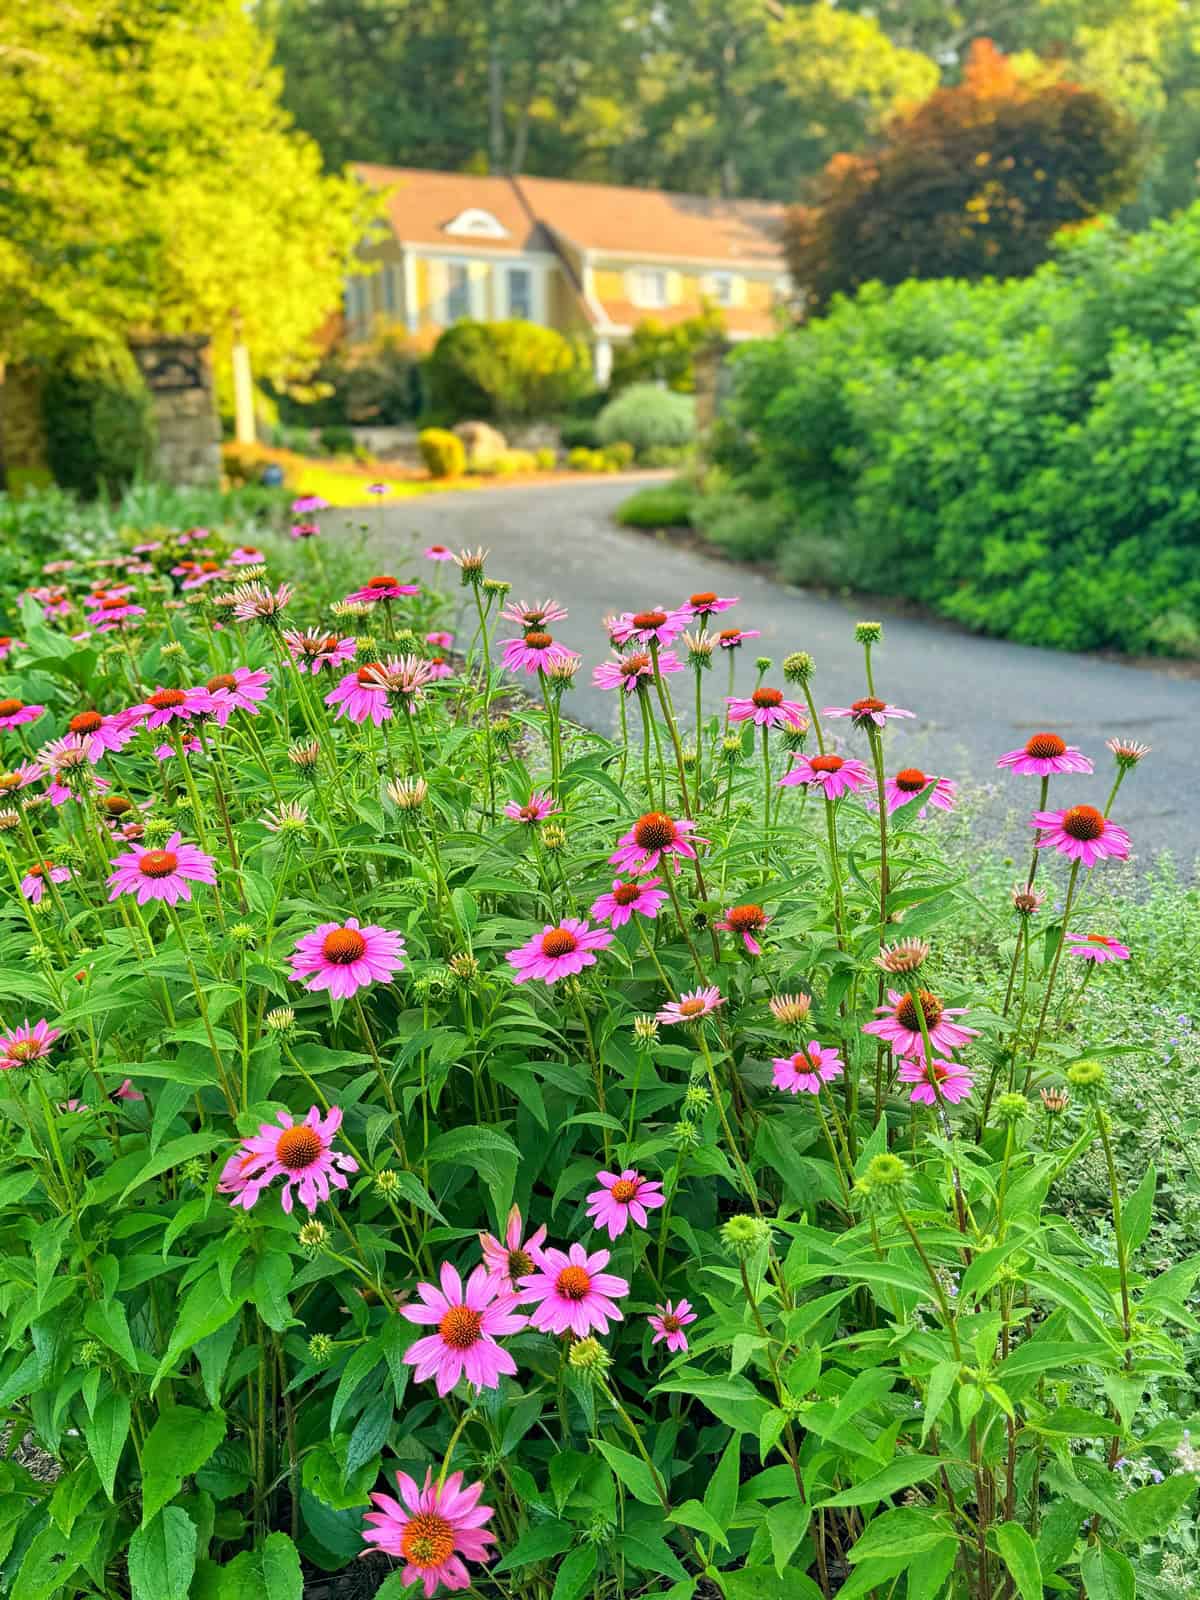
Coneflower (Echinacea)
A pollinator favorite with long-lasting, daisy-like blooms that are perfect for natural, cottage-style arrangements. For my best tips on growing purple coneflower, please visit this post → Purple Coneflower Care Guide
Black-Eyed Susan (Rudbeckia)
Bright, cheerful summer flowers that add warmth and texture to bouquets. It is one of the easiest perennials to grow and staple in my zone 6b gardens. To learn how I grow rudbeckia, please visit this post → How to Grow Black-Eyed Susan

Yarrow
A long-lasting cut flower available in beautiful shades of yellow, white, pink, and coral that makes a beautiful vase filler. To learn how I grow achillea, please visit this post: How to Grow Yarrow
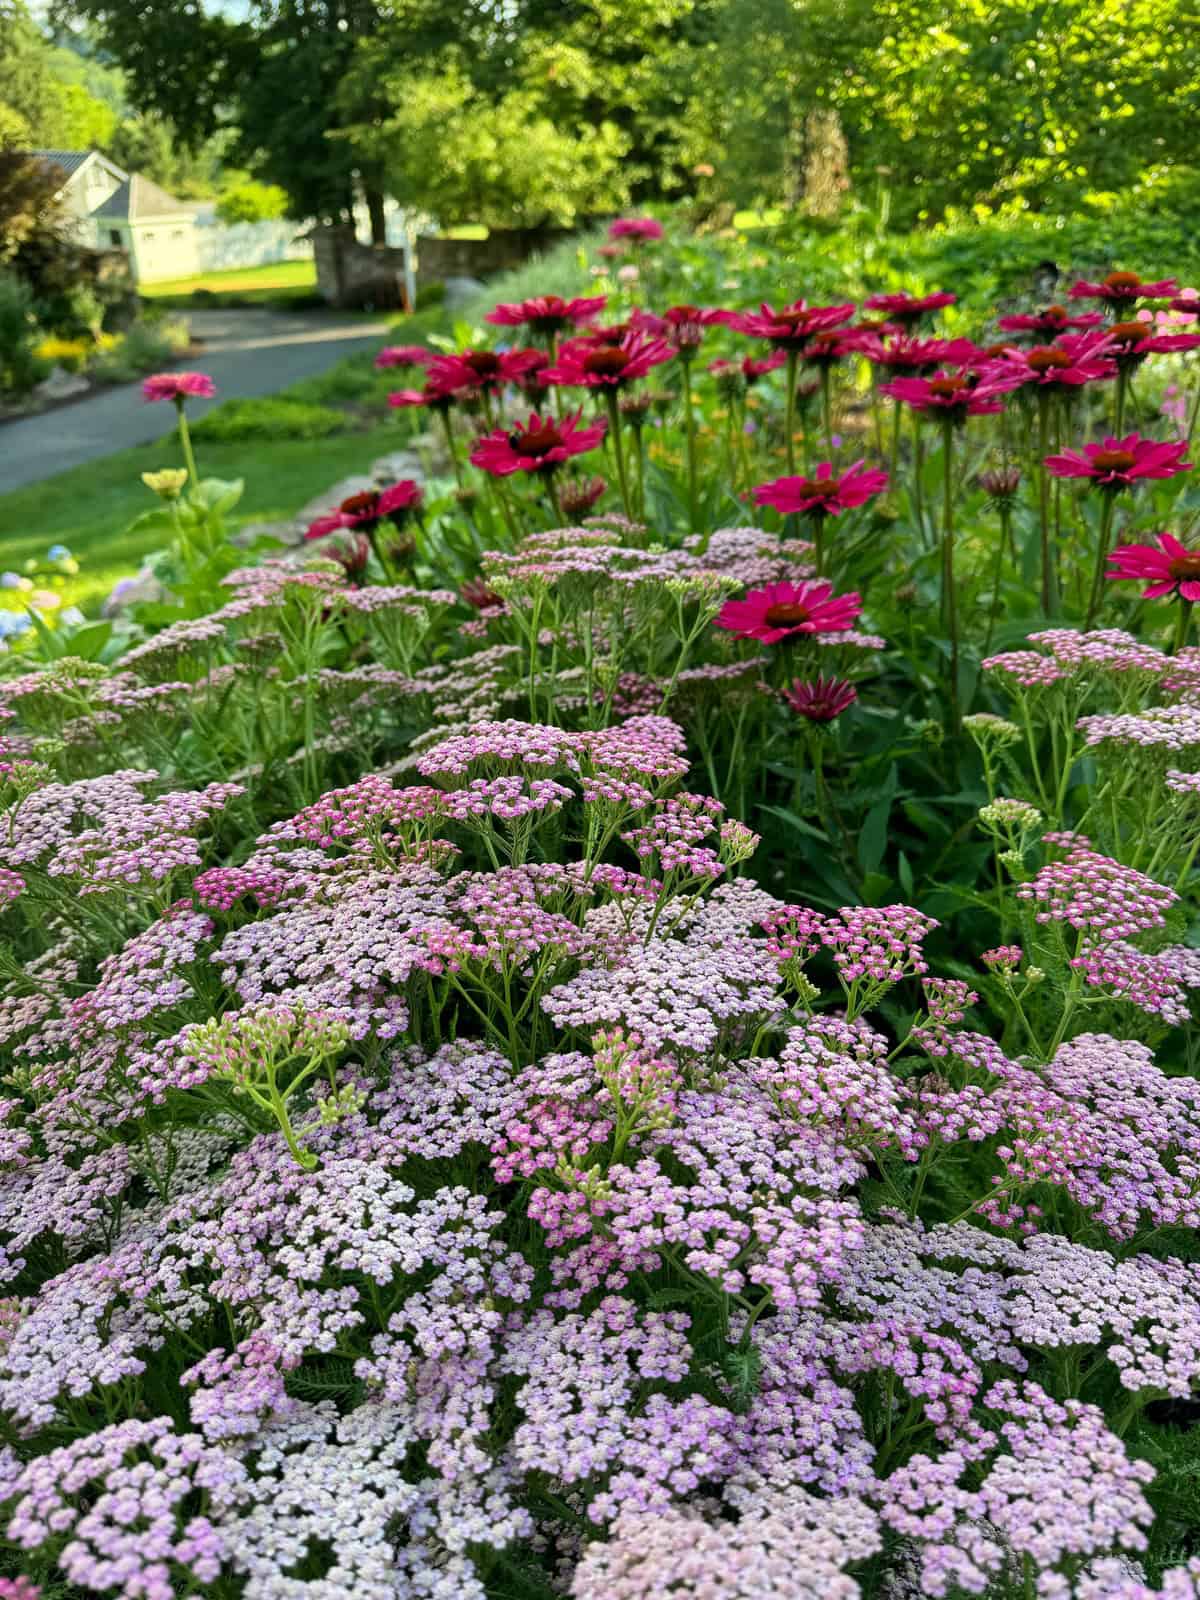
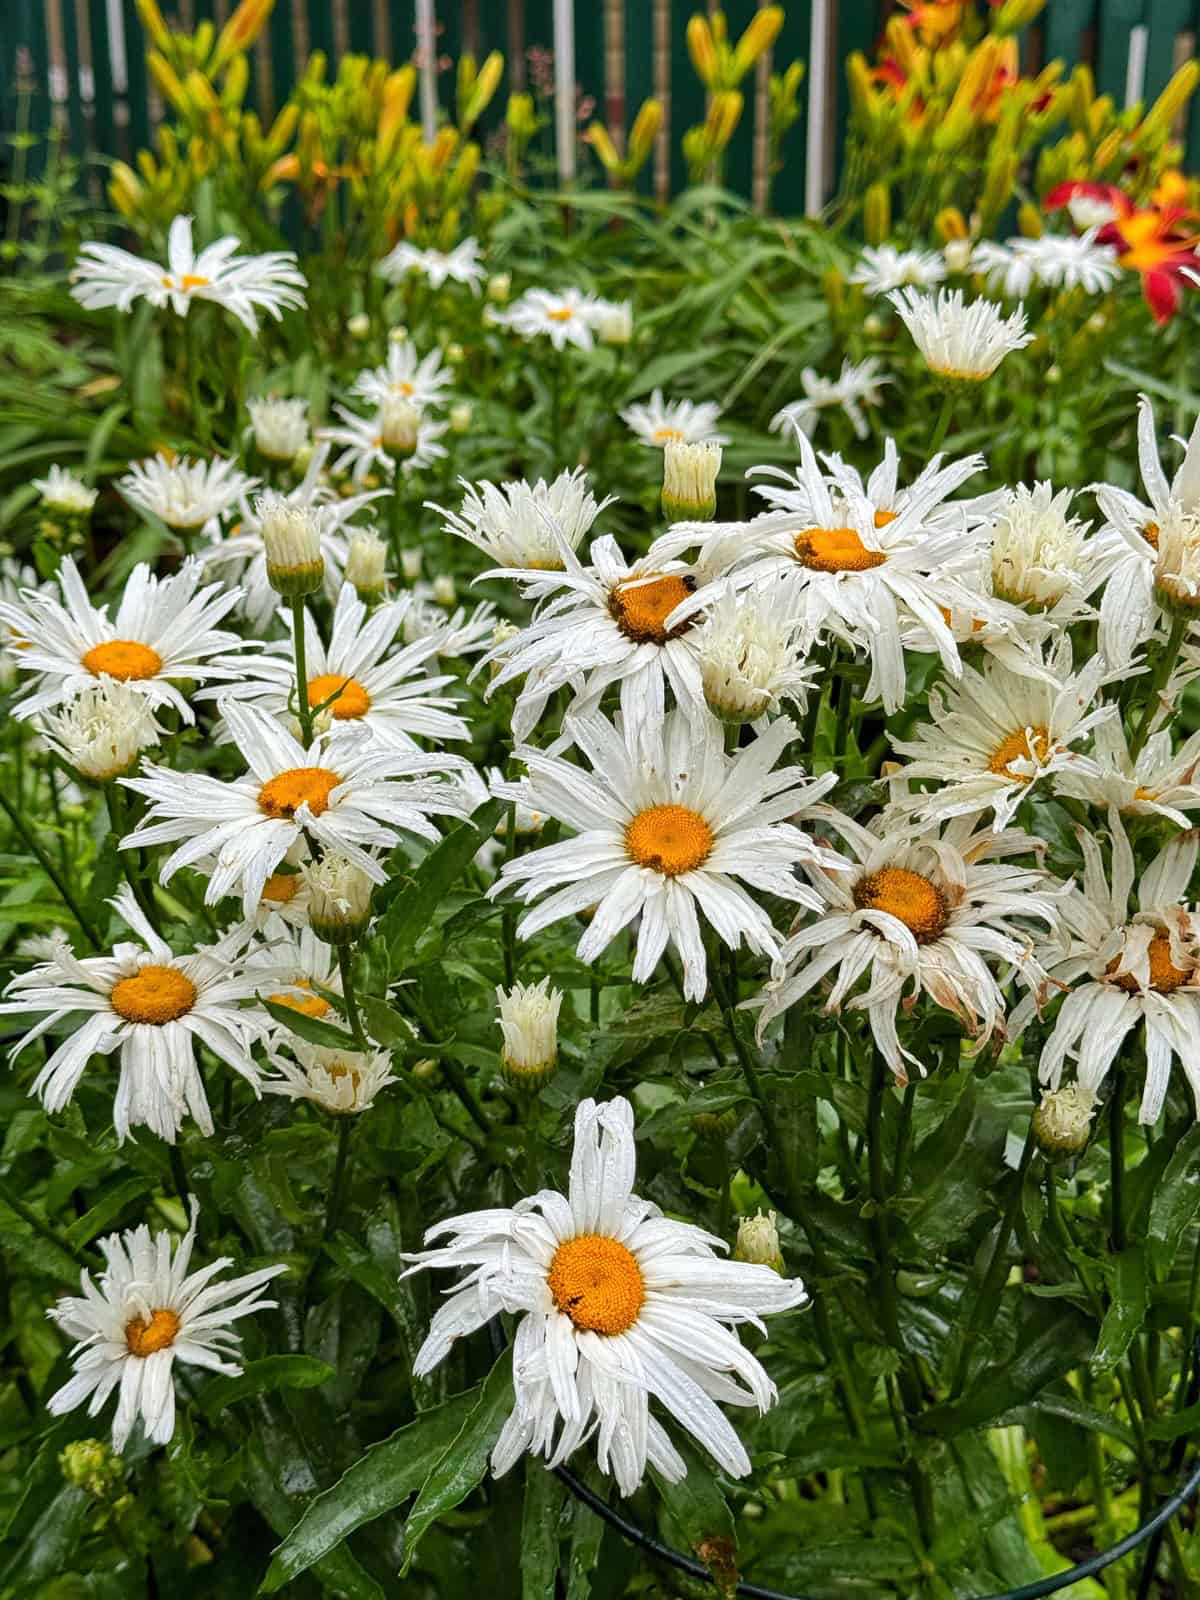
Shasta Daisy
Classic white blooms with sunny centers—a perfect bouquet filler.
If you’re not sure how perennials differ from annuals, or which ones are right for your garden, start with my Perennials vs Annuals Guide for a simple, beginner-friendly explanation.
And if you want other perennial planting ideas for a cutting garden, please visit this post here: Top Perennials for a Cut Flower Garden
Which Method Should You Choose?
With so many ways to start a cut flower garden, it can feel overwhelming to know where to begin. The good news is that you don’t have to commit to just one method. In my own garden, I almost always use a combination: direct sowing the easy annuals, starting specialty varieties indoors, winter sowing hardy annuals, and planting dahlia tubers once the soil warms. Each method has its strengths, and choosing the right approach simply depends on your experience level, your climate, and which flowers you’re most excited to grow.
Here’s a quick review to help you decide:
Direct Sowing
Best for: Beginners, budget-friendly gardens, fast-growing warm-season flowers
Great for: Zinnias, cosmos, sunflowers, calendula, amaranth
If you’re brand new to growing cut flowers, direct sowing is the easiest and most forgiving method. I rely heavily on it every season because it’s quick, inexpensive, and produces armloads of blooms with very little effort. For my best tips → Direct Sowing Guide
Indoor Seed Starting
Best for: Gardeners who want unique varieties or an earlier start
Great for: Snapdragons, celosia, specialty zinnias, lisianthus (advanced)
I start many of my cut flowers indoors because it opens up varieties you’ll never find at a nursery. It takes a bit more setup, but once you learn the basics, it’s incredibly rewarding—especially when you see that first tray of seedlings pop. For my best indoor seed starting tips → Indoor Seed Starting Guide
Winter Sowing
Best for: Low-maintenance gardeners, cool-season flowers
Great for: Larkspur, delphinium, sweet peas, calendula
Winter sowing is a set-it-and-forget-it method that’s perfect if you don’t want grow lights or indoor space. I use this method every year for hardy annuals and some perennials because it produces tough, weather-ready seedlings with almost no effort. For my best outdoor seed starting tips → Winter Sowing Guide
Planting Tubers and Corms
Best for: Gardeners who want showstopping blooms
Great for: Dahlias, ranunculus, anemones
Tubers offer massive payoff, especially dahlias, which are the backbone of my summer bouquets. If you’re ready for big, beautiful blooms, tubers are absolutely worth adding to your garden.
→ Planting Dahlia Tubers
→ How to Grow Dahlias
Buying Nursery Starts
Best for: Gardeners who want instant progress with minimal fuss
Great for: Perennials, shrubs, gomphrena, and celosia
Nursery plants are perfect if you’re short on time or new to gardening. I often mix nursery starts with my homegrown seedlings to stagger bloom times and ensure steady production.
Adding Perennials & Flowering Shrubs
Best for: Long-term garden structure and reliable cuts
Great for: Coneflower, yarrow, black-eyed Susan, hydrangeas (shrubs)
These plants come back every year and provide steady stems without replanting.
Read more about how to choose the right perennials for your cutting garden → Top Perennials for Your Cut Flower Garden
Succession Planting for Continuous Bouquets
One of the best ways to keep fresh flowers coming all season long is to practice succession planting, a simple technique where you plant the same flower in intervals so new blooms are always coming into season. Instead of getting one big flush and then a lull, succession planting gives you a steady stream of stems from early summer until frost.
I use succession planting with certain flowers every single year because it keeps my bouquets looking full, fresh, and never “end of season tired.” It’s a game changer for a productive cut flower garden.
What Is Succession Planting?
Succession planting means sowing or planting flowers in stages which is usually every 2–3 weeks. So that as one group starts to fade, another is just beginning to bloom. This method is especially helpful for annual flowers that bloom quickly and then tire out.
Best Flowers for Succession Planting
These flowers respond beautifully to staggered plantings:
Zinnias
Fast-growing, long-lasting, and incredibly productive. I sow a new round every 2–3 weeks for nonstop bouquets. Read more here about succession planting zinnias
Cosmos
They thrive with periodic re-sowing and continue to bloom beautifully from early summer through fall. Read more here about succession planting cosmos
Sunflowers
Single-stem varieties are perfect for succession planting because they only get one flower and they’re done. Sow new rows every 2 weeks for a constant supply of perfect stems. Learn more about succession planting sunflowers here.
Calendula and Strawflower
Fast producers that benefit from staggered plantings—especially if you’re cutting heavily.
Tithonia and Amaranth
One early planting and one midsummer planting will give you extended color and height in your garden.
How Often Should You Succession Plant?
There’s no exact rule, but here’s what works best for me in Zone 6b:
- Warm-season annuals: Every 2–3 weeks
- Cool-season annuals: One spring planting and one early fall planting
- Sunflowers: Every 10–14 days for continuous stems
- Zinnias: Two or three rounds total
- Cosmos: Two sowings are usually enough
Your climate, space, and personal bouquet style will influence how often you plant, so use these guidelines as a starting point.
How Much to Plant in Each Round
You don’t need a full garden each time. Small, staggered sowings go a long way.
A simple beginner-friendly rhythm is:
- Round 1: Your main planting
- Round 2: Half the size of round one
- Round 3: A final refresh for late summer and fall
This keeps your garden manageable while still producing an impressive amount of flowers all season.
My Personal Succession Planting Rhythm
In my own garden, I start with a big planting in late spring, then follow up with fresh plantings of single stem sunflowers every few weeks. This approach gives me healthy new plants just as older ones begin to fade and it guarantees I always have fresh stems to cut for arrangements and to share with friends.
Do I always succession plant? No. And that is because I grow so many different types of flowers, I don’t need to. If I was only growing say, zinnias, I 1000% would succession plant so much more to extend their flowering time.

Why Succession Planting Helps Vase Life
Fresh, young plants produce stronger stems and better-quality blooms. Older plants often:
- Stretch
- Produce shorter stems
- Lose vigor
- Develop more pest or disease issues
Staggering your plantings keeps your bouquets looking as fresh in August as they did in June.
Flowers You Don’t Need to Succession Plant
Not every cut flower benefits from this method. Some bloom steadily all season with good pinching and maintenance.
Skip succession planting for:
- Dahlias
- Snapdragons
- Perennial flowers
- Flowering shrubs like hydrangea and lilacs
This keeps things simple and helps beginners prioritize which flowers deserve the extra effort.
Supporting, Pinching & Deadheading Cut Flowers
One of the biggest secrets to growing long, strong stems for bouquets is learning how to support, pinch, and deadhead your flowers. These simple techniques dramatically improve bloom production, stem strength, and overall plant health. After nearly 30 years of growing cut flowers, I can say with confidence that these three skills are what take a beginner garden from “pretty” to professional-level production.
Supporting Tall Cut Flowers
Many tall, top-heavy flowers need support—especially in windy areas or during heavy summer rains. Without proper support, stems can bend, flop, or snap, making them unusable for bouquets.
Flowers that usually need support include:
- Dahlias
- Snapdragons
- Cosmos
- Sunflowers
- Amaranth
- Larkspur
- Delphinium
- Tithonia
- Strawflower (sometimes)
The most common support methods are:
Netting (Flower Netting / Hortonova)
Install netting horizontally across your bed when plants are small. As they grow, the net holds stems upright and encourages straighter, longer cuts.
Staking
Use single stakes for large plants like dahlias or bamboo stakes for long rows of snapdragons.
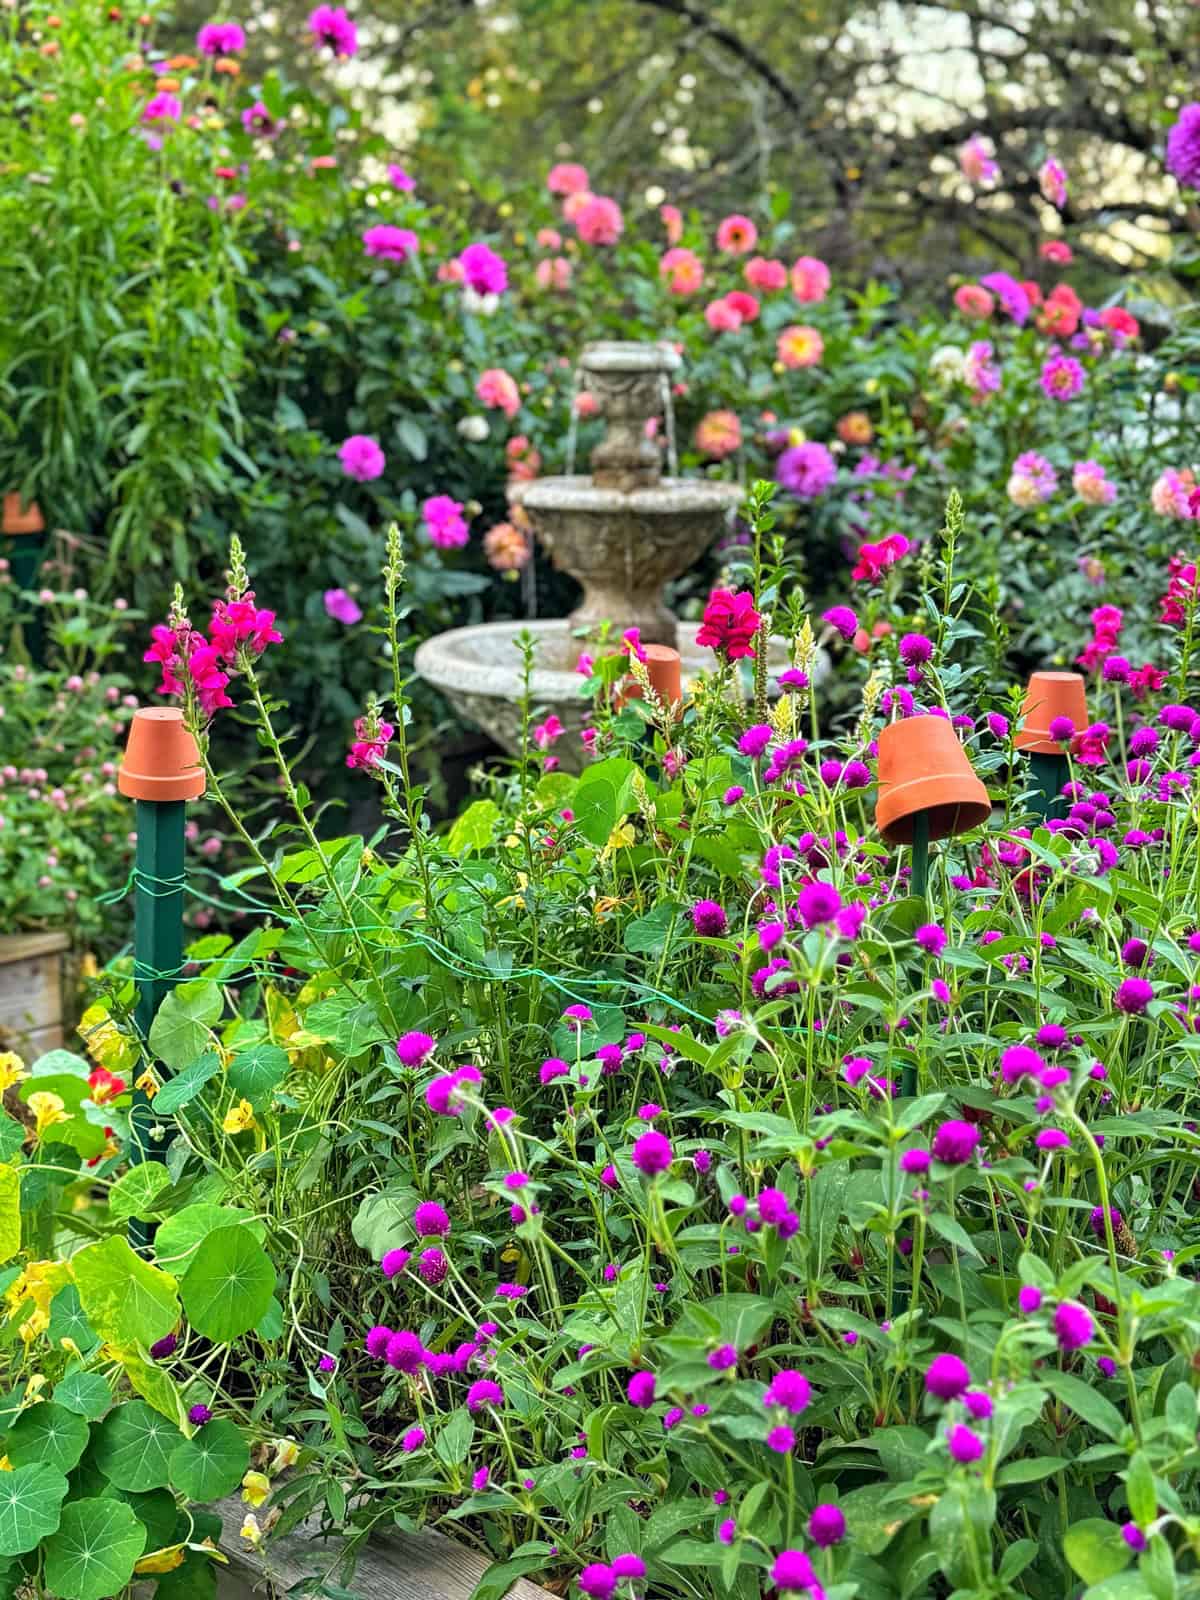
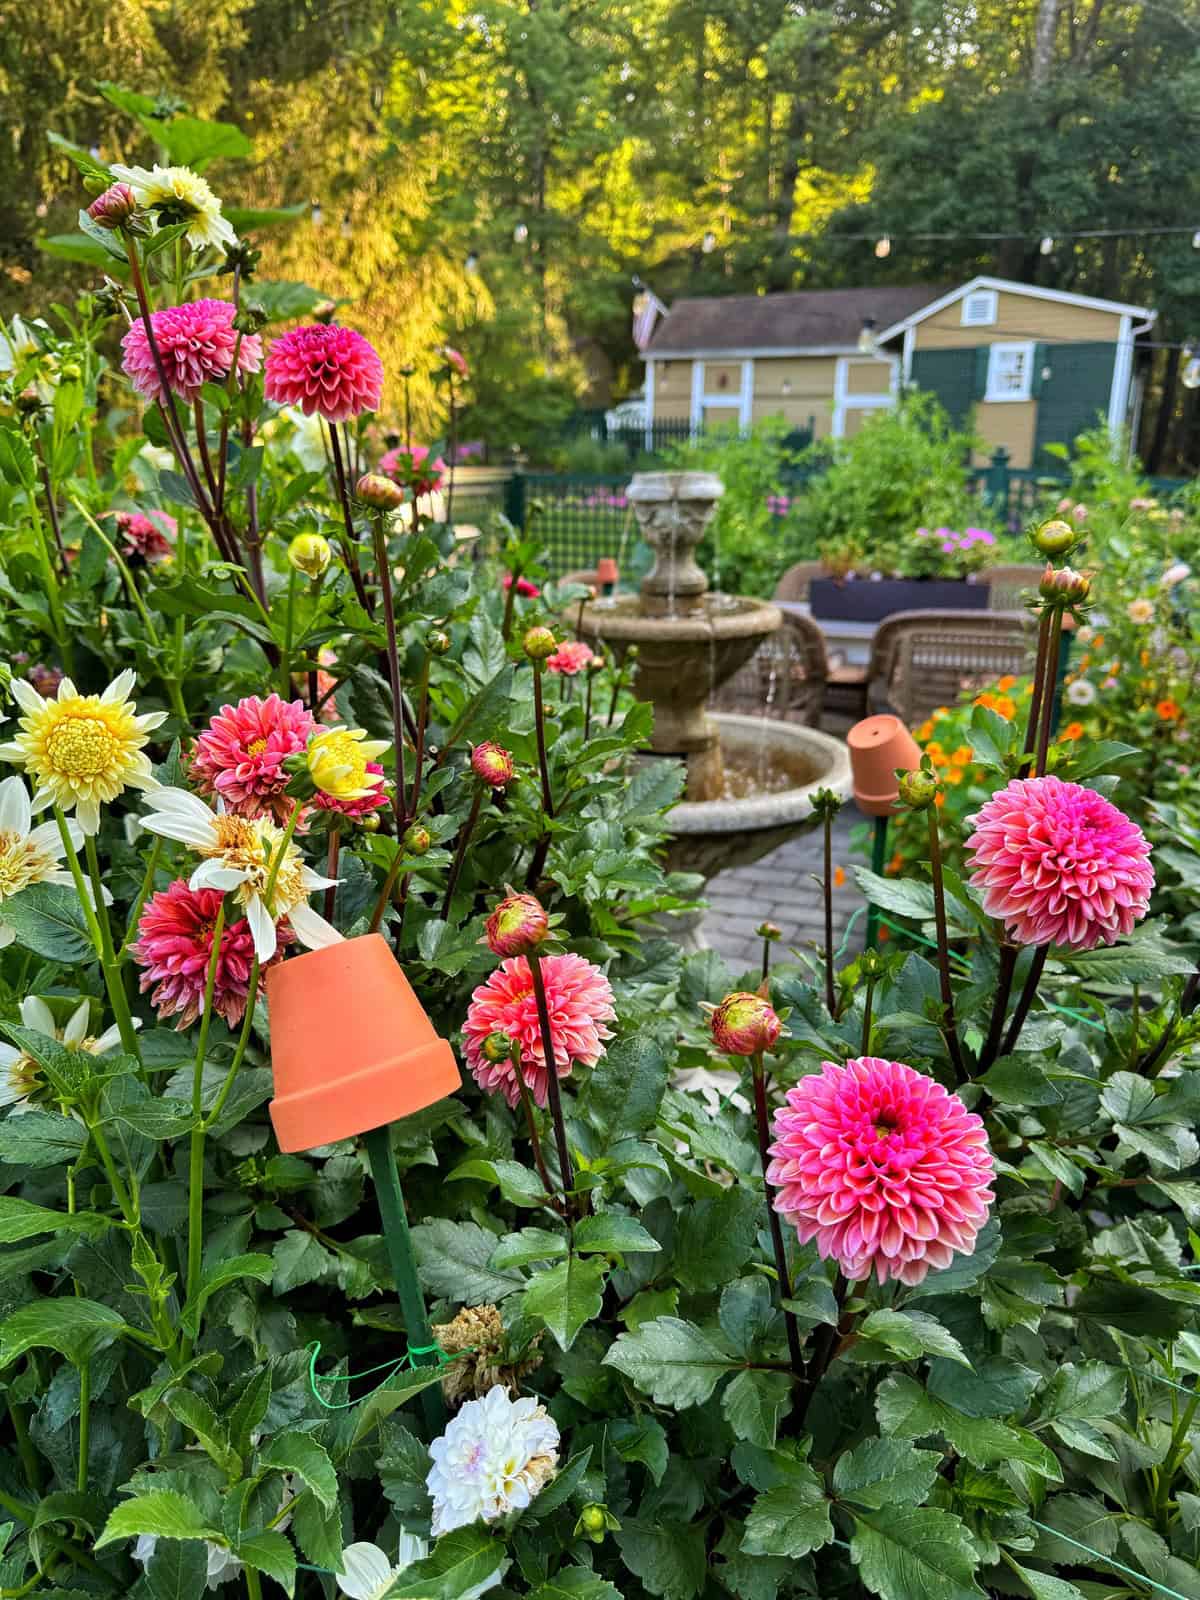
I typically use green garden stakes so they blend in with my blooms and landscape. But they can be a little dangerous when you are cutting flowers. So I top mine off with little terra cotta clay pots.
To learn more about why I add the clay pots to garden stakes, please visit my Why I Use Terra Cotta Pots on My Garden Stakes here.
Corraling
For large beds, string twine around posts to create a supportive “corral” that keeps plants from spilling outward.
To learn more about how I support the blooms in my cutting garden, please visit this post → Supporting Tall Flowers Guide
Stacy’s Growing Tip: In my garden, I use a mix of corraling and trellis netting depending on the flower and location in my garden. Dahlias, in particular, benefit from early and consistent support or the stems can bend under the weight of those gorgeous blooms. I trellis net these every season with two layers of netting to accommodate their stature and bloom weight.

Pinching for More Blooms and Longer Stems
Pinching is one of the most effective ways to increase bloom production. It sounds counterintuitive to remove the top of a healthy plant, but pinching encourages branching—which means more stems, more flowers, and a bushier, more productive plant.
Flowers that benefit from pinching
- Dahlias
- Snapdragons
- Zinnias
- Cosmos
- Celosia
- Amaranth
- Tithonia
- Sweet peas

How to Pinch
- Wait until the plant has 3–5 sets of true leaves.
- Use clean snips or your fingers to remove the top 3–4 inches.
- New branches will form below the cut, doubling or tripling your stem production.
For more information about my pinching process, read these posts:
→ How to Grow Dahlias
→ How to Grow Snapdragons
I never skip pinching. It’s one of the simplest ways to guarantee fuller, more productive plants, especially with dahlias, zinnias, cosmos, and snapdragons.

Deadheading to Extend Bloom Time
Deadheading means removing spent flowers so the plant continues producing new blooms instead of shifting energy into seed production. For cut flower gardeners, deadheading is essential—it’s how you keep annual flowers blooming all summer long.
Flowers that rely on consistent deadheading
- Zinnias
- Cosmos
- Calendula
- Strawflower
- Marigolds
- Black-eyed Susan
- Coneflower (optional if cutting)
How to Deadhead
- Cut below the spent bloom to a set of healthy leaves or a new side shoot.
- Always cut deeper than you think—this encourages stronger stems and new flower production.
For best deadheading practices, read my full guide here→ Deadheading Flowers Guide
When You Don’t Need to Deadhead
Some flowers bloom continually without needing much removal.
Regular cutting counts as deadheading. The more you harvest, the more your flowers will bloom. This is one reason cut flower gardening is so rewarding because your bouquets are actually helping your plants produce more.
With regard to flowering shrubs, regular pruning rules apply. To learn more about proper pruning and deadheading, read my full tutorial here: Pruning Hydrangeas
And you don’t need to deadhead single stem sunflower varieties.
Why Support, Pinching & Deadheading Matter in a Cut Flower Garden
These three practices:
- Improve stem length
- Encourage more blooms
- Prevent flopping
- Reduce disease
- Keep the garden looking tidy
- Extend your harvest window
- Increase vase life quality
Together, they transform a basic flower patch into a high-performing cutting garden and they don’t require any special equipment or advanced skills.


How to Harvest Cut Flowers (And Make Them Last Longer in the Vase)
Learning how to properly harvest and condition your flowers is one of the most important skills in cut flower gardening. The way you cut, handle, and hydrate your stems directly affects how long your bouquets will last. After nearly 30 years of growing flowers for cutting, these are the methods that consistently give me long, strong, beautiful blooms for arrangements.
Harvest at the Right Stage for Each Flower
Cut flowers last the longest when harvested at the ideal stage of maturity. Every type of flower has its own timing, but here are the general guidelines I follow in my Zone 6b garden:
- Zinnias: Use the wiggle test. Hold the stem below the bloom and gently shake it. If the flower head stays firm, it’s ready to cut.
- Cosmos: Harvest when the petals have just begun to unfurl. Fully open blooms don’t last as long.
- Sunflowers: Cut when the petals begin lifting off the center disk but before they fully open.
- Snapdragons: Harvest when the bottom third to half of the florets are open.
- Dahlias: Cut fully open blooms—dahlias won’t continue opening in the vase.
- Hydrangeas: Choose mature blooms with papery petals for the longest vase life.
→ Internal link anchor text: Hydrangea Care Guide
Choosing the right harvest stage helps prevent drooping, wilting, or short vase life.
When selecting blooms, look for flowers that have just opened but still have a few unopened buds on the stem. The buds will continue to open in the vase, extending the life and beauty of your arrangements.

The Best Time of Day to Cut Flowers
The best time to harvest flowers is when they are naturally full of moisture:
- Early morning before the sun warms the garden
- Late evening after temperatures cool down
Avoid cutting during the heat of the day when stems are stressed, dehydrated, and quick to wilt. In my zone 6b cut flower garden, I do almost all of my cutting early in the morning. The stems are crisp and hydrated, and the flowers look their absolute best once conditioned.
Whether you cut in the morning or evening, always bring a bucket of warm (not hot, not cold) water with you to the garden. Warm water helps stems begin hydrating quickly and reduces shock after cutting.
Use Clean, Sharp Tools
Using clean, sharp snips or pruning shears helps prevent bacterial contamination, which can drastically shorten vase life.
- Clean tools with rubbing alcohol
- Avoid crushing or tearing stems
- Make a clean, angled cut just above a leaf node or side branch. This encourages the plant to produce more stems and keeps it healthier through the season.
This small step makes a big difference in how long your arrangements last.

Condition Stems Immediately After Cutting
After cutting, plunge stems directly into a bucket of warm, clean water. Avoid using water that is cold or too hot, as extreme temperatures can shock the stems and reduce vase life.
Conditioning steps
- Strip away any leaves that will sit below the water line
- Put stems into water right away
- Keep buckets in a shaded, cool area while harvesting
This method has greatly improved vase life for my dahlias, zinnias, cosmos, and sunflowers.

Special Conditioning Tips for Popular Cut Flowers
Dahlias
Dahlias last longest when dipped in hot water (around 160–180°F) for 30 seconds before moving them to cool water. To learn more, check out this post → How to Grow Dahlias
Hydrangeas
Hydrangeas benefit from a boiling water dip or cutting small slits in the stem to improve water uptake. To learn more about conditioning hydrangea flowers, read my full guide→ How to Keep Fresh Cut Hydrangeas from Wilting Guide
Snapdragons
Condition upright in a deep bucket to prevent curved stems. Read more in my comprehensive post → How to Grow Snapdragons
Zinnias
These thrive in room-temperature water and respond well to deep conditioning.
To learn more about how I cut my zinnia flowers for arranging, read more here → How to Grow Zinnias
Each flower has its own needs, and learning these small tricks will dramatically improve your arrangements.

Use the Right Water and Flower Food
Fresh water is the simplest way to extend vase life, but flower food provides an extra boost.
To keep flowers fresh longer
- Change the vase water every 1–2 days
- Remove wilted or damaged blooms
- Use a floral preservative (store-bought or homemade – get my DIY flower food recipe here.)
- Avoid placing flowers near heat sources or sunny windows
Most homegrown flowers easily last 5–7 days with proper care. If you don’t have floral preservative on hand, use your favorite DIY flower food recipe or simply replace the water frequently as clean water alone makes a big difference.

Give Your Flowers Time to Rest Before Arranging
After cutting, give flowers a few hours to hydrate fully in a cool place. This “rest period” helps:
- Firm up stems
- Reduce drooping
- Improve overall vase life
- Make arranging easier
Professional florists call this conditioning, and it makes a noticeable difference in your bouquets.
How to Store Cut Flowers Before Arranging
If you won’t arrange your flowers immediately:
- Keep them in a cool, dark area
- Avoid drafts or direct sun
- Store in clean buckets of water
- Refrigeration works for some varieties (but avoid storing with produce)
Hydrating overnight works wonders for dahlias, hydrangeas, snapdragons, and most summer annuals.
My Bouquet Routine
On harvest days, I gather flowers early in the morning, place them directly into buckets of cool water, and let them rest in my mudroom or garage for several hours. Once they’re fully hydrated, I start arranging them into bouquets. This routine has dramatically improved the vase life and overall quality of my flowers, especially in the heat of summer.

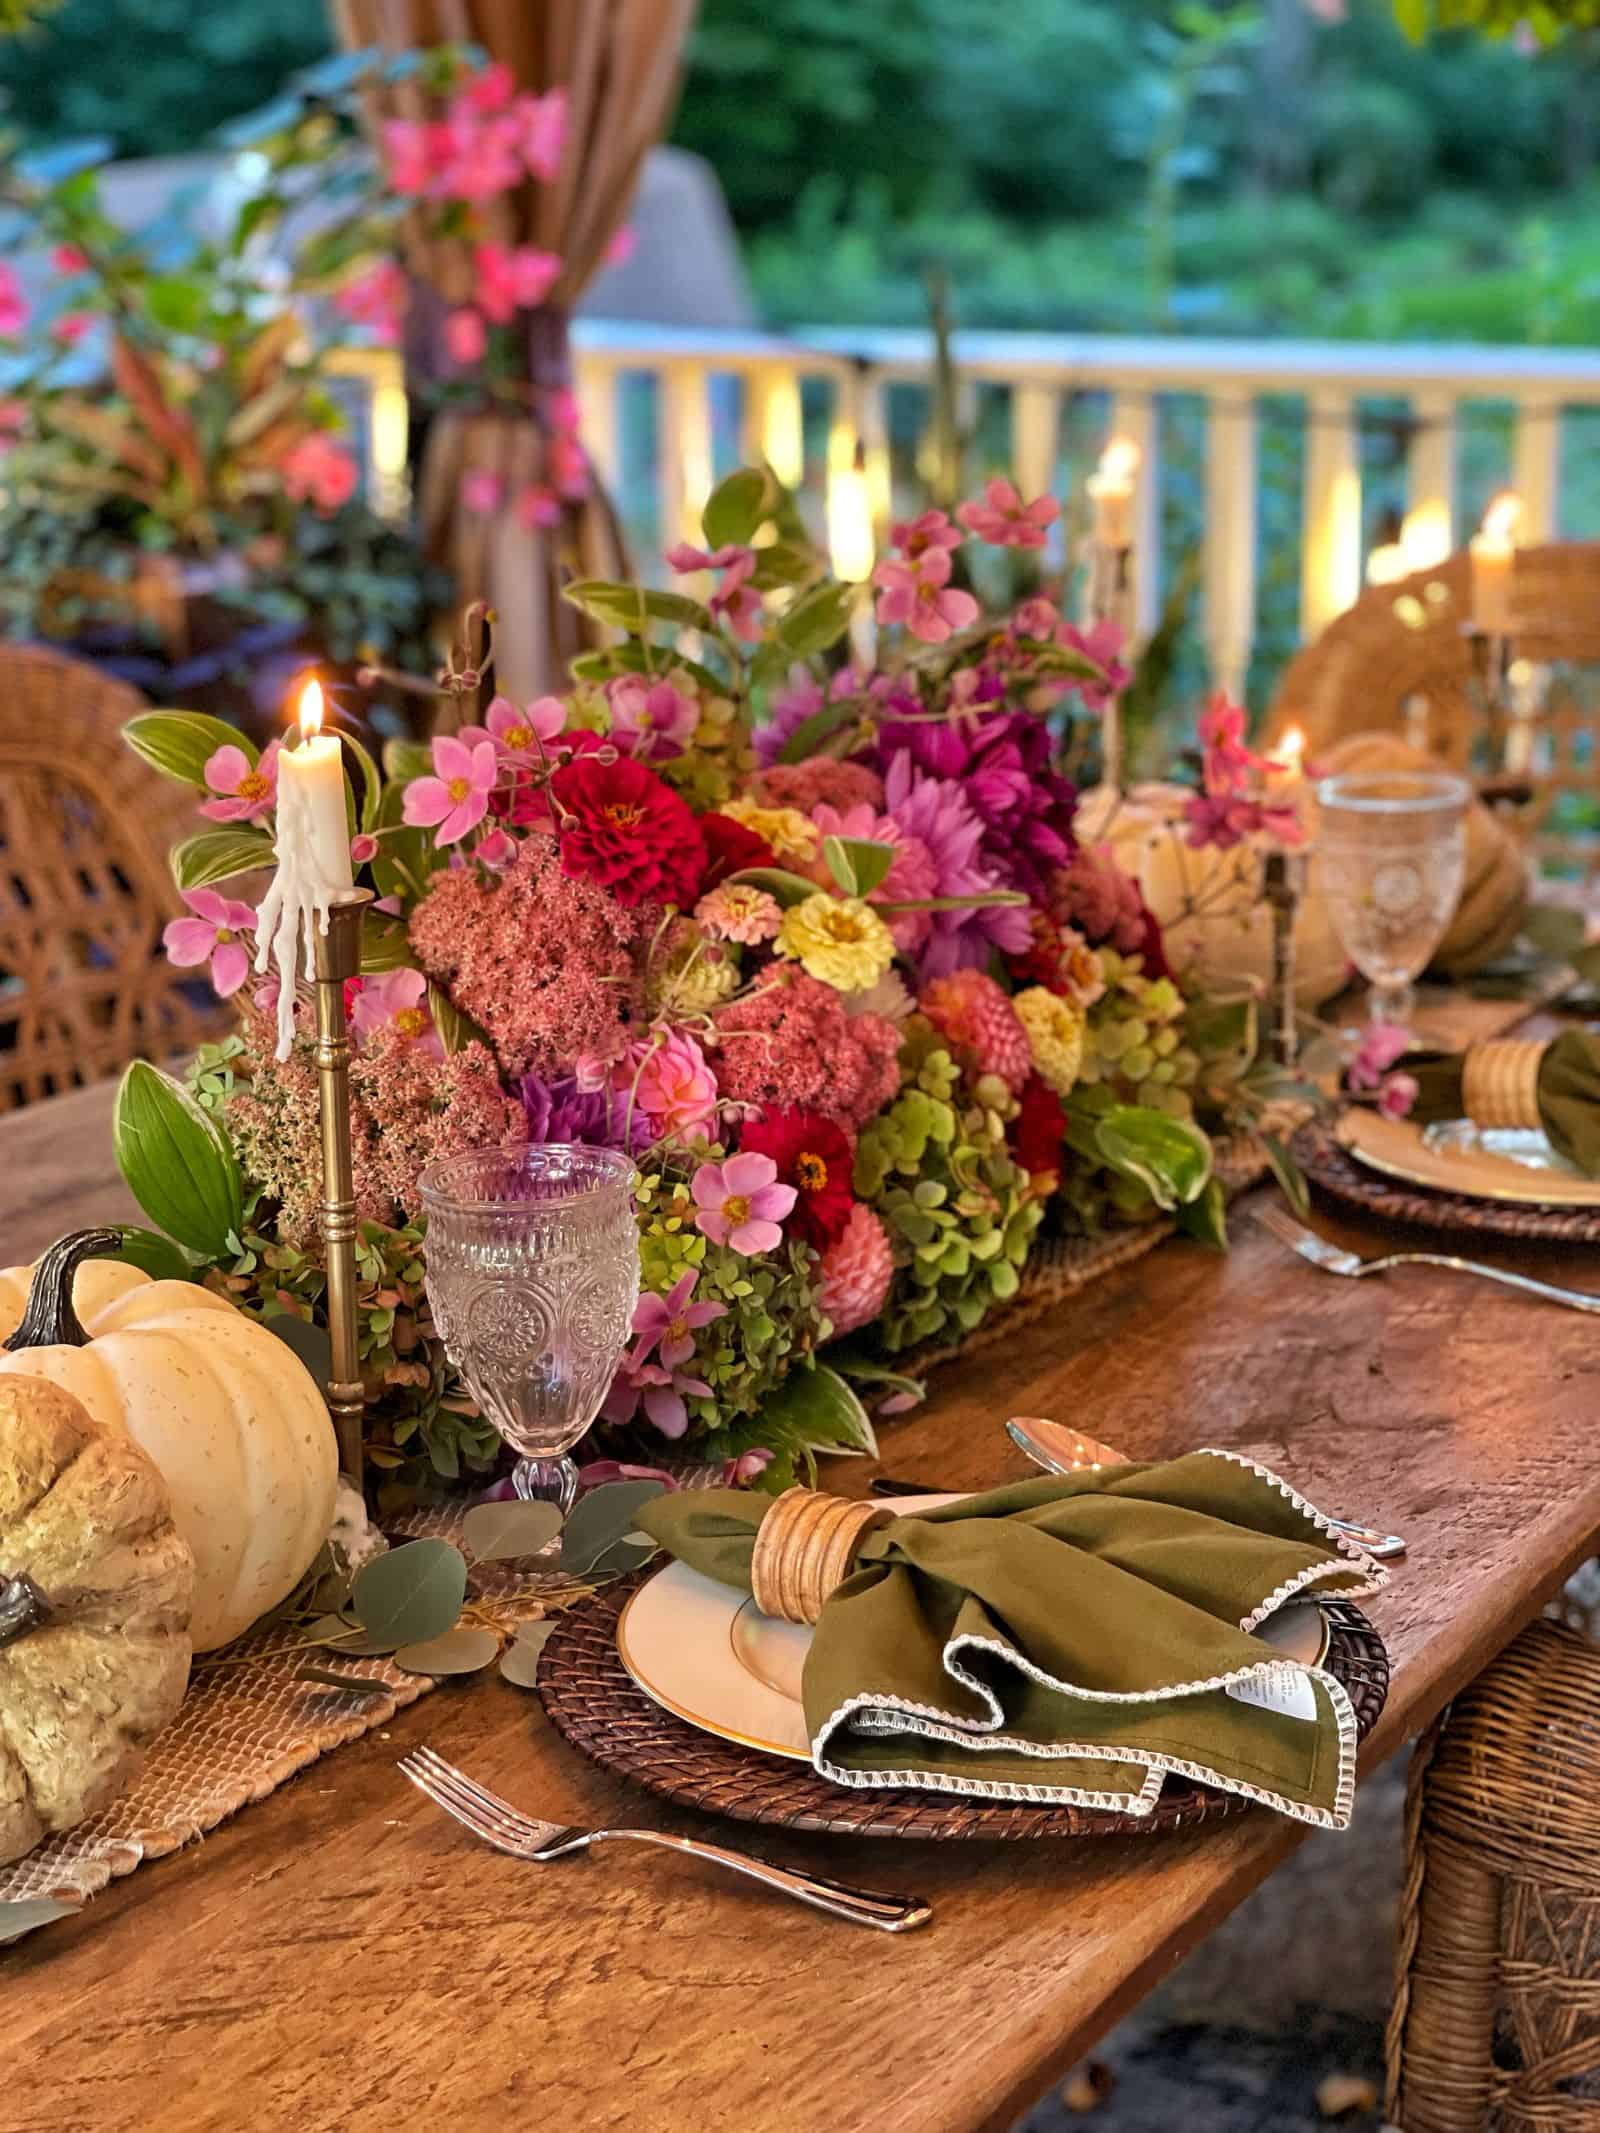
How to Arrange Your Garden Flowers Into Beautiful Bouquets
Once your flowers are harvested and conditioned, the final step is arranging them into beautiful bouquets. You don’t need professional training to create stunning displays—just a few simple techniques and the right preparation.
If you want to dive deeper into floral design basics, vase mechanics, bouquet structure, and professional tips, be sure to read my complete guide: How to Arrange Flowers Like a Pro.
Start With Clean Vases and Fresh Water
Begin with a clean vase, room-temperature water, and floral preservative or your favorite DIY flower food. Clean water and clean tools extend vase life dramatically.
Build a Strong Foundation With Foliage
Add a small amount of foliage—such as hydrangea leaves, basil, mint, yarrow, or shrub cuttings—to create a foundation. This helps support your flower stems and gives the arrangement structure.
Add Your Focal Flowers
Choose three to five focal blooms to anchor your bouquet. Dahlias, hydrangeas, large zinnias, and sunflowers all make excellent focal points. Space them so the arrangement looks balanced from multiple angles.
Layer in Supporting Flowers
Next, add medium-size flowers like snapdragons, cosmos, celosia, or strawflower. These blooms help round out the bouquet and create flow.
Finish With Airy, Textural Stems
Light, wispy flowers like ammi, feverfew, dill, Queen Anne’s lace, or small cosmos stems add movement and a natural, garden-gathered feel.
Keep the Shape Loose and Natural
Cut flower garden bouquets look best when they’re relaxed and slightly asymmetrical. Let the flowers fall naturally instead of forcing them into a strict shape.
For Detailed Arranging Techniques
If you want step-by-step arranging tutorials, bouquet recipes, and advanced tips, visit my full arranging guide: How to Arrange Flowers Like a Pro.

Cut Flower Gardening in Containers
If you don’t have space for an in-ground cutting garden—or you simply want flowers closer to your patio, deck, or front steps, container gardening is an excellent way to grow beautiful blooms for bouquets. Many annuals, perennials, and even tuber-grown flowers thrive in pots when given the right soil, light, and care.
I grow flowers in containers every year because it allows me to experiment with new varieties, extend my cutting space, and enjoy blooms in areas where the soil is less ideal.
Best Flowers to Grow in Containers for Cutting
Some flowers adapt especially well to pots and still produce long stems suitable for arrangements. My favorites for containers include:
- Dahlias (compact and medium varieties do especially well)
- Zinnias
- Strawflower
- Snapdragons
- Cosmos
- Celosia
- Amaranth
- Calendula
Larger varieties of dahlias and sunflowers can also be grown in very large pots or grow bags for additional space.
To read more about how to grow dahlias in pots, you may find this post helpful → Growing Dahlias in Pots
Choose the Right Containers
When choosing containers for cut flowers:
- Select pots that are at least 12–16 inches wide, larger for dahlias
- Make sure they have excellent drainage
- Use grow bags for lightweight, breathable options
- Place containers where they’ll receive 6–8 hours of sun
Bigger pots retain moisture better and help prevent stress, especially in the heat of summer. For a deeper dive into how to choose the right planter for your garden, please visit this post here: How to Choose the Perfect Planter
Use High-Quality Potting Soil
Container-grown flowers rely heavily on soil quality. For the best results:
- Use a high-quality potting mix, not garden soil
- Add compost for added nutrients
- Consider incorporating slow-release fertilizer
- Top off soil levels each season as mixes settle
This gives your flowers a strong foundation for producing healthy stems.

Watering and Fertilizing Container Flowers
Container-grown plants dry out faster than in-ground beds. To keep your flowers thriving:
Watering Tips
- Check soil daily during hot weather
- Water deeply to saturate the entire container
- Avoid letting pots dry out completely
I strongly recommend setting up drip irrigation on timers so it is set and forget. This works really well for me in my zone 6b gardens and saves a lot of time!
Fertilizing Tips
- Use a balanced, water-soluble fertilizer every 1–2 weeks
- Dahlias and heavy feeders benefit from consistent nutrition
- Slow-release fertilizers are great for low-maintenance care
Plants grown in pots have no way to access deep soil moisture or nutrients, so regular watering and feeding make all the difference.
For more detailed information about how I grow flowers in planters, please visit this post → Container Gardening for Beginners
Supporting Flowers in Containers
Even in pots, many cut flowers need support to stay upright and produce straight stems:
- Stake dahlias early
- Use mini trellises for larger cosmos varieties
- Corral amaranth and celosia with simple bamboo stakes
- Keep pots in sheltered areas to reduce wind stress
Container-grown plants can flop more easily because they lack the anchoring power of garden soil.
My Favorite Container Flowers
Every year, I grow several varieties of dahlias, zinnias, and snapdragons in containers on my deck and patio. This allows me to enjoy fresh blooms right outside my kitchen door while testing new varieties for vase life and stem length. Dahlias, especially, perform beautifully in containers as long as the pots are large and the plants are well-fed.
Why Containers Are a Great Option for Beginners
Container gardening is a wonderful entry point for new cut flower gardeners because:
- You control the soil quality
- You avoid weeds
- You can move pots to find the best sun
- You can grow flowers in small spaces
- You get beautiful blooms within arm’s reach
It’s a fantastic way to dip your toes into cut flower gardening before expanding into raised beds or in-ground plots.

Common Cut Flower Gardening Mistakes I’ve Made (And How to Avoid Them)
Every gardener makes mistakes, especially when growing flowers for cutting. After nearly 30 years of growing and refining my cutting garden, I’ve learned that a few simple adjustments can make a big difference in bloom production, stem length, and overall plant health. Here are the most common mistakes I’ve made over the years, and how you can avoid them in your own garden.
Planting Too Close Together
When I first started growing cut flowers, I underestimated how much space certain plants needed. Overcrowding can lead to weak stems, poor airflow, and disease.
How to avoid it:
Follow spacing recommendations on the seed packet or plant tag, and thin seedlings if necessary. Give each plant enough room to branch out and produce long, usable stems.
Not Pinching Flowers Early Enough
I used to hesitate to pinch young plants because it felt wrong to cut off the top of something I was trying to grow. But skipping this step leads to tall, leggy plants with fewer blooms.
How to avoid it:
Pinch flowers like dahlias, zinnias, cosmos, celosia, and snapdragons once they have three to five sets of true leaves. This encourages branching and dramatically increases stem production.
Forgetting to Deadhead Regularly
Early in my gardening journey, I didn’t realize how quickly spent blooms can signal a plant to stop producing. Deadheading is essential for continuous color and longer cutting windows.
How to avoid it:
Remove spent blooms frequently, cutting down to a strong leaf node or side shoot. Remember—cutting blooms for arrangements also counts as deadheading.
Not Giving Tall Flowers Enough Support
I learned this one the hard way. Tall, top-heavy plants like dahlias, snapdragons, cosmos, and amaranth can bend or break in wind or rain if they aren’t supported early.
How to avoid it:
Stake plants early, install horizontal netting, or use a simple corral system with twine and stakes. Supporting plants before they flop makes all the difference in stem quality and harvest success.
Harvesting at the Wrong Time of Day
In my early years, I cut flowers whenever I had a minute—often in the heat of the day. The blooms wilted quickly and didn’t last long in arrangements.
How to avoid it:
Cut flowers in the early morning or late evening when temperatures are cool and stems are fully hydrated. Avoid harvesting during peak heat.
Cutting Flowers at the Wrong Stage
I used to cut flowers when they “looked pretty,” not realizing that the stage of development affects how long they last.
How to avoid it:
Learn the ideal cutting stage for each flower variety. For example, dahlias should be fully open, zinnias must pass the wiggle test, and sunflowers last longest when petals are just starting to lift from the center.

Neglecting Soil Health
Like many beginners, I thought flowers would grow anywhere. Over time, I learned that soil quality directly impacts bloom production.
How to avoid it:
Amend soil with compost, ensure good drainage, and fertilize regularly with balanced nutrients. Healthy soil produces more flowers with stronger stems.
Forgetting to Succession Plant
Back in the day, I used to plant everything at once, not realizing many annuals tire out mid-season. As a result, I’d have a big flush of blooms and then nothing.
How to avoid it:
Sow fast growers like zinnias, cosmos, calendula, and sunflowers every two to three weeks for consistent bouquets all season long.

Trying to Grow Every Flower in One Season
It’s tempting—especially with all the gorgeous varieties out there. But trying to grow everything at once leads to overwhelm and a garden that’s harder to maintain.
How to avoid it:
Start with a small selection of flowers you truly love. Add a few new varieties each year as your confidence and experience grow.
Not Conditioning Flowers Properly After Harvesting
In my early years, I’d cut flowers and immediately arrange them, wondering why they wilted so quickly.
How to avoid it:
Place stems in water immediately after cutting, strip leaves below the water line, and let them rest in a cool location for a few hours before arranging. Proper conditioning dramatically improves vase life.


Expert Advice for Aspiring Cut Flower Gardeners: Getting Started Right
If you are just starting out with cut flower gardening, my best advice is to begin small, get your feet wet, and build your confidence one season at a time. It’s so easy to get swept up in seed catalogs or garden inspiration and suddenly plan for more than you can realistically manage. I’ve been there myself. But trust me—bigger gardens mean more work, and they aren’t always more enjoyable.
Starting with a smaller cutting garden gives you the chance to learn, observe, and understand how different flowers grow. You’ll manage the beds more easily, stay on top of harvesting and maintenance, and actually enjoy the process instead of feeling overwhelmed. A small, well-tended space can produce more beauty than you ever imagined.
Growing a cut flower garden has been one of the most rewarding parts of my gardening journey. There is nothing quite like stepping outside in the morning, snipping a few stems, and creating a bouquet for your home—or inviting a friend to cut flowers with you so they can bring that beauty home too. It’s a simple joy that never wears off.
If you’re looking for more ideas as you get started, you may also enjoy these guides:
- Cut Flower Garden Design Guide – for planning and layout inspiration
- How to Grow Dahlias – one of the most rewarding cut flowers you can grow
- How to Grow Snapdragons – early-season blooms with excellent vase life
- How to Grow Zinnias – perfect for beginners and endlessly colorful
- Container Gardening for Beginners – a great option if you’re gardening in small spaces
- How to Arrange Flowers Like a Pro – once your garden is blooming
Wherever you are in your gardening journey, I hope your cut flower garden brings you as much joy, color, and satisfaction as mine has brought me over the years. With a little patience and the right flowers, you’ll create a space that fills your home—and your heart—with beauty season after season.
Thanks so much for growing stuff with me! I hope you found these tips on cut flower gardening for beginners helpful and are inspired to grow one this year!
See you in the garden.
For more information about growing a cut flower garden, see these cooperative extension articles:
- North Carolina Cooperative Extension
- The Missouri Cooperative Extension
- University of California Cooperative Extension
Thank you for visiting the blog today!
Enjoy your day! xo


Stacy,
I didn’t start any flowers from seeds this year. Time got away from me but I will be planting some cut flowers regardless. Your tips are so helpful. Thanks so much!
Hey Rachel! There’s still time! There are lots of seeds you can still start indoors or just sow them outside. And thank you!!! xoxo
Your gardens are beautiful! I would love to grow flowers and landscaping like this! I may try! Thanks for all the great tips and I will be following along to learn more!
I’m so glad I can’t wait to see your garden! Thank you!
Fantastic post! I love seeing all your garden pictures again. I can’t wait for winter to be over and get out there…don’t know where I’m planting the 5 zillion seeds I just bought!!!
Thank you Jennifer! Did you start any seeds yet? I just started the sweet peas this week! I am so excited to get the new garden going here and see what pops up in the rest of the beds!
Thanks so much Stacy. We live in south Jersey
Love the cut garden article
I wish you all the luck in the world to your new yard and home!! Cant wait to see your beautiful flower beds
I really appreciate that Debbie! Thank you so much!