Homemade Flower Food: A Simple Recipe for Beautiful, Long-Lasting Bouquets

Keep your flowers fresh for days with this easy homemade flower food recipe! Wait until you try this simple DIY flower food solution for long-lasting blooms.
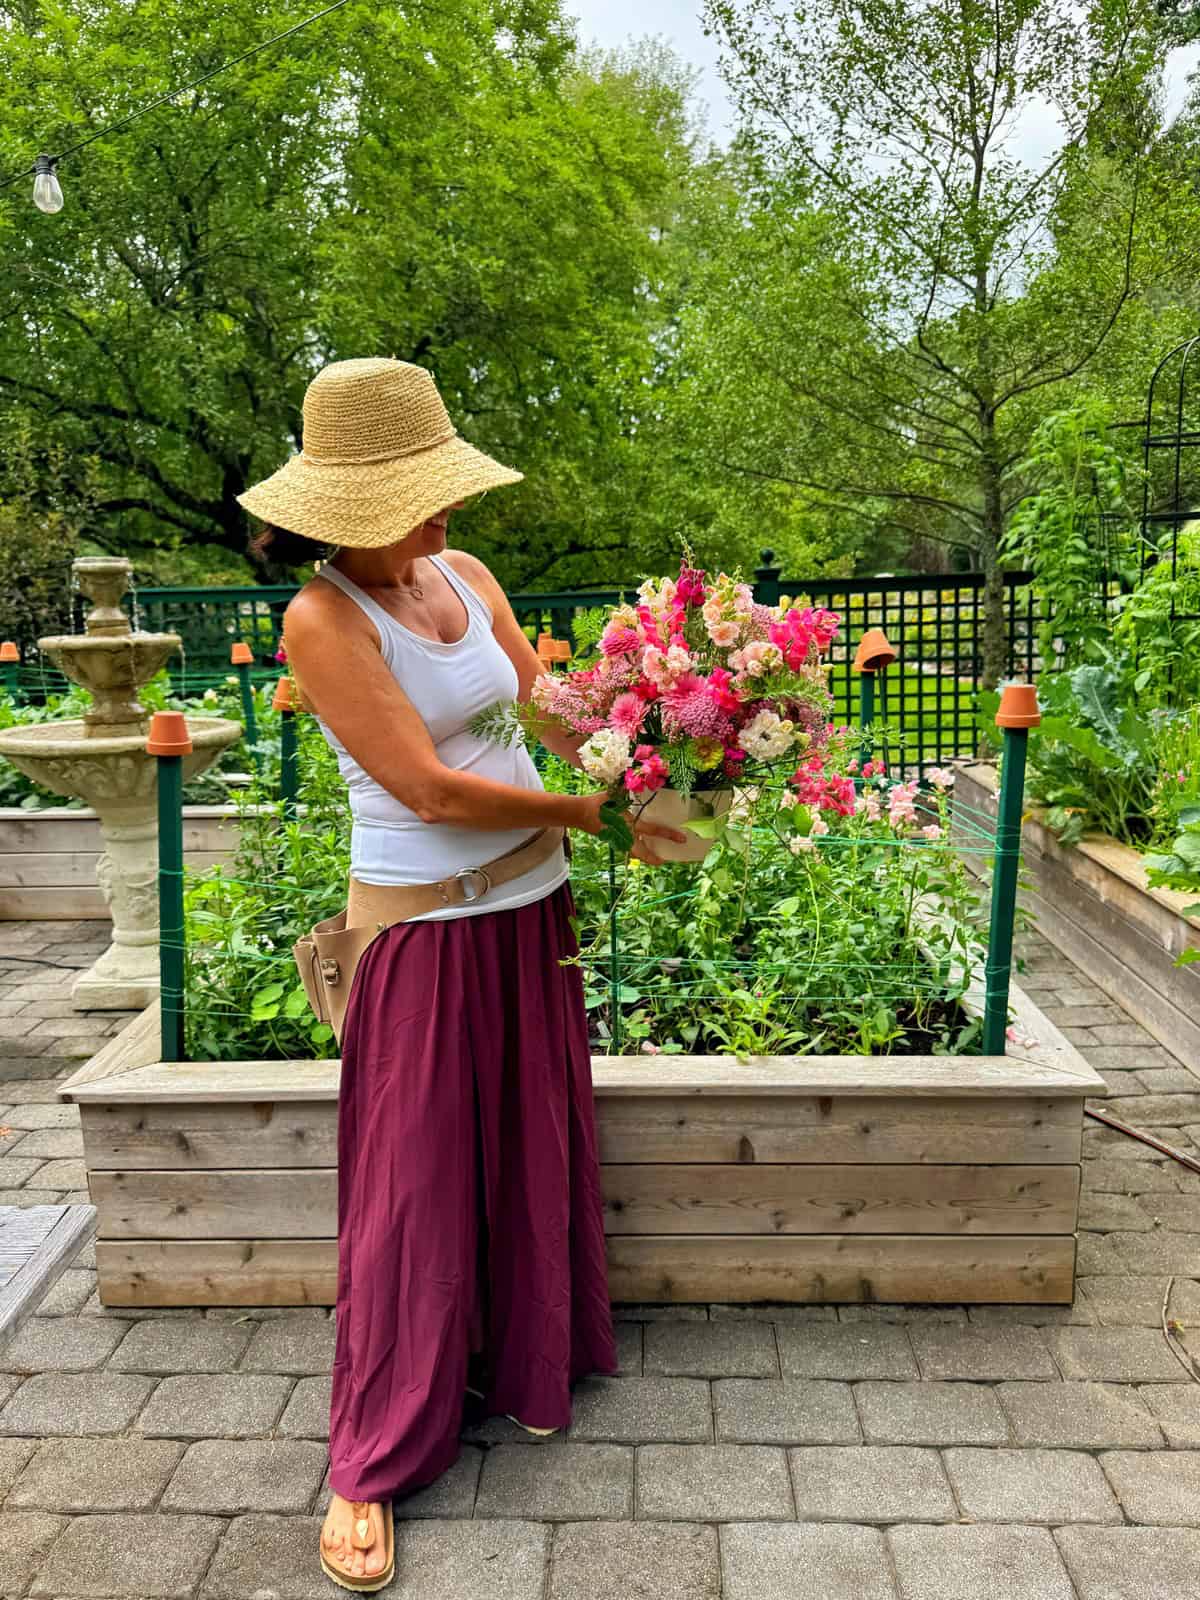
As someone who grows a cut flower garden, I find myself cutting fresh blooms almost daily to brighten up my home or give away to friends and family. There’s something so satisfying about arranging flowers from your own garden, but it’s so frustrating when those beautiful bouquets wilt after just a day or two.
Hi, I’m Stacy Ling, a trained Master Gardener in USDA Zone 6b, New Jersey, sharing beginner-friendly tips to help your garden thrive. After nurturing my flowers from seed to full bloom, you can bet I want to enjoy them as long as possible!
The secret to longer-lasting cuts is flower food.
While pre-made packets are convenient, I’ve found it is crazy simple and much less costly to make my own at home with just a few pantry staples. I always have the ingredients on hand, and I bet you do too!
Today, I’m sharing my simple, go-to recipe so you can keep your beautiful bouquets looking fresh for days.
(Posts on stacyling.com may contain affiliate links. Click HERE for full disclosure.)

My Go-To DIY Flower Food Recipe
Here’s the latest DIY recipe I use to keep my garden blooms looking fresh and beautiful in my home. It’s easy to make and uses ingredients you probably already have in your kitchen.
A Quick Note on Safety: This recipe includes a very small, highly diluted amount of household bleach to keep bacteria at bay. Please use precise measurements and never add more than the recipe calls for. Keep the solution out of reach of pets and children, and as with any household chemical, do not mix it with other cleaning products, especially ammonia.
Ingredients
- 1 quart warm water
- 2 tablespoons lemon juice (or white vinegar works too)
- 2 tablespoons granulated sugar
- ½ teaspoon chlorine bleach (or apple cider vinegar)
Instructions to Make Homemade Flower Food
- Mix the Ingredients: Start by combining the lemon juice (or vinegar), sugar, and bleach (or apple cider vinegar) in warm water. Stir until the sugar is completely dissolved.
- Prepare the Flowers: Before placing your flowers in the vase, trim the stems at an angle under running water to improve water uptake. Remove any leaves that would be submerged in the water to prevent bacterial growth.
- Arrange and Enjoy: Place your flowers in the vase with the prepared flower food solution. Keep the vase away from direct sunlight, drafts, and heat sources to extend the life of your blooms.
I’ve noticed that using this DIY flower food keeps my flowers fresh for days, often outlasting store-bought preservatives. Plus, it’s incredibly cost-effective! Pre-made flower food packets like this one can add up when you cut a lot of flowers.
DIY Flower Food Variations
For years, I used this homemade flower food recipe too! Here’s what you need to make it.
- 2 aspirins
- 1 teaspoon of sugar
- and a few drops of chlorine bleach (to kill harmful bacteria).
It is harder to feed fresh-cut flowers if they are sitting in floral foam, so I use that formula per quart of water when watering the blooms.

Why This DIY Flower Food Works: The Science in the Vase
In my experience, homemade flower food can make all the difference in keeping cut flowers fresh for longer. The secret lies in providing the essential nutrients that flowers need even after they’ve been cut from the garden. When flowers are left in plain water, they don’t receive the nutrients necessary to maintain their vibrancy. Commercial flower food works by combining three key components: sugar, acid, and a biocide to prevent bacterial growth.
Fortunately, we can replicate this professional formula perfectly at home with a few pantry items. Here’s a closer look at the important role each ingredient in my recipe plays to keep your blooms beautiful.
1. Sugar (The Food)
Cut flowers are separated from their plant and root system, but they are still very much alive and need energy to survive. The sugar in this recipe provides essential carbohydrates that supplement the natural sugars lost after cutting. This gives the flower the fuel it needs to maintain its cellular processes, helping buds to open and petals to keep their vibrant, healthy appearance.
2. Lemon Juice (The Acidifier)
Freshly cut stems can absorb water most efficiently in slightly acidic conditions. The citric acid in the lemon juice lowers the water’s pH, which helps the flower “drink” more freely and stay hydrated. As a bonus, a lower pH also helps the flower’s cells stabilize their pigments, which is essential for keeping the colors of the petals rich and bright.
3. Bleach (The Protector)
This might sound surprising, but a tiny, highly diluted amount of bleach is the secret weapon for longevity. It acts as a biocide, a substance that controls the growth of harmful bacteria and fungi in the water. This is critical because bacteria multiply rapidly in a vase and will quickly clog the flower’s water-uptake channels (its vascular system, known as the xylem). By keeping the water clean, bleach ensures your flowers can stay hydrated, which is the #1 defense against premature wilting.

Your Checklist for Longer-Lasting Flowers
Making the right flower food is a huge step, but following a few extra care tips will extend the life and beauty of your blooms even further. For the best results, follow this simple checklist every time you bring a new bouquet home.
✓ Start with a Squeaky-Clean Vase. Bacteria is the #1 enemy of fresh flowers. Before you begin, always wash your vase with hot, soapy water and rinse it well to remove any residue from previous bouquets.
✓ Give the Stems a Fresh Cut. Using sharp scissors or pruners, trim at least a half-inch to an inch off each stem at a 45-degree angle. This creates a fresh surface with maximum surface area for the stem to absorb water.
✓ Remove All Lower Leaves. Strip off any leaves that will sit below the waterline in your vase. Submerged leaves will quickly begin to rot, breeding bacteria that will shorten the life of your entire arrangement.
✓ Use Your DIY Flower Food. Add your homemade flower food to a vase filled with fresh, cool water. This provides the essential nutrients and antibacterial protection your flowers need to thrive indoors.
✓ Replenish and Refresh Every 2-3 Days. Don’t just top off the water! For the best results, empty the vase, rinse it, trim the stems again, and refill it with fresh water and another dose of your flower food every two to three days.
✓ Choose a Cool Location. Display your beautiful arrangement away from direct sunlight, heating vents, or ripening fruit. All of these things can accelerate the wilting process. A cool spot in your home will always help your flowers last longer.

Advanced Conditioning for Peak Bloom Longevity
While a fresh, angled cut and clean water are essential, some flowers benefit from a little extra attention to ensure they hydrate perfectly and last as long as possible. These advanced techniques are used by florists to give blooms the best start:
The Submersion Revive (The “Dunk”)
This is a GREAT technique for reviving slightly wilted or dehydrated blooms (like Hydrangeas) and for deeply hydrating newly cut garden flowers. After trimming the stems, simply submerge the entire flower (head and stem) into a tub, sink, or bucket of cool water for 20–30 minutes. This allows the petals and leaves to absorb water directly, quickly boosting turgidity and firmness.
If you’ve ever watched your fresh flowers droop in a vase, this can help perk them back up! I’ve had this happen to me when I don’t spend the time conditioning my blooms (like hydranteas) first. To learn more about how to keep them from wilting, read my comprehensive post about how to keep hydrangea flowers fresh here.
The Hot Water Treatment (For Woody or Sappy Stems)
Certain flowers with thick, woody stems (such as Lilacs, Sunflowers, or Hydrangeas) or those that exude a milky sap (like Poppies) benefit from a brief “shock” treatment.
- After cutting the stem, place the bottom 1–2 inches into a cup of very hot (not boiling) water for about 30 seconds.
- Immediately transfer the stem to your vase of cool flower food solution. This treatment helps clear blockages and improves water uptake.
- Note: This is an advanced technique—be careful not to steam the petals!
I’ve used this method with both lilacs and hydrangeas from my New Jersey gardens. It works really well at keeping my blooms perky. And it’s easy to given all you need is a pot, some water and a stove!
The Alum Powder Dip
For extremely difficult-to-hydrate stems, particularly those with lots of sap, florists sometimes use alum powder (a common pickling spice). I use this method all the time with my the hydrangea flowers that I cut from my garden. After making a fresh cut, simply dip the bottom inch of the stem into the dry alum powder, then immediately place it into your flower food solution. The alum helps to seal the stem and stop sap leakage, promoting better water absorption.
This is the method I use with my zone 6b fresh cut hydrangeas all the time! It works so well at keeping the blooms hydrated an full. They’ve lasted for almost two weeks!
By incorporating these pro-level conditioning methods, you are giving your bouquets every possible advantage for peak vase performance!
Frequently Asked Questions (FAQ)
1. Can I make a large batch of this flower food to store for later?
Yes, you can absolutely pre-mix a larger batch to have on hand! Simply scale the recipe up, and store the solution in a clearly labeled, sealed container in a cool, dark place (like a refrigerator, away from food items). It should last for about one week. Be sure to give it a good shake before each use.
2. Does this recipe work for all types of cut flowers?
This is a fantastic all-purpose recipe that works wonderfully for most common cut flowers, especially those with woody stems like roses, as well as carnations, sunflowers, and zinnias. However, some flowers that grow from bulbs, like daffodils and hyacinths, can release substances into the water that are toxic to other flowers. It’s often best to keep them in their own separate vase.
3. Can I use a different type of sugar, like brown sugar, honey, or a sugar substitute?
For the best results, it’s critical to stick with plain white granulated sugar. Honey has its own natural properties that can interfere with the bleach, brown sugar can make the water cloudy and contains molasses, and artificial sweeteners provide no nutritional energy for the flowers. Plain white sugar is the cleanest and most effective fuel source.
4. My vase water turned cloudy. What did I do wrong?
You didn’t necessarily do anything wrong! Cloudy water is simply a sign of a bacterial bloom, which is exactly what we are trying to fight. It’s a clear signal that it’s time to change the water. Discard the old solution, give the vase a thorough cleaning with soap and water, re-trim your flower stems, and refill with fresh water and a new dose of flower food.
5. I’ve heard you can use a penny in the water. Does that work?
This is a popular “old wives’ tale,” that is not very effective. Modern pennies are made of zinc, not copper, so they have no antibacterial properties (You’d have to predate 1982). A balanced recipe like this one will always give you much better and more consistent results.

FAQs: Flower-Specific Care
Do certain flowers need special care in the vase?
Yes, while the homemade flower food recipe works for most common blooms, a few popular varieties have unique needs. Giving them this extra care can dramatically increase their vase life:
Tulips & Anemones
These flowers are known for continuing to grow and bend in the vase, often reaching toward the nearest light source. If they start to sag or you want them straighter, you can try piercing the stem with a pin just below the flower head or, as a simpler method, simply wrap the entire bouquet tightly in paper and place it in deep water for a few hours to force the stems to straighten up. Dropping a penny made prior to 1982 can also help – there’s something in the copper that helps them perk them straight!
Daffodils & Other Bulbs (like Hyacinths)
These flowers excrete a slimy sap into the water that is toxic to other flowers, causing them to wilt quickly. Condition them in a separate vase for at least 6–12 hours first, and do not recut the stem or change the water if you move them into a mixed arrangement.
Roses
If your rose head looks droopy, don’t worry—it’s likely just air getting trapped in the stem. Try the “Submersion Revive” trick: Recut the stem and immediately place the entire rose (head and stem) into a bathtub or sink full of cool water for 20–30 minutes to force the air bubble out.
Woody Stems (Lilacs, Hydrangeas, Cherry Blossoms)
The bark on these stems makes it hard for them to drink water. After recutting at an angle, some experts suggest lightly smashing the bottom inch of the stem with a hammer or crushing it with a pair of shears to help the stem absorb water more effectively.

Love Fresh-Cut Flowers? Here’s How to Grow Your Own
If you enjoy arranging fresh flowers and want more of them throughout the season, growing your own cut flower garden is easier than you might think. In 3 Easy Ways to Start a Cut Flower Garden, I walk through simple seed-starting methods (including winter sowing), what to plant for long-lasting blooms, and how to plan for continuous harvests. It’s designed for beginners who want beautiful bouquets without overcomplicating the process.
For a broader look at creating a low-maintenance flower garden — including a dedicated chapter on cut flower gardening — you’ll find the full framework inside The Bricks ’n Blooms Guide to a Beautiful and Easy-Care Flower Garden.

Final Thoughts About Making Homemade Flower Food
Making DIY flower food at home has transformed how I enjoy my garden’s blooms indoors. It’s a simple yet effective way to extend the life of your cut flowers, allowing you to enjoy the beauty of your garden for even longer. I encourage you to give it a try—you might be surprised at just how much longer your flowers will last!
For more information about making homemade flower food, please read this article from the University of Massachussettes Amethysts Cooperative Extension.
Have you made your own flower food before? Will you give this recipe a try? Tell me more in the comments below so we can chat about it and learn from each other.
To learn more about cut flower gardening and how to start your own, please read this article that I shared.
Thank you for visiting the blog today!
Enjoy your day! xo

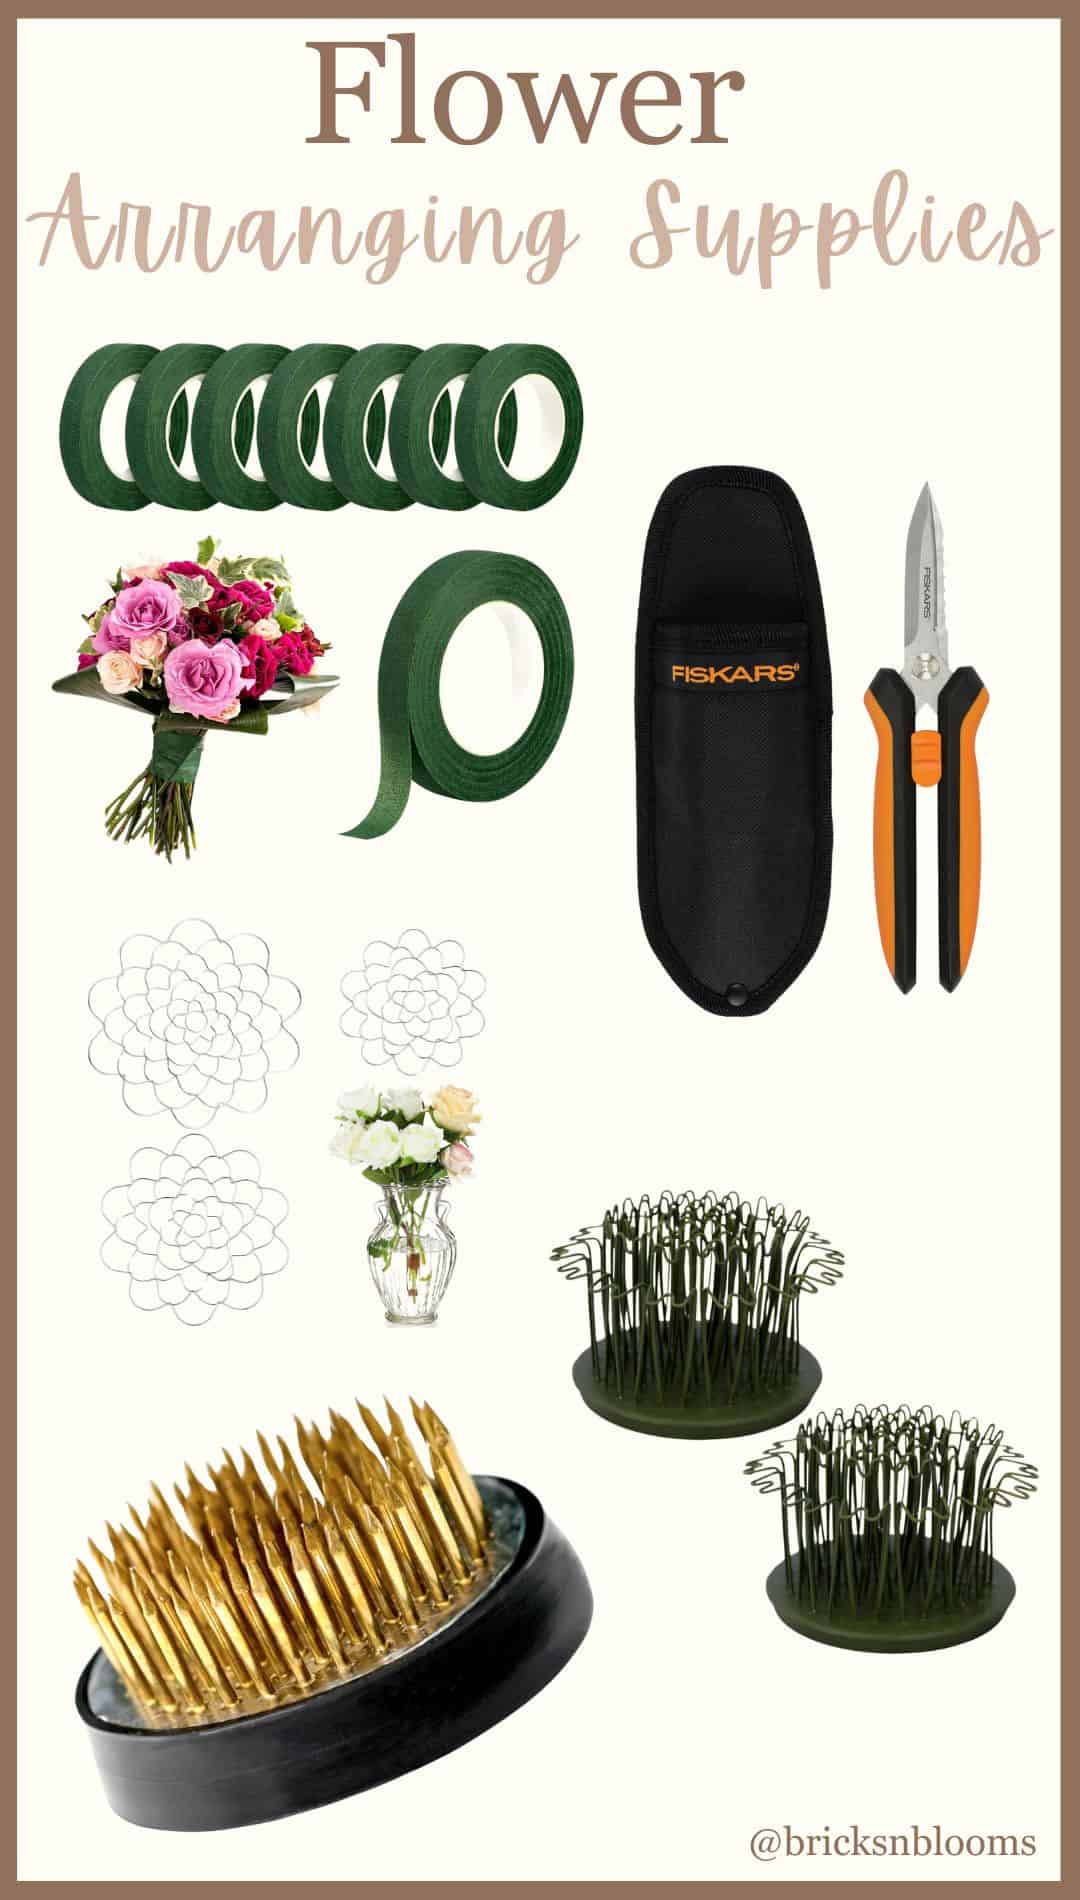
Shop for Flower Arranging Supplies
Click here or on the image to shop the post!

Thank you.
I have been looking for a solution to add to my fresh cut flowers.
This will do the trick!
I’m so glad you’ll try it! It helps prolong the blooms so much!
How long does the flower food keep, i.e., can I make a batch and store it for continuous use?
Thank you so much for this recipe!
You are welcome Sandy! I hope you find it helpful!