DIY Floral Arrangement: How to Arrange Flowers

Learn how to arrange flowers like a pro and make a DIY floral arrangement with these expert tips and step-by-step guide.
Looking to create stunning floral arrangements that look professionally done? Whether you’re growing your own blooms or picking up a fresh bunch from the market, it’s easy and affordable to spruce up your home or create a beautiful bouquet for any occasion.
With over 25 years of gardening experience and a dedicated cutting garden, I’m excited to share my tips and tricks so you can confidently design your own floral masterpieces.
We’re covering the basics of designing bouquets and ensuring their longevity. Plus I’m sharing some seasonal ideas that you can try throughout the year. Let’s get started!
(Posts on stacyling.com may contain affiliate links. Click HERE for full disclosure.)

Benefits of DIY Floral Arrangements
If you’ve ever admired the stunning creations of professional florists and wished you could work the same magic with flowers, you’re in for a treat! I’m excited to guide you through the rewarding world of floral arranging.
Creating your own arrangements is not only incredibly satisfying, allowing you to play with colors, textures, and shapes, but it’s also a great way to save money while making your home look amazing. Each arrangement becomes a unique expression of your personal style that is perfect for any occasion.
The best part? It’s surprisingly easy! While professional arrangements might seem intimidating, we’ll keep things simple and fun, ditching the stuffy rules, and complicated techniques.
Whether you’re arranging flowers in a vase or crafting a centerpiece for your dining table, these easy tips will set you up for success.
Best Flowers for a DIY Floral Arrangement
To start, there’s no right or wrong way to make an arrangement. However, it’s a good idea to consider balance, scale, color, texture, and interest when you are making one. And choose flowers that YOU enjoy. Here are some favorites that I grow in my cutting garden that work beautifully.
- Roses
- Chrysanthemums
- Carnations
- Baby’s Breath
- Ferns (greens)
- Sunflowers
- Ranunculus
- Scabiosa
- Tulips
- Daffodils
- Peonies
- Hydrangeas
- Lilacs
- Yarrow
- Snapdragons
- Dahlias
- Zinnias
- Sedums
Experiment with these flowers to create diverse and stunning bouquets!

Tips for Choosing Your Flowers for Arranging
When growing flowers to cut or purchasing bunches, consider the color combination, texture, and dimension the arrangement will have when it’s complete. If you are going with one type of flower, adding greenery will help balance the arrangement out.
But if you want a mix of blooms?
Select flowers that are different sizes, colors, shapes, and textures to add interest to the arrangement.

How to Arrange Flowers Like a Pro
Arranging flowers is so fun and easy to do. While working, it’s important to ensure that it looks symmetrical, so you’ll want to turn the arrangement frequently while creating your design. It’s easiest to make a base layer of greenery first to help anchor the flowers as you add them. And it’s helpful to use some tape or floral foam to keep the flowers and greens in place.
Essential Tools and Materials to Arrange Flowers
Before we start, gather your tools:
- Snips or Sharp Scissors
- Fresh Flowers
- Plant Food
- Vase, Container, Bucket, or Other Vessel
- Floral Tape, Floral Frog, or Wet Floral Foam
- Water
Use the Thriller, Filler, and Spiller Method
The “thriller, filler, and spiller” method is a simple yet effective way to create stunning floral arrangements. The “thriller” is the focal point, often a tall or uniquely shaped flower that draws the eye. The “filler” adds volume and texture, filling in the gaps around the thriller with clusters of smaller blooms or foliage. Lastly, the “spiller” cascades over the container’s edge, creating a sense of movement and abundance. By combining these three elements, you can achieve a balanced and visually appealing arrangement that showcases the beauty of each flower.
How to Arrange Flowers: A Step-by-Step Guide
Creating a beautiful flower arrangement is both an art and a science. Follow these detailed steps to arrange flowers like a pro, and bring the vibrant beauty of your cutting garden indoors.
Step 1: Prepare Your Workspace
Start with a clean, organized workspace. It makes the process much more enjoyable.
Step 2: Selecting and Preparing Flowers
Choose the freshest flowers. In my cutting garden, I grow a variety of blooms specifically for arranging. If you don’t have a cutting garden yet, consider starting one—it’s a game changer! When selecting flowers from your garden, cut the stems at a diagonal to ensure they absorb water better and immediately drop them in room temperature water so they don’t lose hydration.
If you purchased blooms from the market, give them each a fresh snip before dropping them in your arrangement.
Step 3: Creating the Base with Greenery
Use greenery to create a sturdy base in your vase. It provides structure and adds texture.

Step 4: Adding Focal Flowers
Pick your show-stopping blooms—roses, lilies, or peonies. Place them in the arrangement, ensuring they stand out.
Step 5: Incorporating Filler Flowers
Filler flowers like baby’s breath or daisies add volume. They should complement your focal flowers without overpowering them.
Step 6: Final Touches
Add any unique elements like berries or twigs for extra flair. Step back and adjust as needed to ensure balance.

DIY Floral Arrangement Cheat Sheet
- Gather all of the supplies before getting started.
- Remove extra foliage, particularly those that may fall beneath the water line.
- Before making fresh cuts, measure the flowers against the container to see where you want to cut. Make fresh cuts on a diagonal.
- Fill the container with fresh water halfway.
- Add plant food to the container before making the arrangement.
- Start with fresh foliage plants first and make a base that will hold the flowers.
- Next add the flowers that will be the focal point like roses or hydrangeas.
- Then add in filler or smaller flowers like baby’s breath or chrysanthemums.
- Step back and see if you need to rearrange to get the right look.

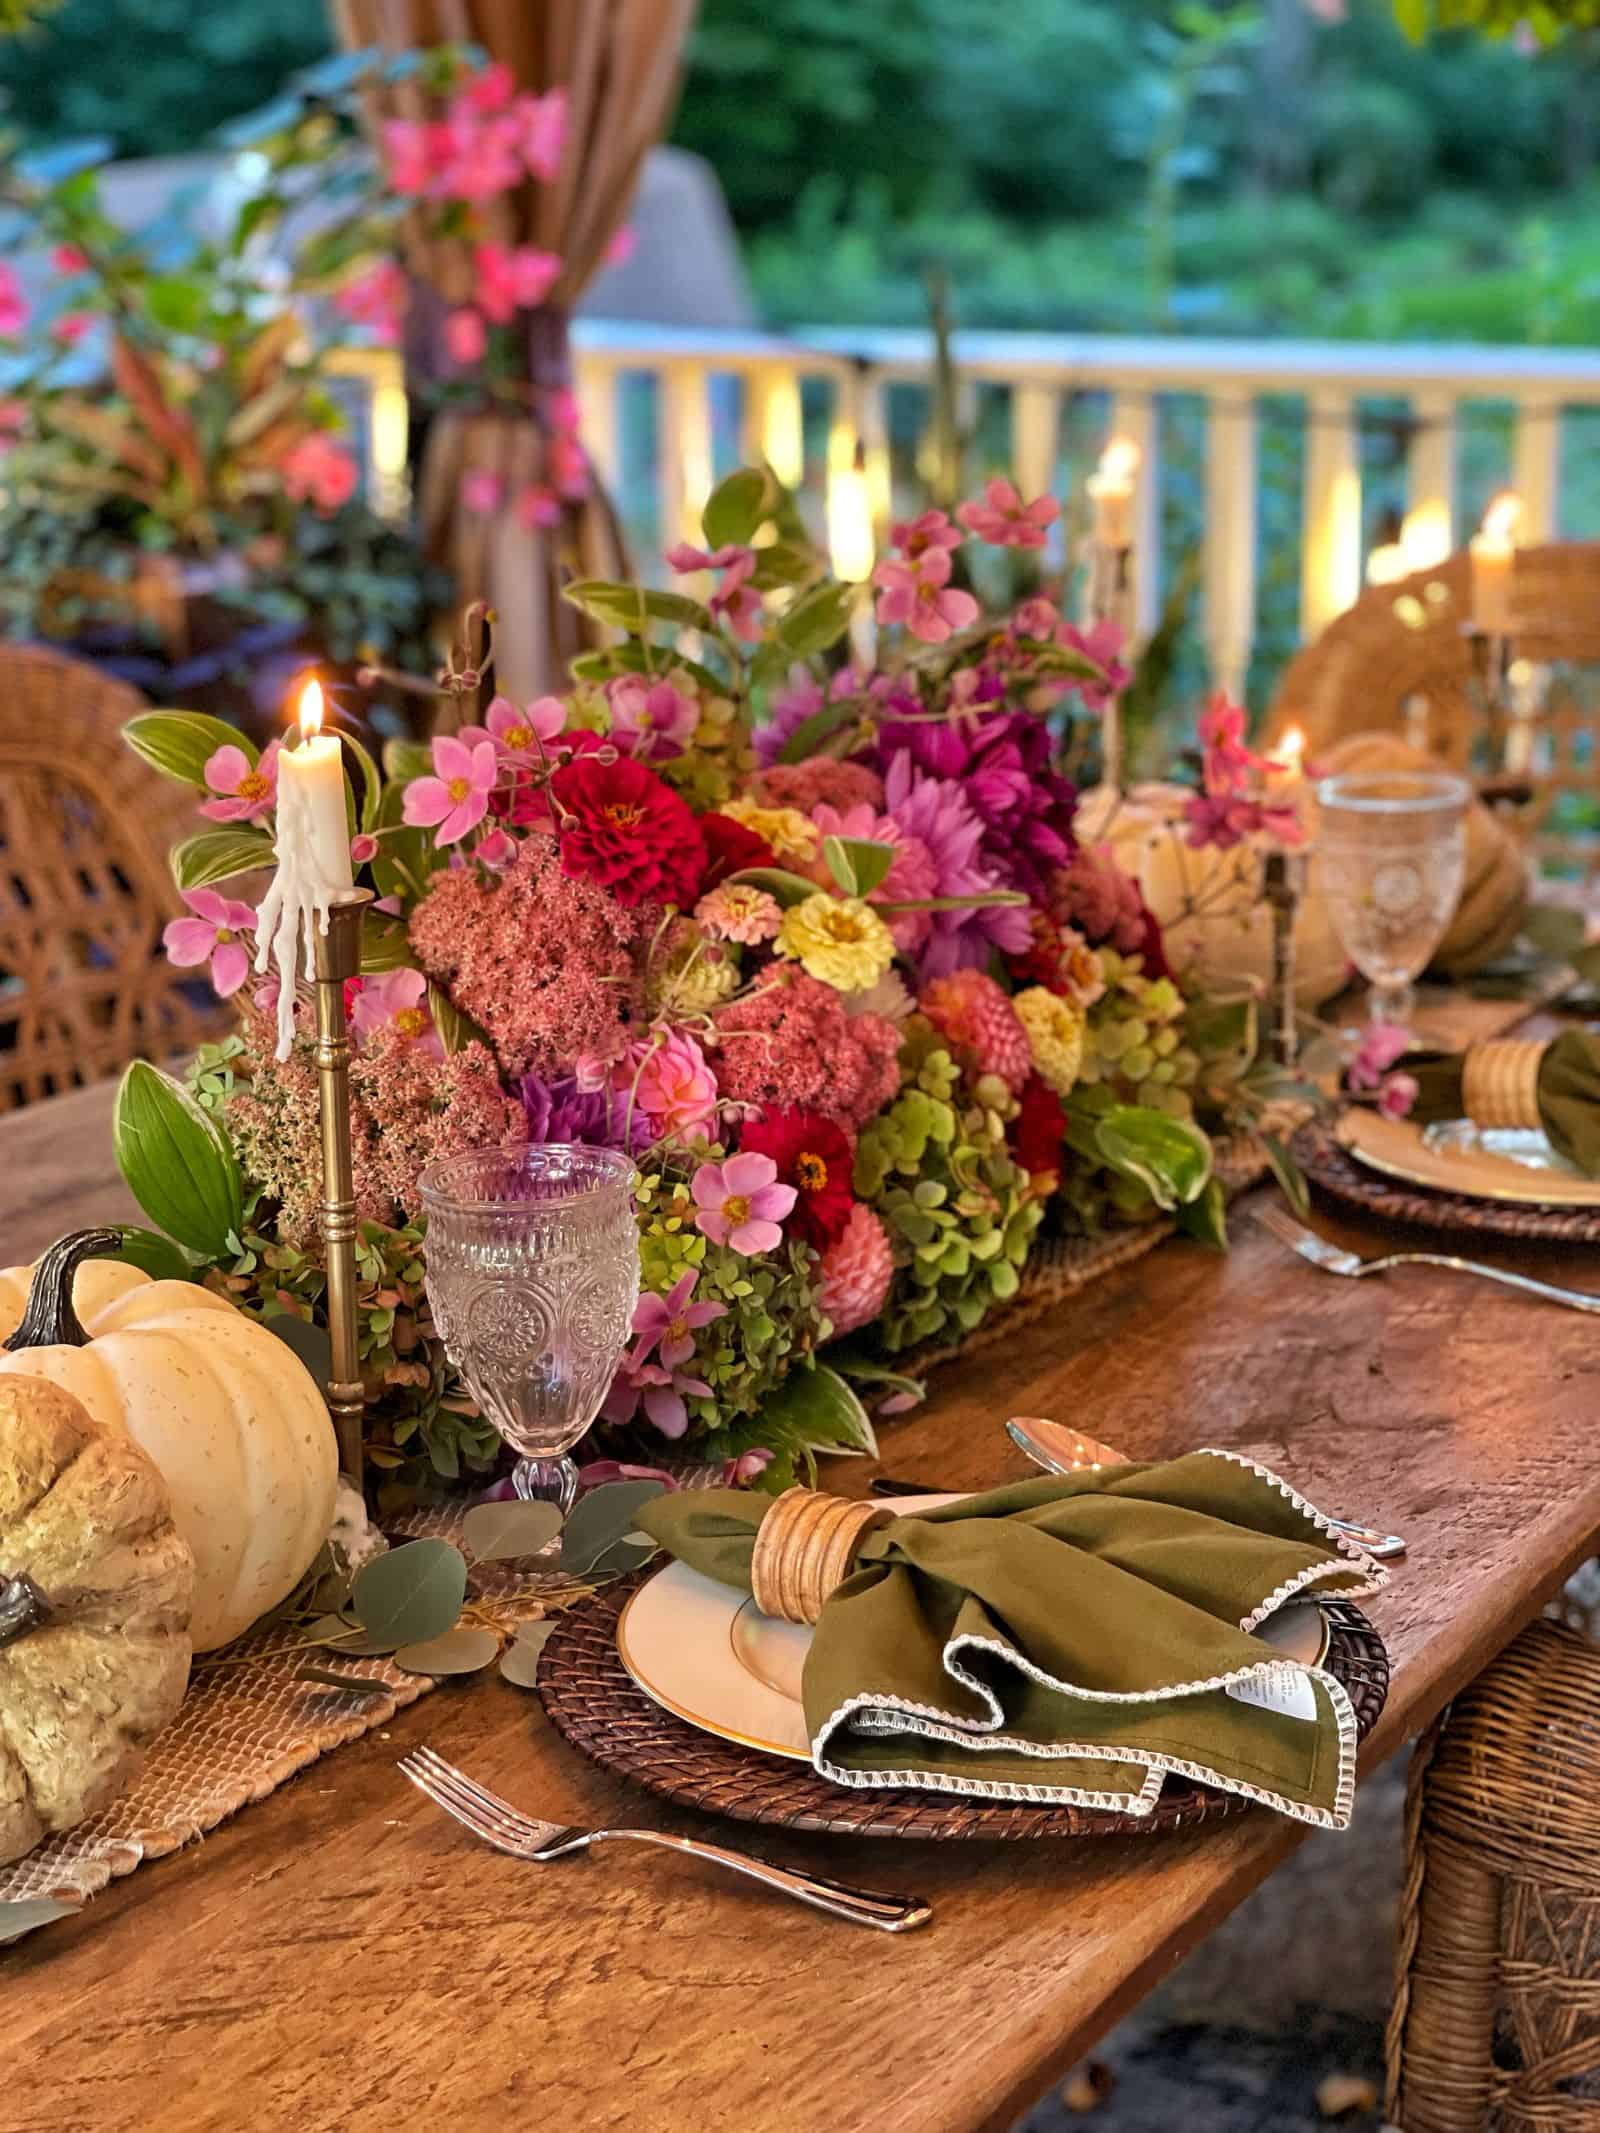
How to Arrange a Stunning Fresh Flower Centerpiece for Your Dining Table
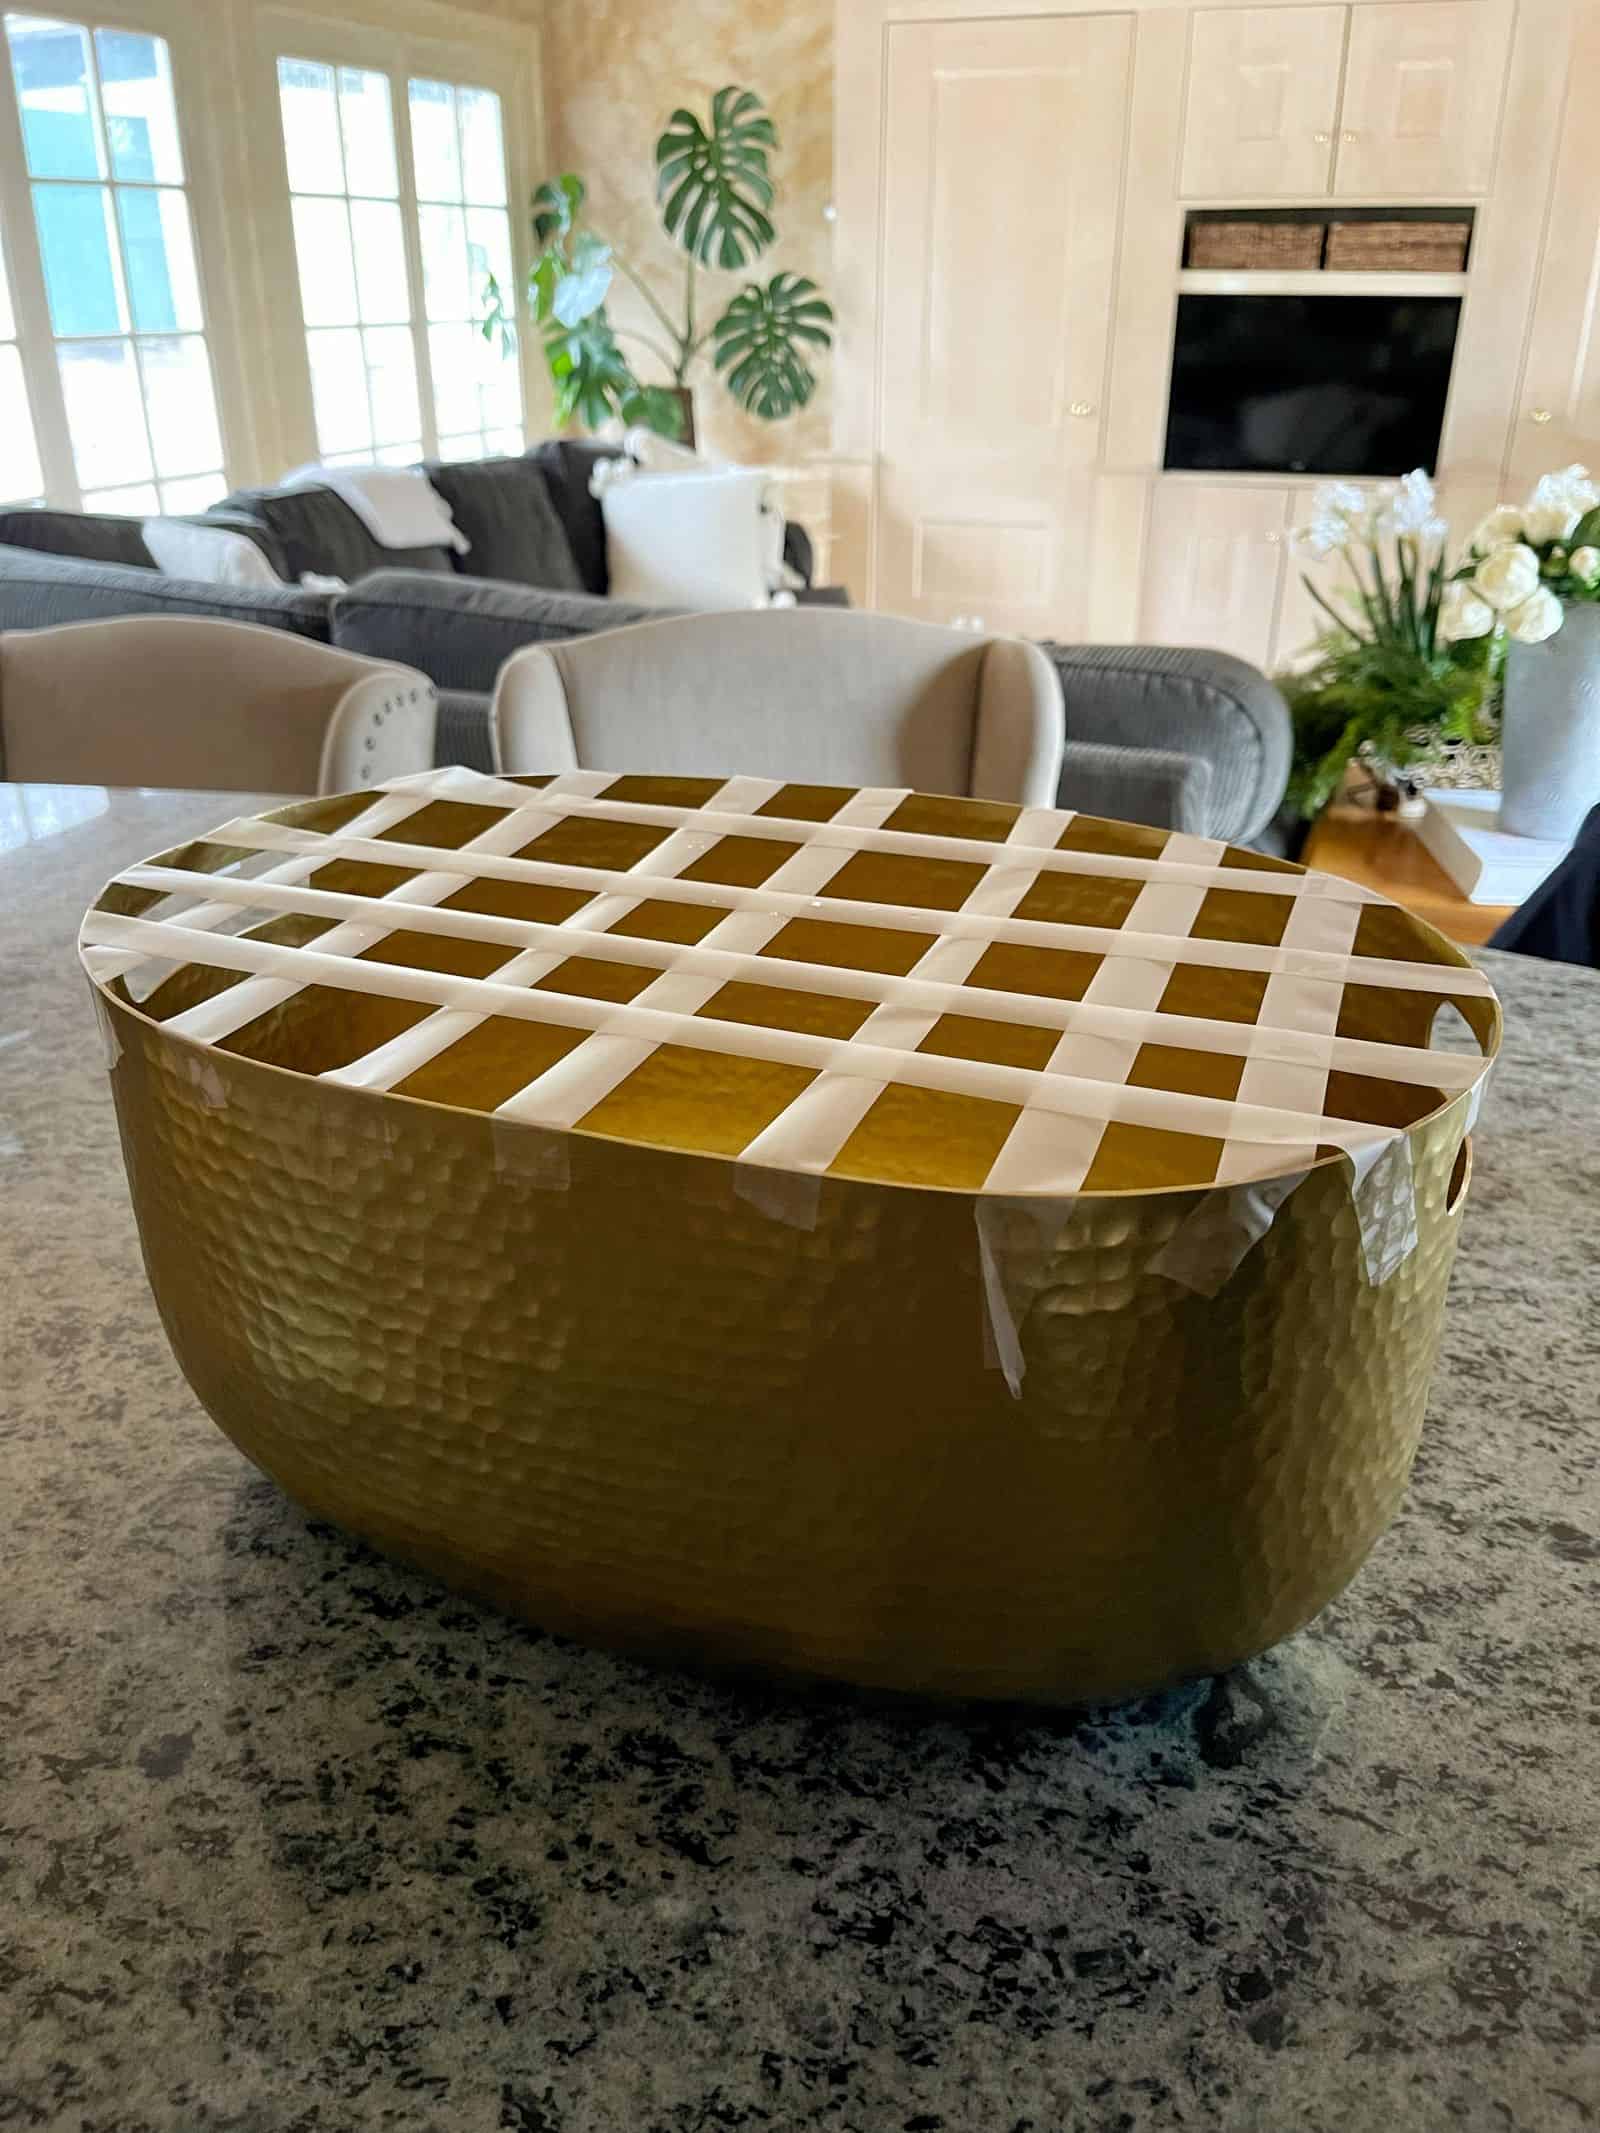
Originally, I started with just tape (without floral foam) in this gold, hammered ice bucket. But the flowers were flopping over too much because the container is so large.
So I added some wet floral foam at the base to help hold the flowers as I worked. I started with a base of greenery going around the container. Then added my focal point flowers: hydrangeas and roses.
To finish off the arrangement, I added some baby’s breath and carnations. And to add a little more texture to the arrangement, I tucked in beautiful white fluffy chrysanthemums.
As I worked I moved flowers around until I felt the arrangement had the right balance, contrast, dominance, proportion, scale, and rhythm. Sometimes, I’ll create a design, not love it, remove all the flowers, and start over. I did that a few times while making this particular centerpiece.
So don’t be afraid to make changes and most importantly…don’t give up!

Quick Tips for Arranging Flowers
- Change the water every 3 days and feed them.
- Be sure to remove all foliage that falls beneath the waterline.
- Always cut stems on a diagonal so they can soak up more water.
- Pick your vase before choosing your flowers.
- Make sure the vase or container vessel is clean.
- Use wet floral foam, floral frog, or tape to help anchor flowers in place.
- To make the arrangement more unique, add other organic elements that might be unexpected like berries, pine cones, or succulents.

Common Flower Arranging Mistakes and How to Fix Them
When learning how to arrange flowers, it’s a good idea to avoid these common mistakes and create a beautiful, long-lasting DIY flower arrangement.
Avoid Overcrowding Flowers
Overcrowding flowers can cause them to bruise and wilt more quickly. To fix this, give each bloom enough space to breathe. Use a vase that’s appropriately sized for the number of flowers you’re arranging.
Vary Heights and Textures
Arrangements look more dynamic when you vary the height and texture of the flowers. Use a mix of tall and short stems, and combine different textures like smooth tulips with fluffy peonies. This creates depth and visual interest.
Use a Color Wheel
Prevent clashing colors by using a color wheel. Complementary colors (opposite each other on the wheel) create a vibrant look, while analogous colors (next to each other) offer a more harmonious palette. Experiment with different combinations to see what works best.


Proper Hydration
Ensure flowers stay hydrated by trimming the stems at a 45-degree angle and placing them in clean, fresh water. Change the water every couple of days and re-cut the stems to maintain hydration.
Temperature Control
Keep your arrangements away from direct sunlight, heat sources, and drafts. Flowers last longer in cool, stable temperatures.
Avoid Contaminants
Remove any leaves below the waterline to prevent bacterial growth, which can shorten the lifespan of your flowers. Also, clean your vase thoroughly before use.
Anchor Your Stems
Use floral foam or a flower frog to anchor your stems and keep them in place. This prevents the arrangement from shifting and maintains its shape.

Seasonal and Themed Arrangements
Embrace the seasons! In spring, think tulips and daffodils. Summer loves sunflowers and zinnias. Fall is perfect for mums and asters, while winter arrangements can include evergreens and holly.
Learning how to arrange flowers that reflect the beauty of each season can bring a unique charm to your home. Here are some ideas for winter, spring, summer, and fall arrangements.
Winter Arrangements
Winter arrangements often feature evergreens, holly, and pinecones, creating a festive and cozy feel. Consider adding white flowers like roses, amaryllis, or lilies to evoke the purity of snow. Or red blooms that will evoke a festive feel. Twigs, berries, and ribbons in red and gold can add a touch of holiday cheer. For a more modern winter look, use silver and blue accents with white flowers.

Spring Arrangements
Spring is a time of renewal, and your flower arrangements can reflect this vibrant energy. Incorporate tulips, daffodils, and hyacinths for their bright, cheerful colors. Pair them with fresh green foliage and delicate blossoms like forsythia, cherry, or apple blossoms. Consider using pastel colors to capture the essence of spring.

Summer Arrangements
Summer is the perfect time to go bold with your flower arrangements. Sunflowers, zinnias, dahlias, snapdragons, and daisies are excellent choices for their vibrant colors and sturdy stems. Incorporate lush greenery and even some tropical flowers like hibiscus or bird of paradise for an exotic touch. Bright, saturated colors work well to capture the lively spirit of summer.

Fall Arrangements
To me, you can’t beat the look of an autumn DIY floral arrangement. They are so bright, vivid, and beautiful, it’s one of my favorite ones to create!
When creating fall arrangements, we want to evoke the warmth and richness of the season. Use flowers like chrysanthemums, hydrangeas, celosia, strawflowers, asters, and marigolds in shades of orange, red, and yellow. Incorporate elements like wheat, dried grasses, and colorful autumn leaves to enhance the seasonal feel. For a rustic touch, consider adding apples, gourds or small pumpkins.

Themed DIY Flower Arrangements
For themed arrangements, think about the occasion or holiday. For example, a Valentine’s Day arrangement might include red roses and baby’s breath, while an Easter arrangement could feature pastel-colored tulips and lilies. Tailoring your arrangements to specific themes adds a personalized and thoughtful touch.
By tailoring your arrangements to the season or theme, you can create gorgeous thematic displays that make your home or event feel cozier, welcoming, and festive.

Maintaining Your Flower Arrangements
Proper maintenance is key to keeping your flower arrangements looking fresh and vibrant for as long as possible. Here are some detailed tips to help you extend the life of your beautiful blooms.
How to Arrange Flowers: Hydration is Essential
First and foremost, ensure your flowers are well-hydrated. Cut the stems at a 45-degree angle before placing them in water; this increases the surface area for water absorption. Use a sharp knife or scissors to avoid crushing the stems. Replace the water in your vase every two to three days, and each time, trim the stems slightly to remove any blockages.
Temperature and Light Management
Keep your arrangements away from direct sunlight, heat sources like radiators, and drafts, as these conditions can cause flowers to wilt faster. Flowers thrive in cool, stable environments, so a room with a consistent temperature is ideal.

How to Avoid Bacterial Growth in Your DIY Floral Arrangement
Bacteria in the water can quickly lead to wilted flowers. Remove any leaves that will be below the waterline in your vase, as submerged foliage can rot and promote bacterial growth. Clean your vase thoroughly with soap and water before using it and consider adding a floral preservative to the water to help inhibit bacterial growth and provide essential nutrients to the flowers.
Regular Pruning and Maintenance With a DIY Floral Arrangement
Inspect your arrangements daily for wilted or dead flowers and remove them promptly. This prevents the decay from spreading to other flowers. If you notice any drooping stems, recut them and refresh the water. Removing spent blooms not only extends the life of the arrangement but also keeps it looking fresh and beautiful for longer.
Additional Tips for Longevity
Consider using a flower food solution, which typically contains a mix of sugars (for nourishment), an acidifier (to help the stems take up water), and a biocide (to kill bacteria). You can also make homemade flower food with this easy recipe. Always follow the instructions for commercial flower food and adjust the quantity based on the size of your vase.
How to Arrange Flowers: Special Care for Different Flowers
Different flowers have different needs. For example, roses benefit from being submerged in water up to their necks in a cool place for a few hours before arranging.
For example, tulips tend to bend as they age. Drop a penny dated before 1982 as the copper acts like a fungicide and helps keep the flowers upright. You can also add a pinhole at the top of the stem beneath the flower head too.
Daffodils excrete a sap that can harm other flowers, so let them sit in water alone for 24 hours before adding them to mixed arrangements.
Some flowers require more to keep them from wilting, like hydrangeas. They are not a cut-and- drop in the vase kind of bloom. You’ll need to take a few extra steps to keep them from wilting. I wrote a whole article of tips to keep hydrangeas from drooping here.

How to Arrange Flowers: Frequently Asked Questions (FAQs)
Curious about how to make the most of your flower arrangements? Here are answers to some common questions that will help you keep your flowers fresh and beautiful for as long as possible.
How long do fresh flower arrangements last?
Fresh flower arrangements typically last between 5-7 days with proper care. This lifespan can be extended by regularly changing the water, trimming the stems, and keeping the arrangement in a cool, stable environment.
Different flowers have varying lifespans; for example, chrysanthemums and carnations are known for their longevity, often lasting up to two weeks, while more delicate flowers like tulips may only last a week. Adding a floral preservative to the water can also help prolong the freshness of the flowers.

What are the best flowers for beginners?
For beginners, it’s best to start with sturdy, long-lasting flowers that are easy to work with. Sunflowers, roses, carnations, chrysanthemums, daisies, and zinnias are excellent choices. Sunflowers are resilient and have large, vibrant blooms that make a statement in any arrangement.
Both carnations and chrysanthemums are very durable, last a long time, and come in a wide variety of colors, making them versatile for any design. Roses are beloved by all and do well in DIY floral arrangements.
Daisies are simple yet charming, and their hardy nature makes them a perfect choice for novice arrangers. And zinnias are super easy to grow, last a long time in a bouquet, and come in so many colors it’s hard not to find one that isn’t gorgeous!
Each of these flowers is forgiving and can withstand a bit of handling as you learn.

How do I keep my flowers from wilting?
To keep your flowers from wilting, follow these essential tips:
- Hydration: Ensure your flowers are well-hydrated by cutting the stems at a 45-degree angle and placing them in clean, fresh water. Change the water every two to three days and trim the stems slightly each time.
- Temperature: Keep your arrangements in a cool area, away from direct sunlight, heat sources, and drafts. Flowers last longer in a cool, stable environment.
- Cleanliness: Remove any leaves that will be submerged in water to prevent bacterial growth. Use a clean vase and add a floral preservative to nourish the flowers and inhibit bacteria.
By following these practices, you can significantly extend the life and beauty of your flower arrangements.
To learn more about keeping your flowers fresher for longer, I wrote an article detailing some tips and tricks for extending vase life. And if you want to drill down even more, check out this article from the Illinois Cooperative Extension Service.
Is It Cheaper to Make Your Own Bouquet?
It is far cheaper to make your own bouquet than purchasing one from the florist. And it’s more rewarding too. If you don’t have access to a cut flower garden, head over to your local florist or market to pick up a few bunches of flowers.
That said, there are a few things you’ll need to buy if you don’t already have them so you can make your own arrangements. Sometimes the up-front costs make it seem like it’s more expensive to make your own, but once you have some supplies on hand, you’ll be good to go.
How to Arrange Flowers: Final Thoughts
Arranging flowers is a great way to bring nature indoors. If you’re not growing a cutting garden yet, give it a whirl! It’s incredibly fulfilling to grow and arrange your own blooms.
Happy arranging!
Make your own DIY floral arrangement and share your results in the comments or on social media. I’d love to see what you create!
For more information about arranging flowers, see this article from Martha Stewart.
If you have any questions, comments or suggestions, please let me know in the comments below. I’d love to hear! And feel free to share this post with anyone you think would find it helpful too.
Thank you for visiting the blog today!
Enjoy your day! xo


I stumbled across this post completely by accident and then read the whole thing… I’m not much of a decorator, but I love having fresh flowers in the house. When I start trying to arrange flowers, it looks awkward or sloppy and I lose confidence and just go back to bunching them straight up in a tall vase. Thanks for showing us the early stages of your process and discussion the missteps & redos. That was super helpful for me!!
Angie thank you so much for you kind comment. I really appreciate hearing that and am so glad you found it helpful!!! nice to meet you!!!
Such a great post! I always admire your beautiful flower arrangements!
Thank you Kim! I appreciate you!