The Best Tips for Harvesting Sunflower Seeds the Easy Way

The best simple tips for harvesting sunflower seeds. Get the timing right, learn how to dry them perfectly, and roast them for a snack.
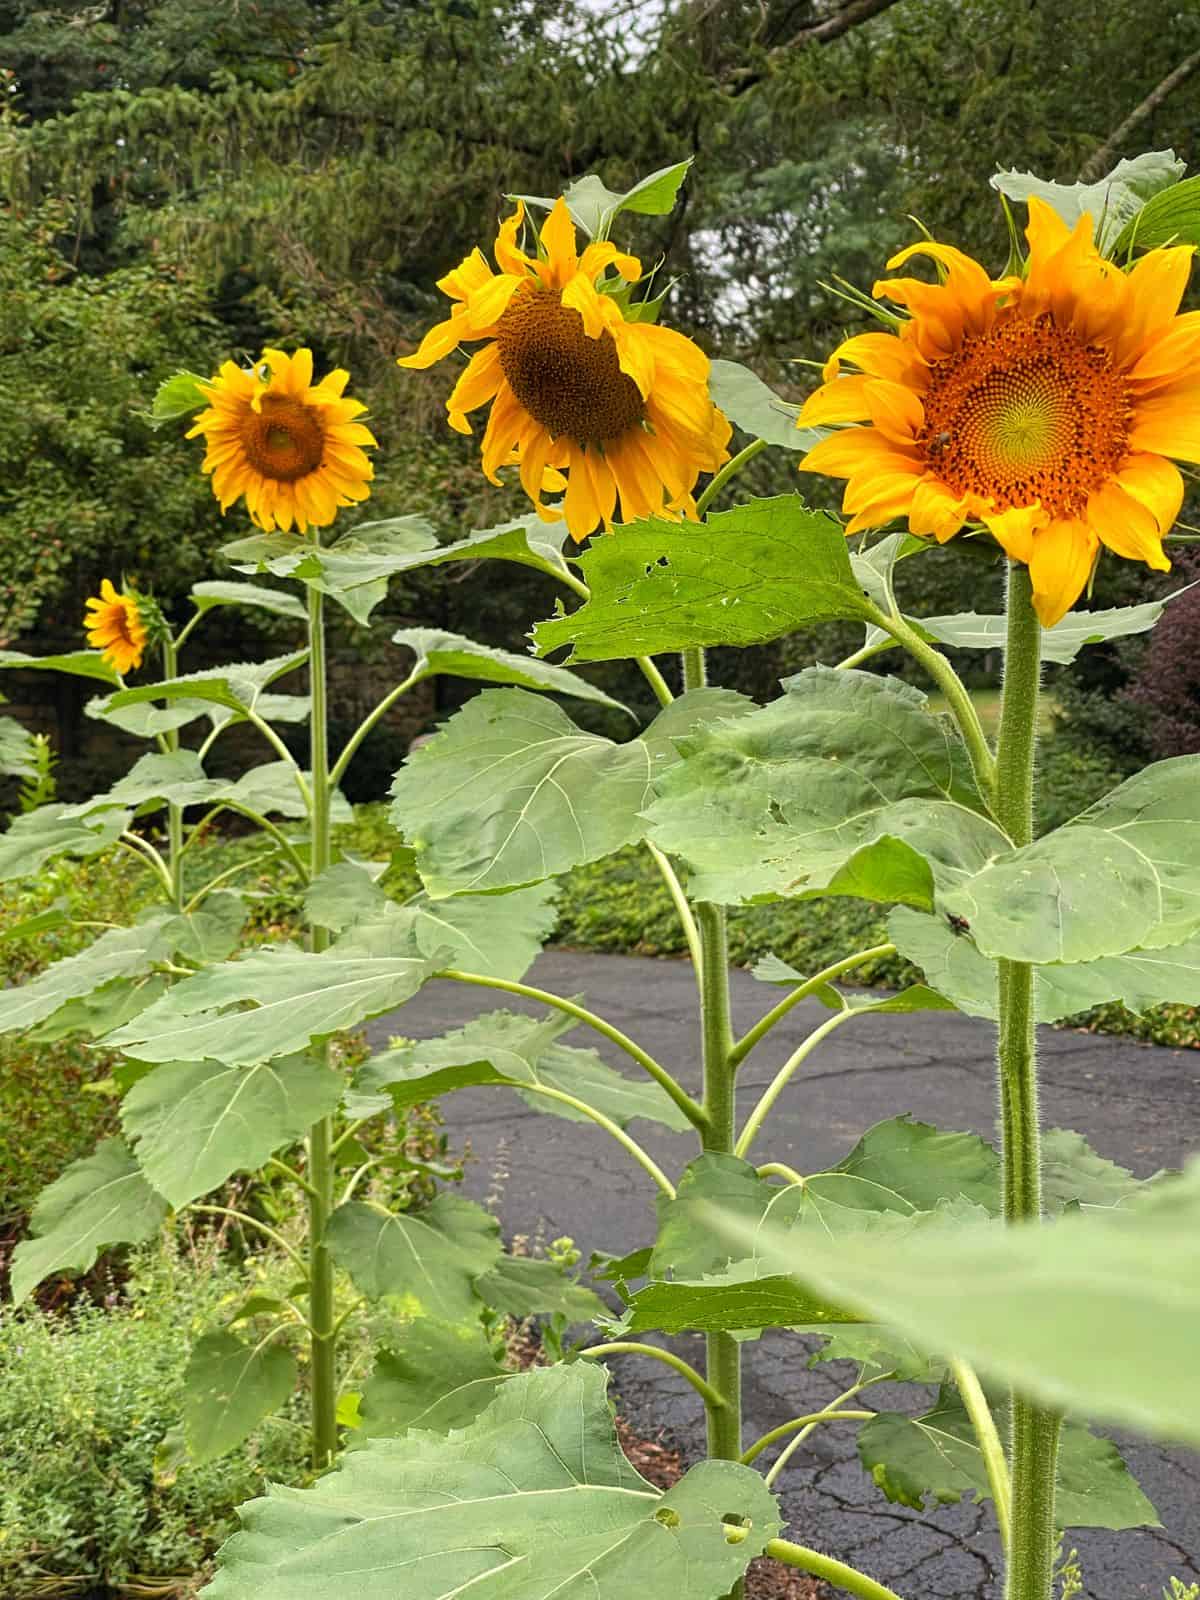
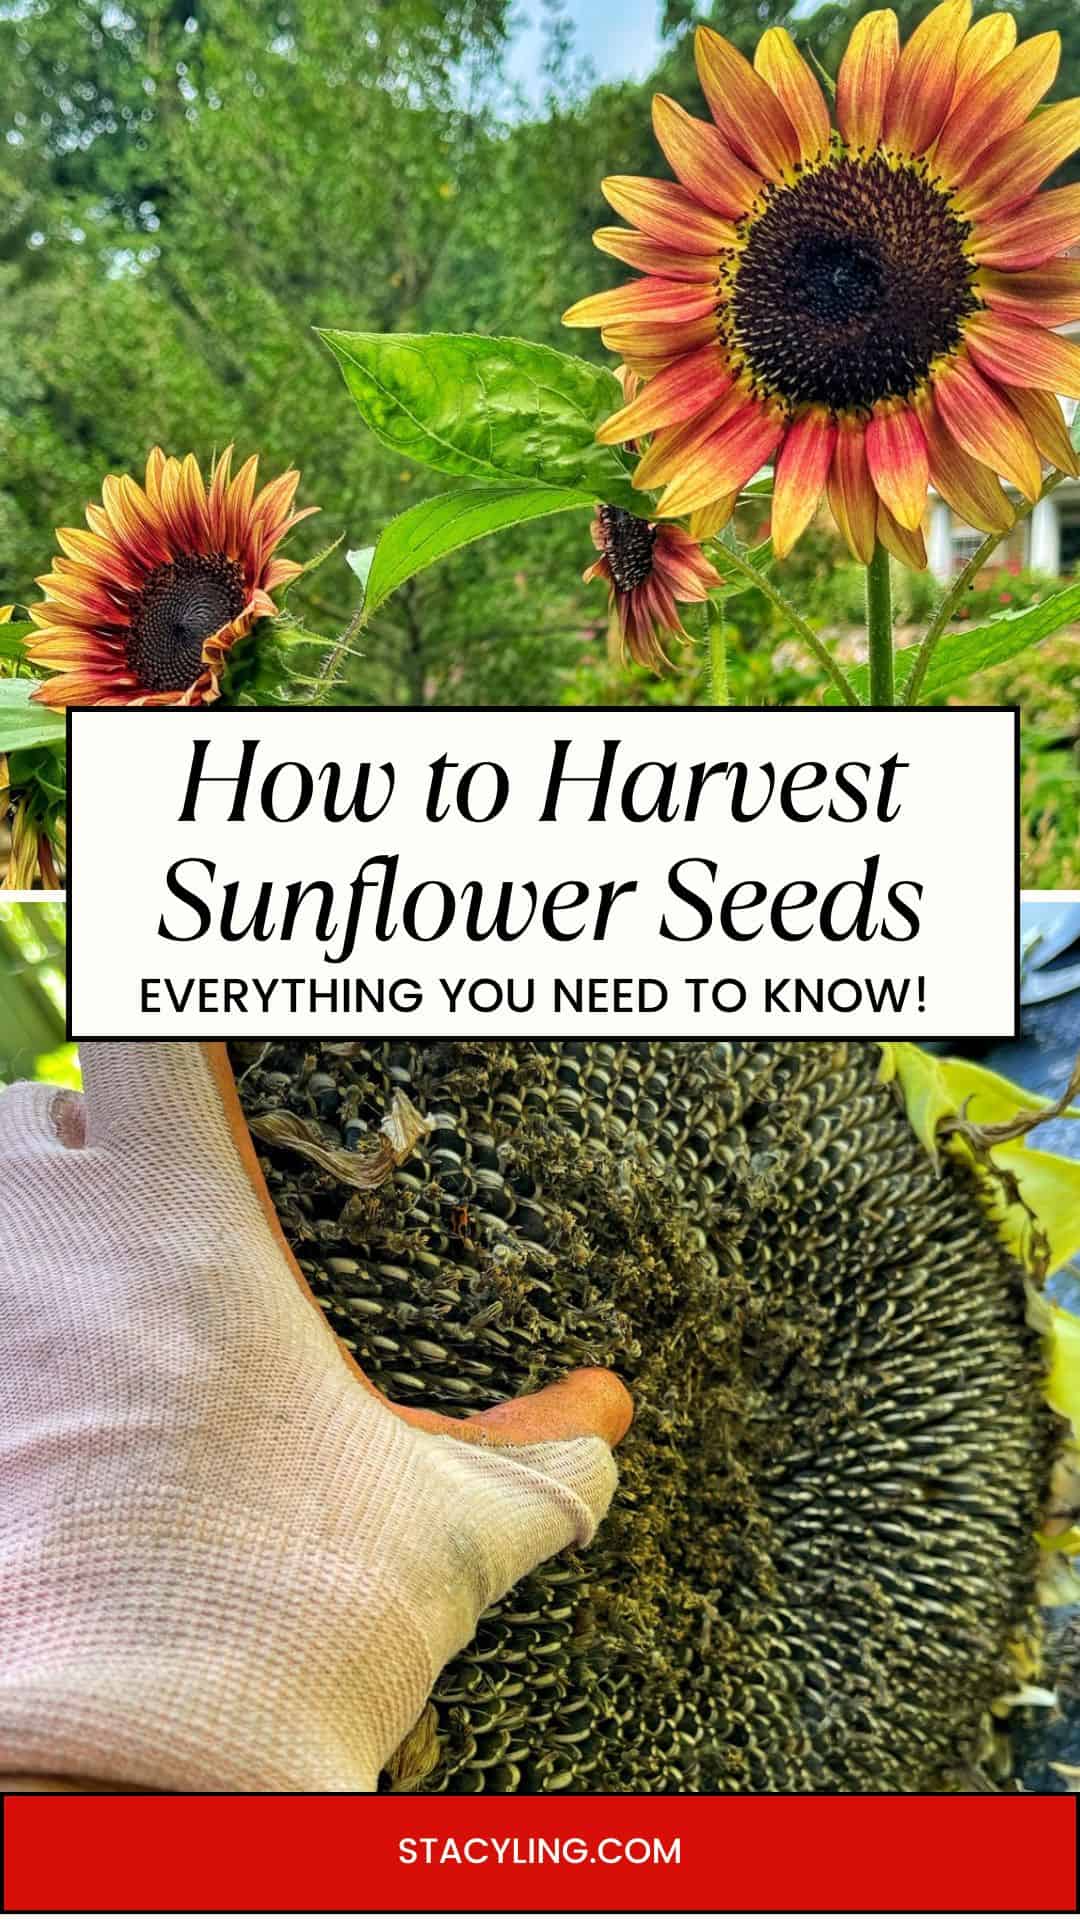
The giant heads of my sunflowers have finally turned from vibrant yellow to a dusty brown, signaling that it’s harvest time! I am so ready to crack open those tightly packed seed heads, revealing the treasure within.
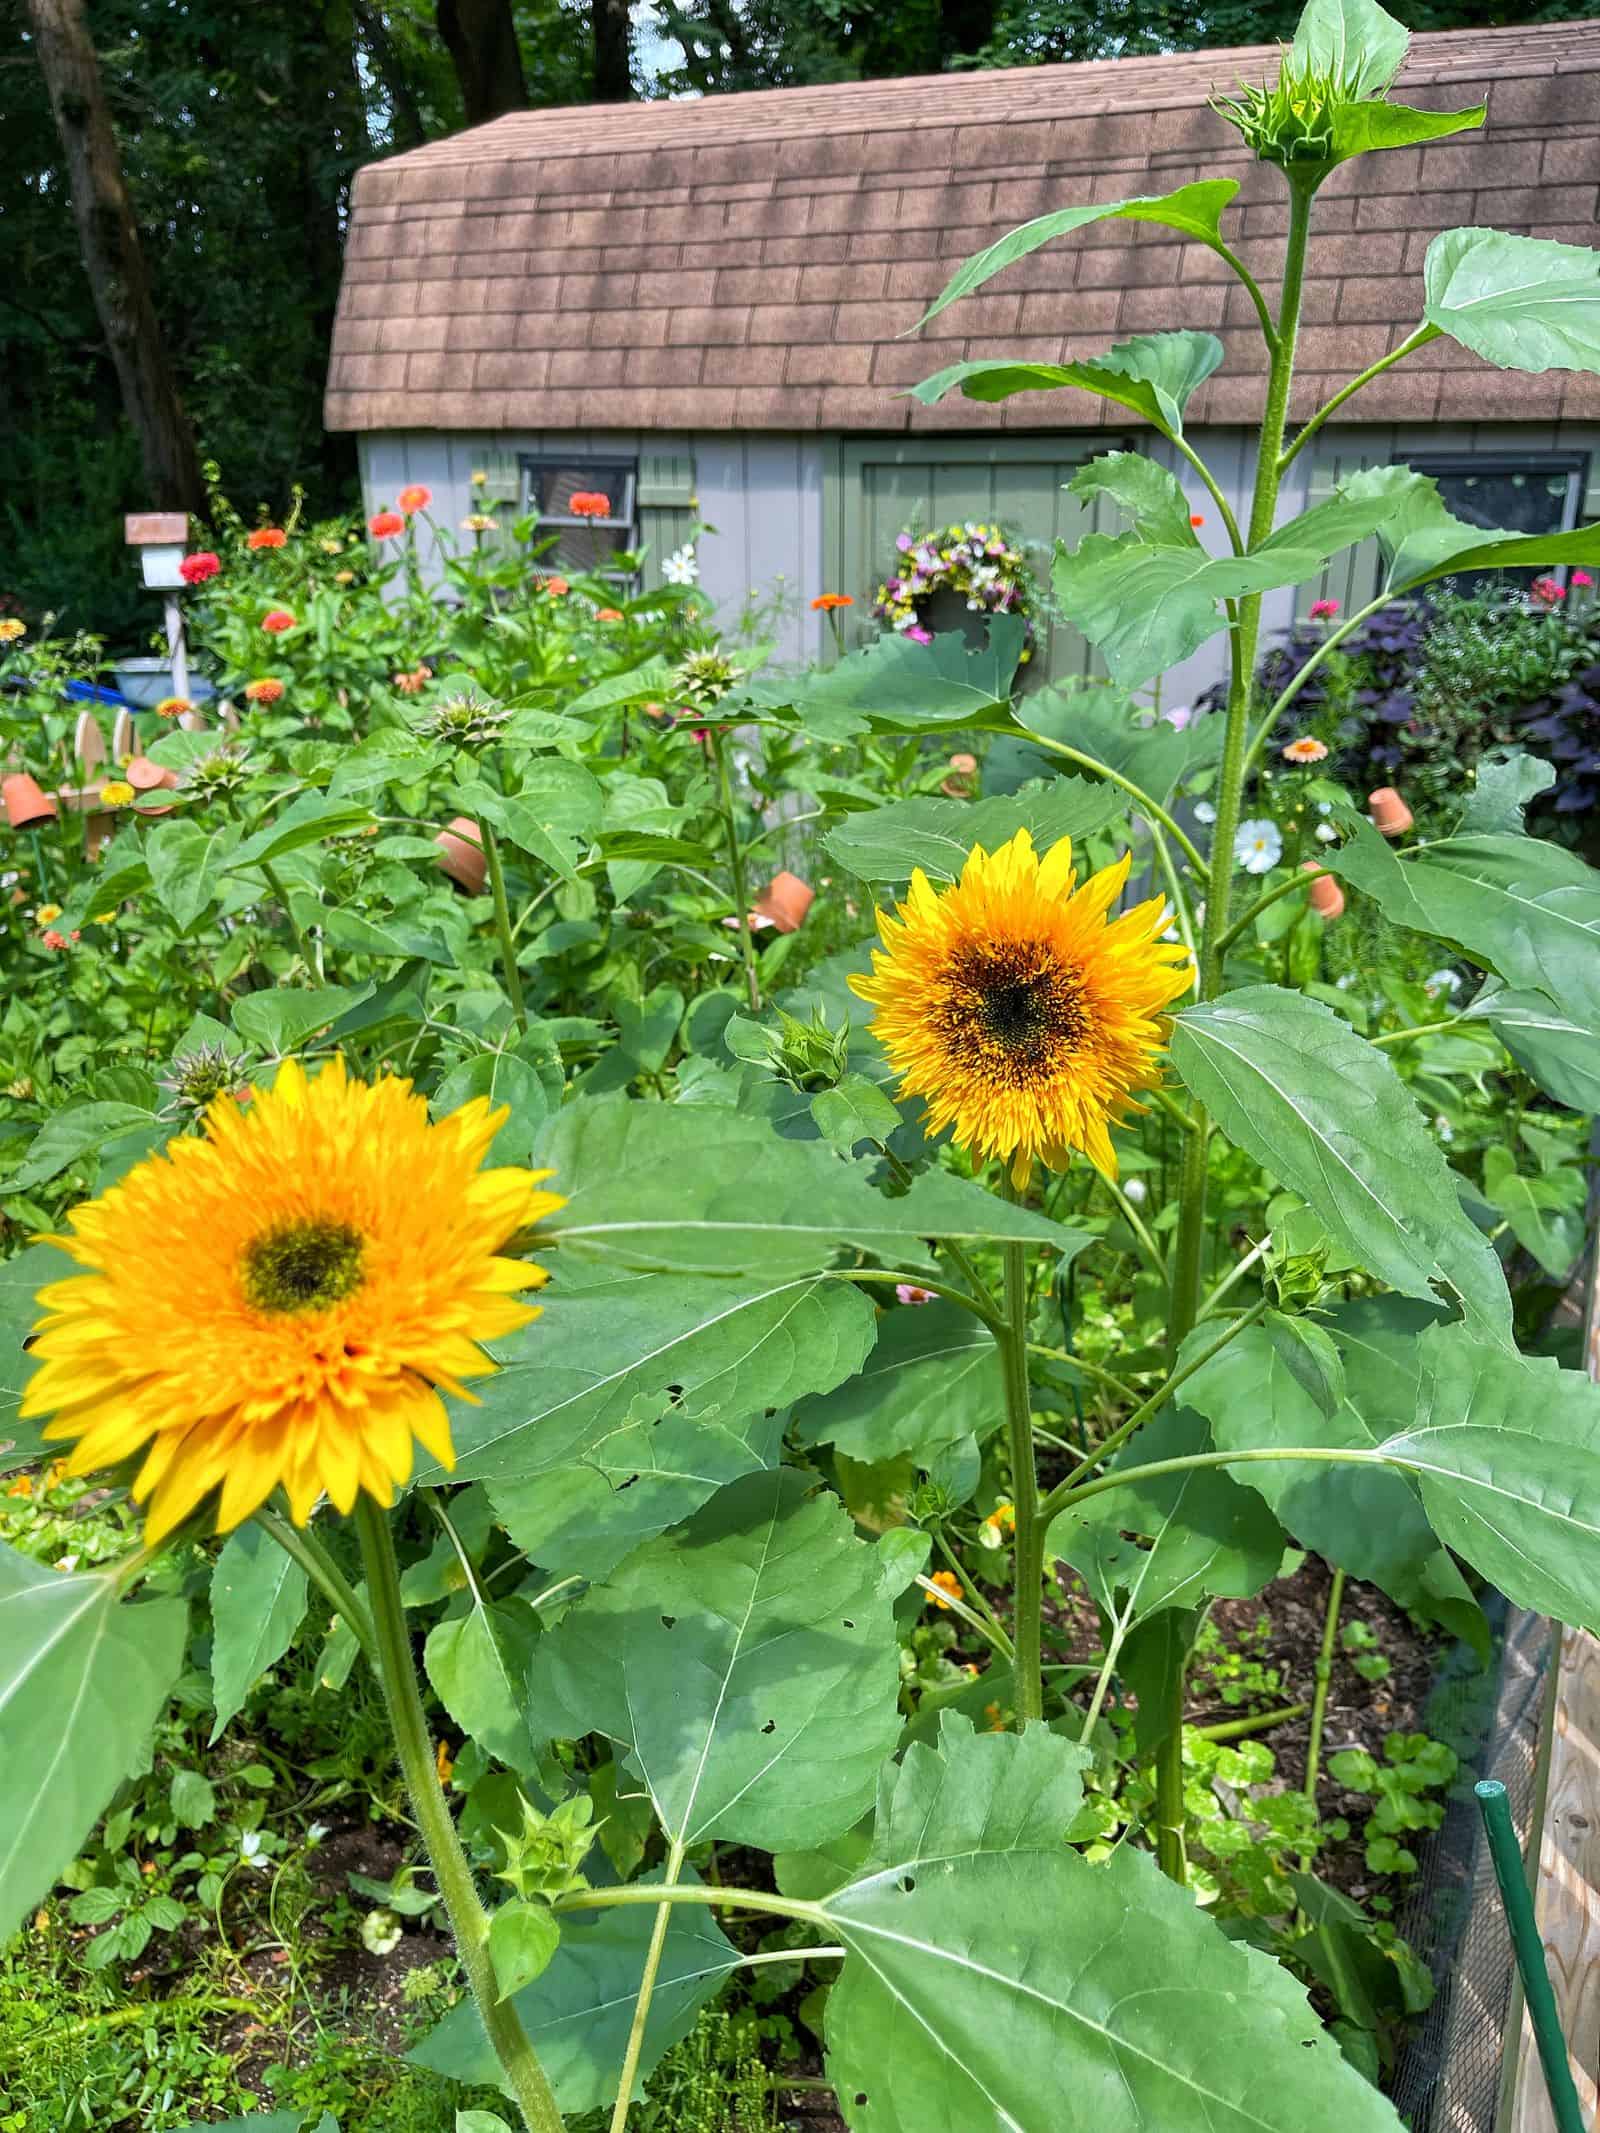
Hi, I’m Stacy Ling, a trained Master Gardener in USDA Zone 6b, sharing beginner-friendly tips to help your garden thrive. I’ve been growing sunflowers since my kids were very young and we love to save the seed each year.
My garden is full of sunflowers this year, so I’m harvesting the seeds. It’ll be great to have some to plant again, plus my husband LOVES snacking on them!
Have you ever harvested sunflower seeds before? If your sunflowers have their seeds intact, harvesting them is so easy to do.
Whether you want to roast them to eat, save them for next year’s garden or feed wildlife, here’s how to harvest sunflower seeds.
(Posts on stacyling.com may contain affiliate links. Click HERE for full disclosure.)
When to Harvest Sunflower Seeds
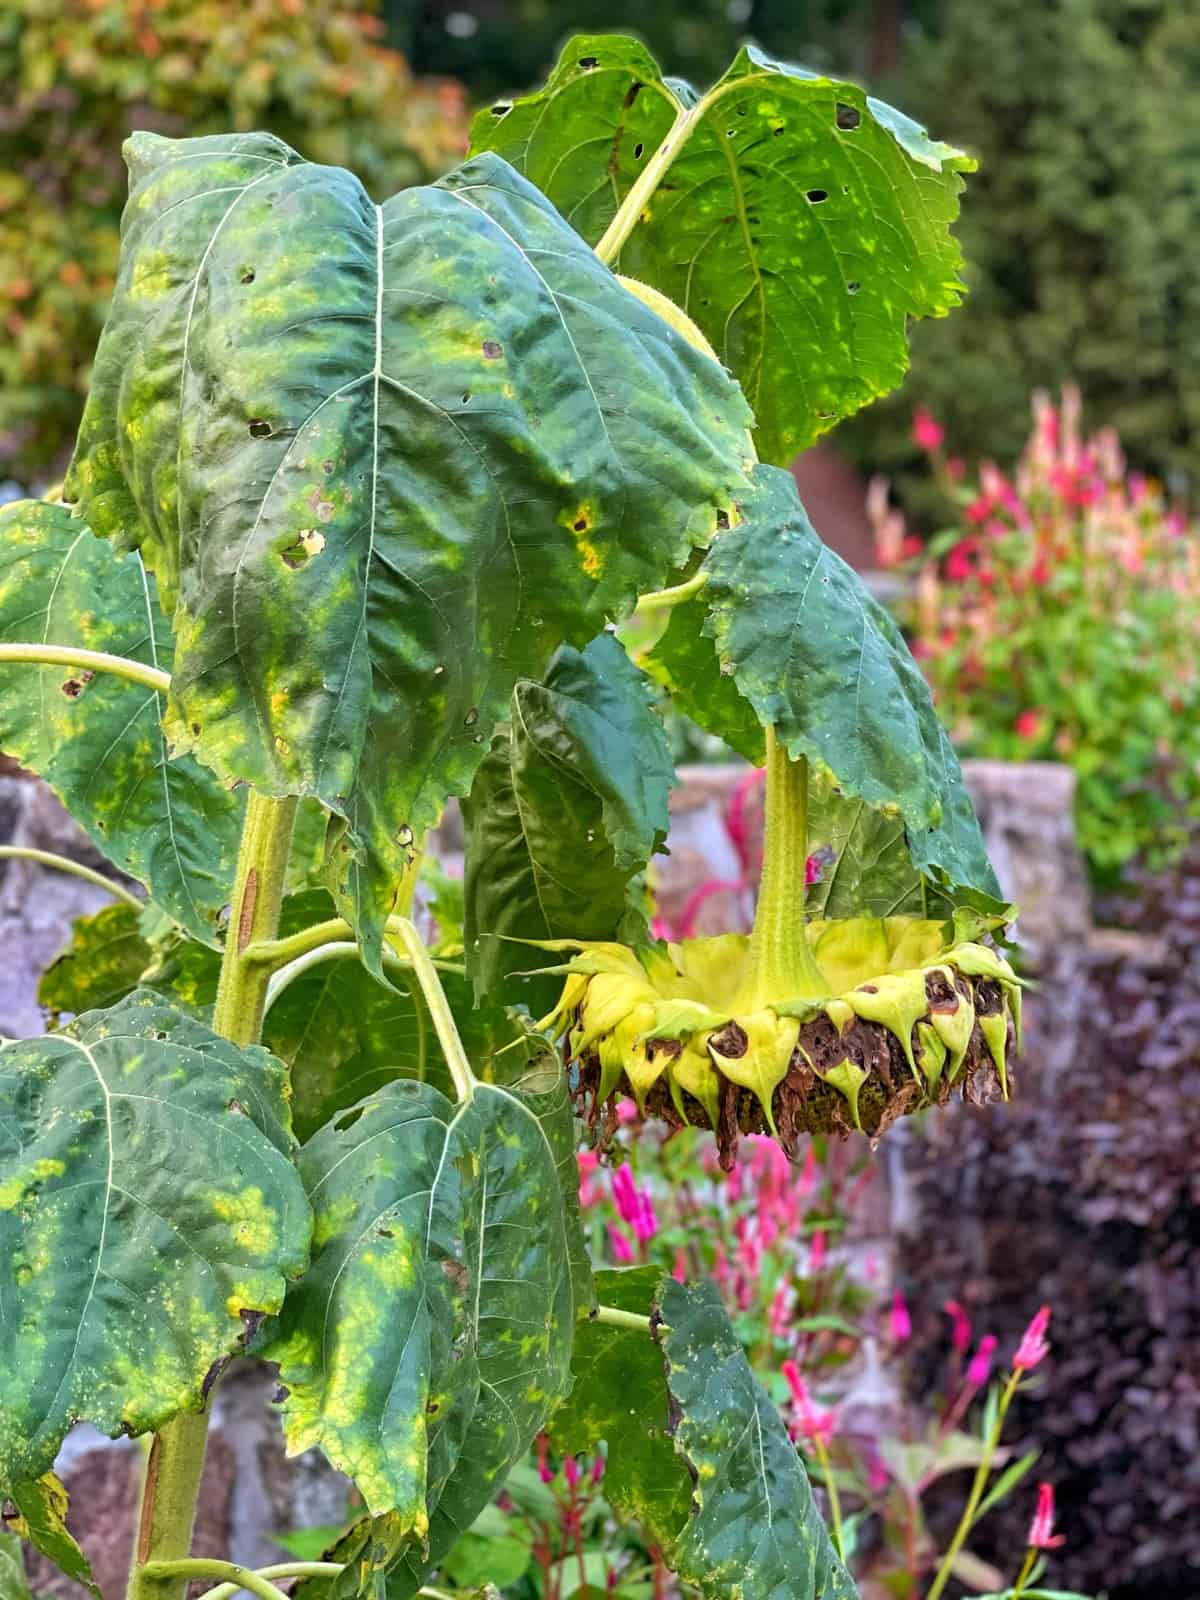
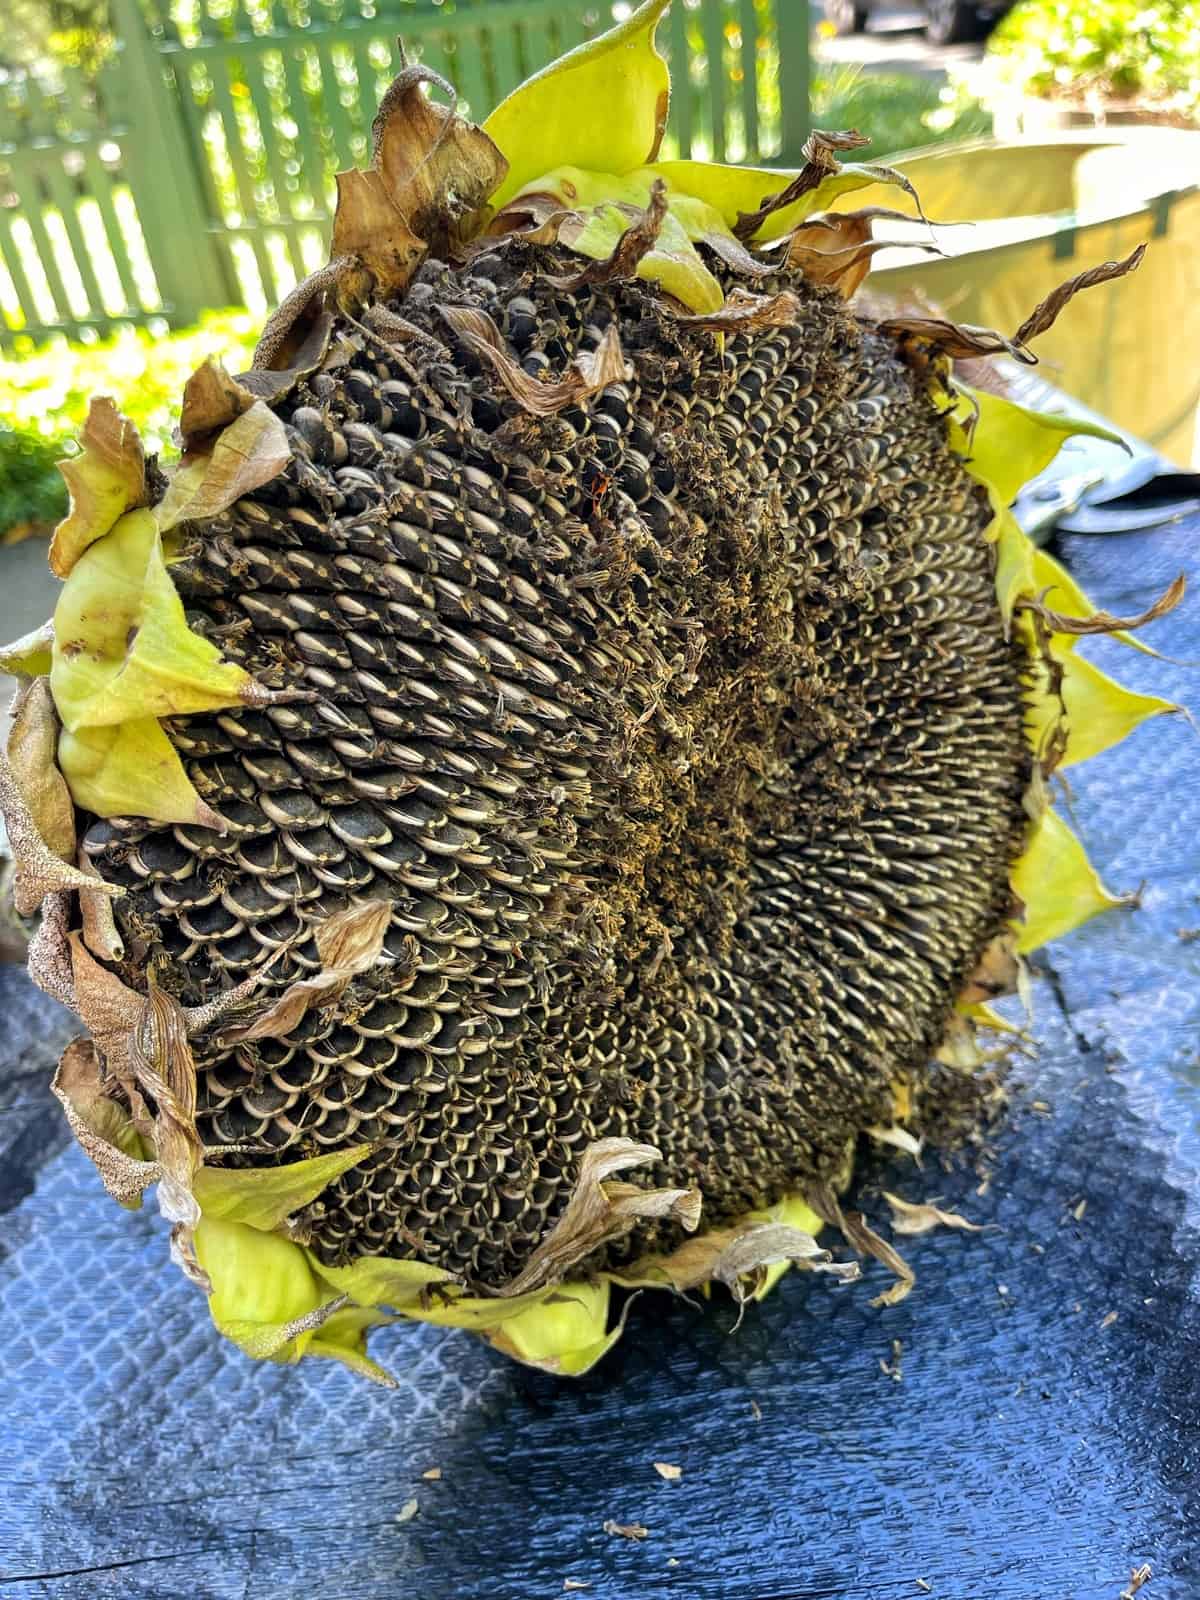
The best time to harvest sunflower seeds is after the sunflowers die back completely and the backs of the flower heads turn brown. At this stage, the seeds will have fully matured and can be easily dislodged from the head.
Keep an eye on the weather and the progression of your sunflower blooms; early signs that the seeds are almost ready include drooping flower heads and drying petals. Make sure to start harvesting promptly before wildlife like birds or squirrels beat you to it!
How long after blooming can you harvest sunflower seeds?
After a sunflower blooms, it typically takes about 30 to 45 days for the seeds to mature and be ready for harvest. However, this timeframe can vary depending on a number of factors, including the sunflower variety, environmental conditions, and how the plant has been maintained.

How to Harvest Seeds From Sunflowers
There are two ways to harvest seeds from sumflowers. You can allow the head to dry on the plant or cut them to hang for 4-5 days in a cool dark dry location before harvesting the seeds.
If you leave them on the plant, there’s a risk the birds or other animals will harvest them first. So keep that in mind before you choose a method.
I prefer to let them dry on the plant and then scrape out the seeds in my zone 6b garden. Here’s how to do it!
Harvesting Sunflower Seeds the Easy Way
Since I’m all about doing things the easy way, this is my preferred method for harvesting sunflower seeds.This is a great activity to do with your kids or grandkids. And it can get a little messy so it’s best to do this outdoors or in a garage, shed, or greenhouse to contain the mess.

Must-Have Tools and Supplies for Harvesting Sunflower Seeds
Not much is needed to harvest sunflower seeds and you probably have a majority of the items needed to do it.
If you grew more than a few sunflowers, I recommend using a pop-up garden debris bag, wheelbarrow or garden cart to collect the seed heads. I prefer using the garden debris bag because it catches all the loose seeds that I want to keep.
Here’s what you need to harvest sunflower seeds.
- Sharp Pruners
- Garden Debris Bag, Wheelbarrow, or Garden Cart
- Table
- Tablecloth or Garbage Bag
- Stock Pot or Bucket
- Garden Gloves
- Colander
- Paper Towels or Newspaper

A Step-by-Step Guide on How to Harvest Sunflower Seeds
Believe it or not, there are not many steps to harvesting sunflower seeds.
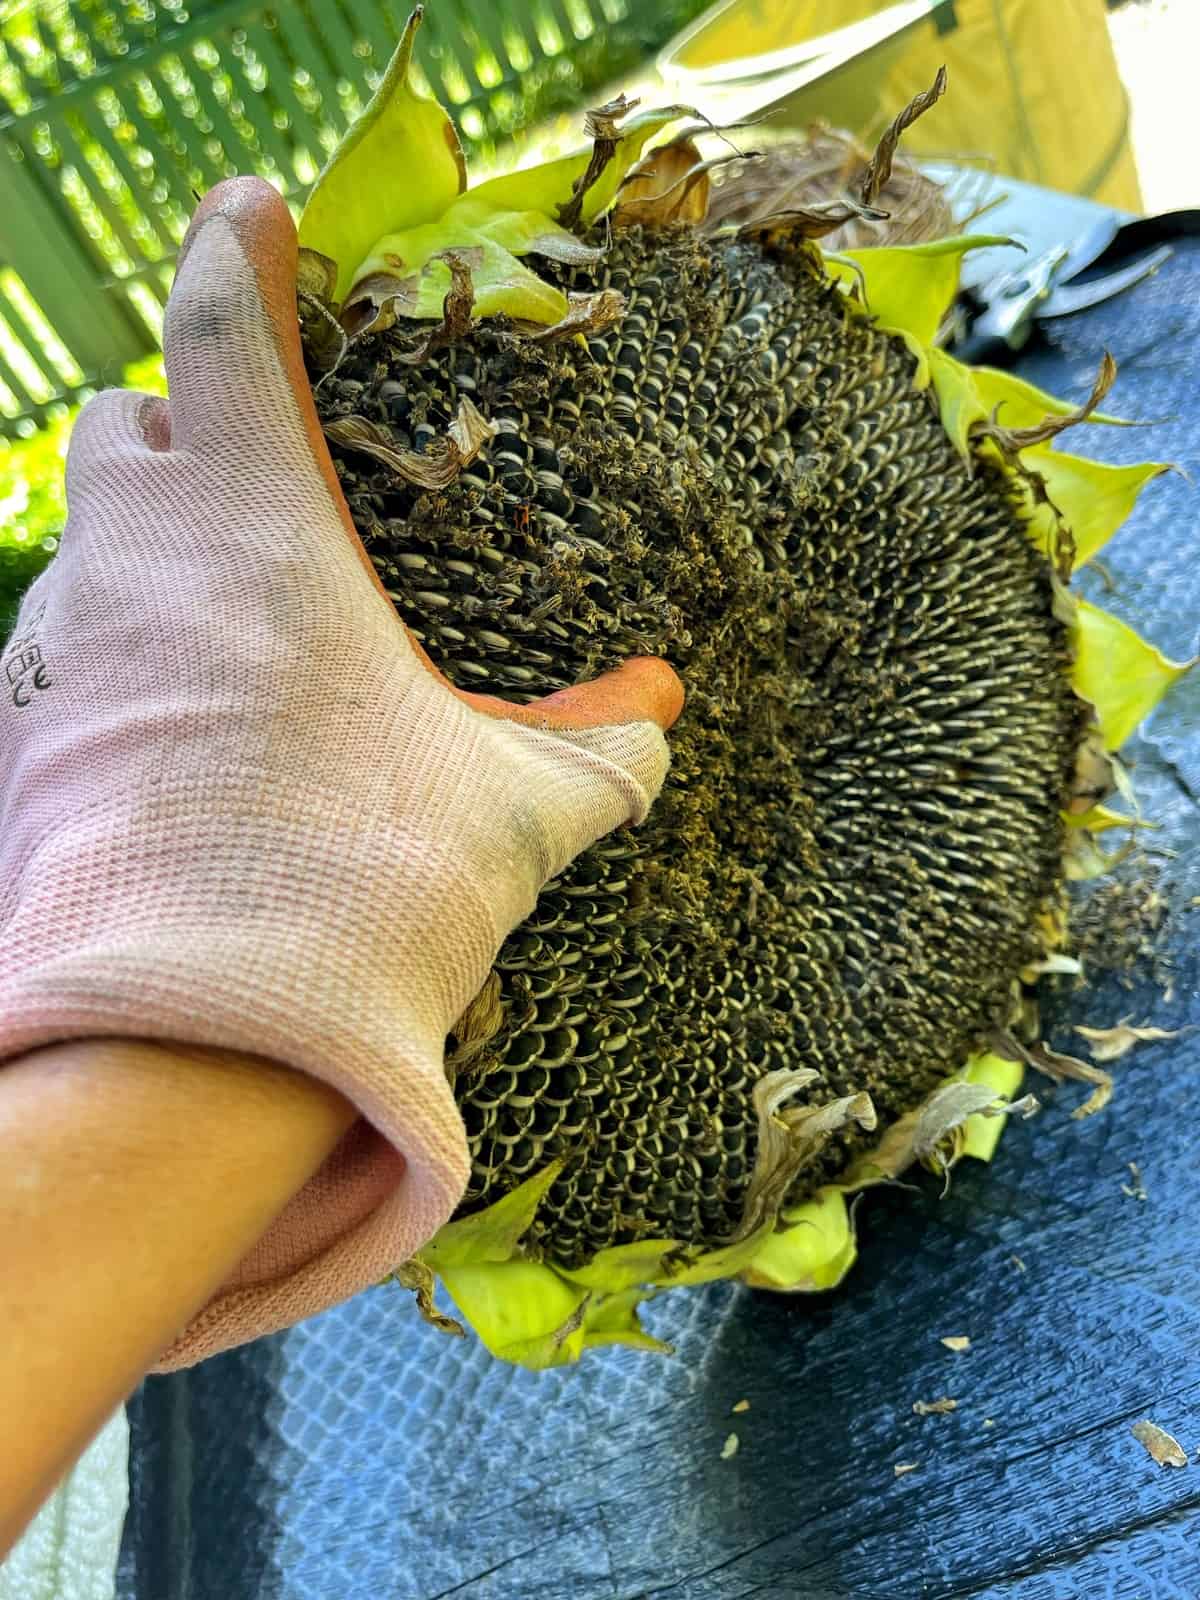
- Using sharp pruners, I cut about a foot off between the head with the stem. I suggest wearing garden gloves for this process because the stems can feel a little prickly.
- Collect the seed heads in a garden debris bag, wheelbarrow, or garden cart.
- After collecting the sunflower heads, I laid a garbage bag on the table to help contain the mess and grabbed one flower head to start harvesting. You can also do this directly over a bucket, but I chose to stand over a table.
- To harvest the flowers, scrape the seed head with your fingers and allow the seeds to fall onto the table. The dryer the flower head is, the easier the seeds will pop out.
- Collect sunflower seeds and temporarily hold them in a stock pot or bucket. Since I was working with several flower heads, I needed something large enough to fit all of the seeds.
- Remove the debris by adding them to a colander and rinse them off.
- Spread the seeds evenly on paper towels in a single thin layer so they can fully dry off before using or storing.
The Critical Curing Phase: Why Drying is Key
Once you’ve scraped the seeds from the head and rinsed off the sticky pulp and debris, the job isn’t quite done. The drying, or curing, phase is the most critical step for successful long-term storage, whether you plan to plant them or eat them later.
Why Drying is Non-Negotiable
- Seed Viability: If seeds are stored with high moisture content (above 10%), they are highly susceptible to mold and mildew. This instantly destroys them for both eating and replanting. Proper curing ensures they stay viable for the next planting season.
- Preventing Rancidity: For edible seeds, excess moisture can contribute to faster degradation, leading to a stale or rancid flavor when roasted.
How to Dry Your Harvested Seeds
- Spread Thinly: Immediately after rinsing and patting dry, spread the seeds in a single, thin layer on paper towels, newspaper, or a clean screen. Do not overlap them.
- Location: Place the drying layer in a cool, dry, and dark area with good air circulation. A pantry shelf, a dehumidified basement, or a garage works well. Avoid direct sunlight, which can cook the seeds and damage their germinating ability.
- Stir Daily: For the first week, gently stir or flip the seeds daily to ensure air reaches every surface and prevent clumping.
- Drying Duration: The seeds should be left to air-dry for a minimum of 2–3 weeks before packaging them for long-term storage.
The Dryness Test (The ‘Rattle Check’)
To be absolutely certain your seeds are cured and ready for storage or roasting, perform this simple check:
- Take a handful of seeds.
- Try to gently press your fingernail into the shell. The seed coat should be hard and dry, not soft or yielding.
- Shake the seeds next to your ear. You should hear the tiny kernel inside rattle slightly against the shell. This indicates the inner kernel has fully shrunk and dried, meaning the moisture content is low enough for safe storage.

Creative and Practical Uses for Sunflower Seeds After Harvesting
There are many ways to use your harvested sunflower seeds, but I have three personal favorite uses: replanting, roasting and feeding the birds.
How to Save Sunflower Seeds for Replanting Next Year
If you plan to store them to plant for next year, after they are fully dry, label them in an envelope and keep them in a cool, dry, and dark place until next year.
Make sure to keep the seeds away from moisture and extreme temperatures to ensure they stay viable. Check the seeds periodically for signs of mold or pests and discard any seeds that show signs of damage right away.
Come spring, you can replant the sunflower seeds in your garden and repeat the process all over again!

Roasted Sunflower Seeds: the Perfect Salty Snack
If you plan to roast them, after rinsing them off, boil them for 15 minutes in salted water. And then spread thinly on a baking sheet, then roast them at 400 for 10-15 minutes. I like to sprinkle mine with a little bit of salt but you can add whatever types of flavorings you like!
Advanced Roasted Sunflower Seeds: The Perfect Crunchy Snack
If you’re looking for that perfect, addictive crunch, brining and slow-roasting your home-harvested sunflower seeds is the secret!
The Brine Method (Required for Salty Flavor)
| Ingredients | Ratio |
|---|---|
| Dried Sunflower Seeds (in shell) | 2 Cups |
| Water | 4 Cups |
| Salt (Sea or Kosher) | 1/2 Cup |
Instructions:
- Dissolve Brine: In a medium pot, bring the water and salt to a boil, stirring until the salt is completely dissolved. Remove from heat.
- Soak: Add the 2 cups of dried, cleaned seeds to the brine. Allow the seeds to soak for at least 8 hours or overnight at room temperature. The longer they soak, the saltier they will be!
- Strain and Pat Dry: Strain the seeds through a colander. Pat them lightly with a paper towel to remove excess surface moisture, but do not rinse them.
Roasting & Seasoning
- Preheat: Preheat your oven to 300°F (150°C).
- Toss (Optional): If adding dry seasonings (like Ranch or Taco), toss the brined, semi-dry seeds with 1 tablespoon of melted butter or olive oil to help the seasoning adhere.
- Spread: Spread the seeds in a single, even layer on a large, rimmed baking sheet.
- Roast: Bake for 30 to 45 minutes, stirring every 10-15 minutes to ensure even roasting. The shells should be slightly golden brown.
- Test: Use the Rattle Test (the kernel should rattle when shaken) to confirm they are done.
- Cool: Allow the seeds to cool completely before serving or storing. The kernels will become significantly crunchier as they cool.
Sunflower Flavor Variations
| Flavor | Ingredients to Add (Toss with Seeds Before Roasting) |
|---|---|
| Spicy Chili-Lime | 1 tsp Chili Powder, 1/2 tsp Cumin, Zest of 1 Lime. |
| Cinnamon Sugar | 2 Tbsp Granulated Sugar, 1 tsp Cinnamon. |
| Smoked BBQ | 1 Tbsp Brown Sugar, 1 Tbsp Smoked Paprika, 1 tsp Garlic Powder. |
| Garlic Parmesan | 1 Tbsp Olive Oil, 1 Tbsp Grated Parmesan Cheese (added in the last 5 minutes of roasting), 1/2 tsp Garlic Powder. |
Feeding Sunflower Seeds to Birds
Birds also love sunflower seeds (if you’ve ever waited too long before harvesting sunflower seeds then you probably know this is true!). I’ve even heard of people using sunflower seeds as chicken feed!
If you’re just feeding typical backyard birds, however, you can add sunflower seeds to a birdhouse feeder or even make suet cakes with sunflower seeds (a great winter treat for your local birds!).
Growing sunflowers has always been a fun project to do with my girls as the seeds are easier for them to plant and simple to start and grow. And once you know how to harvest sunflower seeds, growing them becomes even better!
I hope you enjoyed growing sunflowers this year too!

⚠️ Important Safety: Pesticide Use and Seed Edibility
Before consuming or replanting any harvested seeds, you must know the plant’s history.
If your sunflower plants were treated with systemic pesticides (chemicals absorbed by the plant and moved through its tissues), DO NOT EAT OR PLANT THE SEEDS. Systemic toxins will be present in the seeds.
If the plant was treated with a non-systemic, contact, or organic spray, always check the product label for the Days to Harvest (DTH) interval. If the DTH is listed for edible crops, ensure that period has fully passed before harvesting the seeds. When in doubt, discard the seeds.
Stacy’s Tip: When buying your sunflower seeds, buy organic!

Frequently Asked Questions About Harvesting Sunflower Seeds
Harvesting sunflower seeds can be a rewarding and simple process when you know the right steps. Whether you’re a seasoned gardener or a beginner, it’s important to have clear answers to your most pressing questions about sunflower harvesting.
From timing and techniques to storage and seed viability, this comprehensive FAQ section covers everything you need to ensure a successful harvest and replanting season.
How do I know when sunflower seeds are ready to harvest?
Oftentimes you’ll see the heads droop and lean over. As the seeds mature, the weight of the seeds pulls the head downward, letting you know they’re ready for harvesting. You might even see some of the seeds getting loose. That’s the best time to start harvesting sunflower seeds.
Another trick you can try to make sure your seeds are ready: gently press your fingernail against one of the seeds. If you’re able to make an indentation without actually puncturing the seed then it’s likely ripe and ready to be harvested.
What happens if you harvest sunflower seeds too early?
Harvesting sunflower seeds too early can result in seeds that are underdeveloped and may never fully mature. These seeds are often small, pale in color, and lack the plumpness and flavor of fully ripened seeds.
Additionally, harvesting too early can lead to lower seed yields overall because the plants continue to produce seeds as they mature. Harvest too early and you may miss out on some of the seed crop.
Immature seeds can also be more prone to mold and spoilage while stored, so they are less likely to be good for replanting the following year.

How long to dry a sunflower head?
As I mentioned earlier, you can allow the flower heads to dry a little on the plant before harvesting. Or you can cut the heads and hang them upside down to dry out for 4-5 days in a cool, dark space like a basement or garage.
Since I prefer to allow my sunflowers to die back and dry out on the plant, I’m cutting the heads and harvesting the sunflowers directly.
How can I protect sunflower seeds from birds and squirrels before harvesting?
Protect your sunflower seeds by covering the flower heads with mesh bags or lightweight fabric to deter birds and squirrels.
What is the best way to clean and store harvested sunflower seeds?
Clean seeds by removing debris and contaminants, then air-dry them thoroughly before storing in airtight containers in a cool, dry place.
How long can sunflower seeds be stored for planting or eating?
Sunflower seeds can be stored for up to one year if kept in a cool, dry place in an airtight container.
Can You Eat Sunflower Seeds Straight From the Flower?
I know many that do, but I prefer to harvest them first then roast them after they are cleaned up.
Can You Harvest Sunflower Seeds from Cut Flowers?
Yes, you can! But the process can differ slightly from harvesting seeds from sunflowers left to mature in the garden.
When harvesting sunflower seeds from cut flowers, you’ll want to wait to cut the plant until the flower head has started to mature on the plant. While you’ll likely want to enjoy your cut flowers before they’re drooping, you don’t want to harvest your flowers so early that the seeds are immature.
When you’re ready to harvest the seeds from your sunflowers, it’s important to discontinue their water supply. You can leave them to air dry in a vase or hang them upside down to dehydrate. I recommend doing this indoors or in a protected outdoor space so birds and other animals can’t snack on the seeds before you harvest them.
Once the sunflower heads have thoroughly dried out, set up a bowl or tray to catch the seeds and gently brush the sunflower heads. Allow the seeds to fall onto the prepared surface, and use pliers, tweezers, or tongs to remove any stubborn ones. Rinse the seeds quickly, then dry them thoroughly before storing them in a cool, dry place until you’re ready to use them.

More About Harvesting Sunflower Seeds
And that’s it! Super easy right? From baking to replanting them for next year, sunflowers are very easy to grow (if the critters don’t get to them that is), enjoy, and harvest for later.
To learn how to grow sunflowers from seed, read my in-depth article here that will help you buy seeds, plant, and grow the prettiest blooms.
Do you grow sunflowers? Have you ever harvested the seeds before? How do you like to use the harvested seeds? Tell me in the comments below.
For more information about harvesting sunflowers, please see this article from the South Dakota Extension Service.
To drill down on more beginner gardening techniques and tips, please read these posts:
- Flower Gardening for Beginners
- Growing a Cut Flower Garden for Beginners
- Container Garden Ideas for Beginners
- How to Start a Vegetable Garden
- Herb Gardening for Beginners
Happy Gardening!


I need to grow those Sunflowers to save the seeds! What a beautiful post…and those need to be added to my garden!
Thank you so much Leslie! I appreciate that. xo
Stacy, I so needed this post last year. I grew very large sunflowers but struggled with when to harvest the seeds. Since our sunflowers bloom and die during the summer heat (well at least this crop did-maybe I planted them at the wrong time), the seeds were dried out. I threw most of them back into the ground but only had one variety of sunflower bloom the next year (the smaller flower ones). I will try again and see when I should plant them here in 9b. Good info!
OH I can’t wait to see them Mary! They are so fun to grow right? And thank you!
I’m definitely growing sunflowers next year! This is so good. Thanks for sharing this. 🙂
You are welcome! And I can’t wait to see your plants!
Your sunflowers were so pretty this year Stacy. I can’t wait to save my seeds! I’ve never done it before and an so excited.
I got so many seeds from these! I wound up giving some of the heads to the birds and chipmunks. We had so many!
I save mesh bags from Potatoes and onions and slip them over the heads if I can reach them, otherwise, the birds pick them clean. I also usually hang my head in garage for the winter. I probably should harvest the seeds from the heads in the fall but I have lots of gardens so this works for me. I plant many different types and usually purchase one or two packages in the Spring of something new. The worst part is digging those giants out of the ground and knocking the dirt off and hauling to the woods to discard. Every fall I tell myself that I am going to cut back, but every Spring there I go again. Love, Love gardening
That is the best and it is so true!!! That’s a great tip – I would totally do that with the mesh bags. Thank you for sharing it!
Hello, I do have a stupid question, because I’m sure I know the answer but here we go. I have sprayed the sunflower stems and leaves (not the flower itself) with bug spray to kill the lantern flies. If I harvest them, will they grow next year? Also, would I be able to cook and eat these seeds? Thank you
No questions is ever stupid! And that’s a great question! What did you use on them?