DIY Pumpkin Flower Arrangement for Fall Table Decor (No-Carve)

Create a stunning, effortless no-carve pumpkin centerpiece DIY. Learn the ‘Thriller, Filler, Spiller’ method of arranging flowers that will last through Thanksgiving.
Fall is a time for cozy gatherings and festive decorations, and a beautiful centerpiece is a must-have for any autumn table. What better way to celebrate the season than by bringing the outdoors in with fresh flowers and natural textures?
Hi, I’m Stacy Ling, a trained Master Gardener in USDA Zone 6b, New Jersey. While I love sharing beginner-friendly tips to help your garden thrive, my greatest joy is extending that beauty inside! Today, I’m showing you my secret to effortless elegance: an easy no-carve pumpkin centerpiece using fresh flowers and natural foliage.
This simple DIY combines the rustic charm of a whole pumpkin with vibrant colors, adding the perfect touch of autumnal elegance to your table without any messy carving. It’s the perfect way to create a stunning focal point for Thanksgiving, Friendsgiving, or any special gathering this fall.
(Posts on stacyling.com may contain affiliate links. Click HERE for full disclosure.)
Supplies for This No-Carve Pumpkin Centerpiece With Fresh Flowers
- A pumpkin (heirloom, Cinderella or other flat pumpkin work well!)
- Fresh fall flowers (see suggestions below) in different sizes and varying textures
- Foliage like ferns, boxwood or ivy
- A vase or container to keep you fresh flowers fresh before arranging
- Water
- Garden Snips
- floral foam sphere with bowl or biodegradable floral foam
If you have access to a flower or cutting garden like I do, this dining table centerpiece won’t cost much to make. But no worries if you don’t, because you can head out to your local Trader Joe’s, Market, or Florist and try to find the best deal on flowers and greens.
Depending on the shape of your pumpkin, you may need to secure the floral foam bowl to the pumpkin so it is secure before arranging flowers. If your pumpkin has a stem you can add the floral foam right on top!

Creating Your No-Carve Pumpkin & Fresh Flower Centerpiece
To create a visually balanced and stunning arrangement, we’ll use the “Thriller, Filler, and Spiller” method of floral design. This approach involves selecting plants that fulfill three distinct roles:
- Thriller: These are the stars of the show, tall or dramatic elements that add height and visual impact (e.g., sunflowers, striking celosia plumes, tall branches).
- Filler: These plants fill in the gaps and provide density to the arrangement (e.g., mums, zinnias, marigolds).
- Spiller: These plants cascade or trail over the edges, softening lines and adding movement (e.g., ivy, trailing vines, pansies).
1. Step 1: Select and Secure Your Pumpkin Base
Find an heirloom, Cinderella, or flat-bottomed pumpkin with a level top to securely hold your arrangement. I recommend securely anchoring the dish—you can even hot glue it down to the pumpkin to keep it sturdy, as the blooms and water can make the arrangement quite heavy!
Look for flowers and branches from the garden, or grab them at a market. Depending on the shape of your pumpkin, you may need to secure the floral foam bowl to the pumpkin for better stability. If your pumpkin has a stem, you can add the floral foam right on top and skip the dish!
(Note: If you want to anchor the dish for greater stability, you can also carve out a shallow hole that is large enough to hold the dish without it sinking into the pumpkin.)

2. Step 2: Prepare the Floral Foam and Dish
Soak your floral foam in water until it’s fully saturated, then place the soaked foam snugly in your dish or floral sphere. I like using a dish or sphere that will catch the water when I care for the arrangement.
3. Step 3: Create the Base Layer with Greenery
This is where the Filler and Spiller elements start. Place the dish with the floral foam on top of the pumpkin, ensuring it’s level and secure. Start by creating a layer of greenery, using ivy, eucalyptus, ferns, or similar foliage. This step conceals the foam and dish while adding fullness and establishing the outer shape of the arrangement.
4. Step 4: Add Focal Blooms (The Thrillers)
Next, carefully insert your Thriller elements—the largest or tallest focal blooms—to create verticality and dramatic impact. Make sure they are securely anchored in the floral foam, establishing the maximum height and visual ‘wow’ factor of the centerpiece.

5. Step 5: Fill and Refine the Arrangement
Now, add your Filler flowers, working to create a dense and colorful display. Vary the heights and textures of the flowers to keep the arrangement visually interesting. Finish by re-introducing your Spiller plants, allowing them to gently drape over the edges of the pumpkin. This creates a sense of natural abundance and softens the overall look.
Once complete, remember to water your arrangement regularly to keep the flowers fresh and vibrant. Check the floral foam daily for moisture so the arrangement doesn’t dry out.

Best Fall Flowers for Pumpkin Centerpieces
The best fall flowers to grace pumpkin centerpieces are those that capture the rich and warm hues of the season while adding a touch of elegance to the arrangement.
Here are some fall garden flowers that look amazing in pumpkin centerpieces:
- Marigolds: With their vibrant orange and gold blooms, they are a quintessential choice, infusing a burst of color reminiscent of autumn leaves.
- Chrysanthemums: Deep red and burgundy tones can be achieved with the inclusion of chrysanthemums, which come in a variety of shapes and sizes for creative design possibilities.
- Pansies: The rich jewel tones of pansies together with their happy faces look incredible as spillers or fillers in pumpkin table centerpieces.
- Celosia: Celosia’s unique plume-like or crested flower heads come in rich, warm colors like red, orange, and burgundy, adding essential texture and visual interest.
- Dahlias: These intricate and captivating blooms flower well into autumn and add a touch of sophistication to any flower arrangement. To learn how to grow dahlias in your garden, read this post.
- Zinnias: Zinnia flowers offer a burst of vibrant color, with shades ranging from deep reds and oranges to soft pinks and yellows. Their sturdy stems and long-lasting blooms make them a practical addition.
- Sunflowers: With their cheerful yellow petals, sunflowers can bring a cheerful and rustic charm to the display. They make great thriller elements to the design.
(Note: Keep in mind that not all of these are great cut flowers. For flowers not intended for cutting, you should place them directly inside a pumpkin after it has been fully carved.)

How to Keep Your No-Carve Centerpiece Flowers Fresh Longer
- Cut the stems of the flowers at an angle before placing them in the vase.
- Use fresh, clean water and keep the arrangement well hydrated. Check it daily.
- Add a floral preservative to the water. I’ve got a great homemade flower food recipe with ingredients you probably already have on hand.
- Place the vase in a cool location out of direct sunlight.
This arrangement should last about a week or two depending on the types of flowers you use and how well you care for them. But these simple tips will help your fresh-cut flowers to last longer.

Final Display and Ambiance Tips
You’ve built a gorgeous centerpiece—now let’s set the mood!
- Get Creative: There are endless possibilities when it comes to creating a pumpkin centerpiece. Use your favorite fall flowers and colors to create a unique and personalized arrangement that reflects your style.
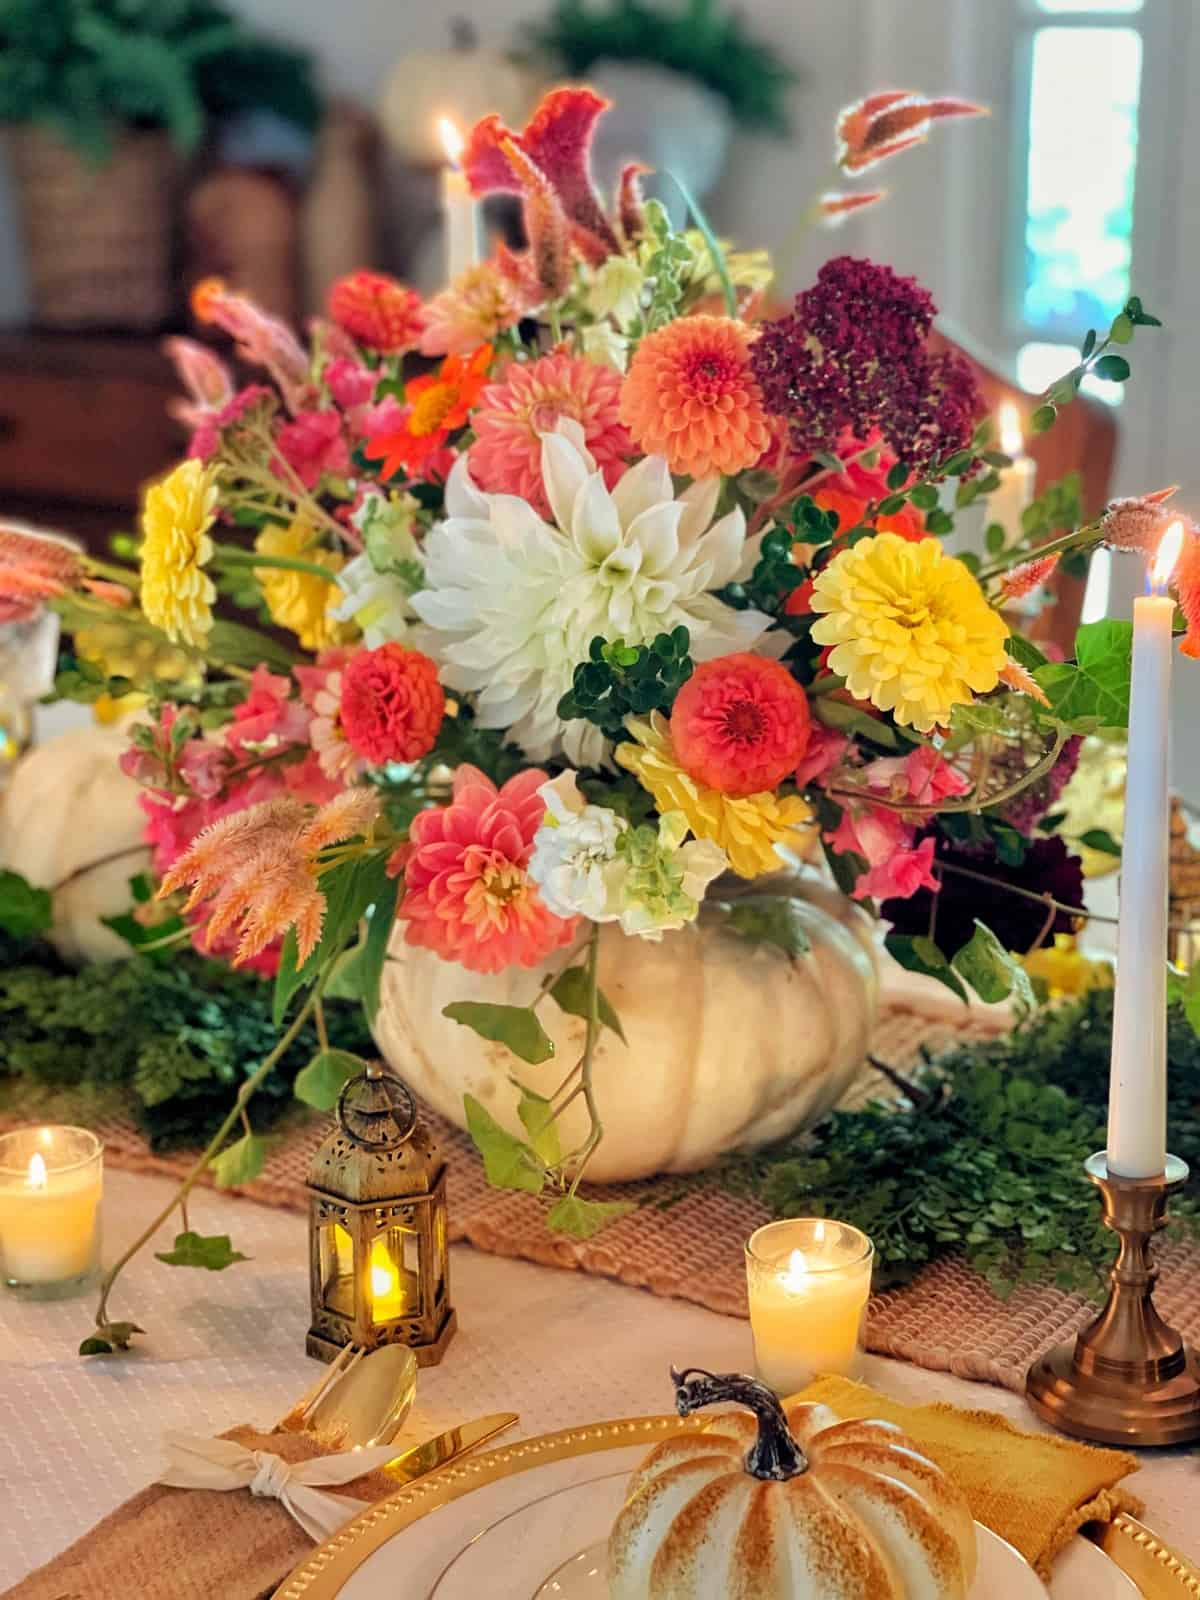
- Add Elegance with Candles: Place a few candles (real or LED) around your pumpkin centerpiece to create a warm, inviting atmosphere and make your table truly glow.
Final Thoughts on Making a No-Carve Pumpkin Centerpiece With Fresh Flowers
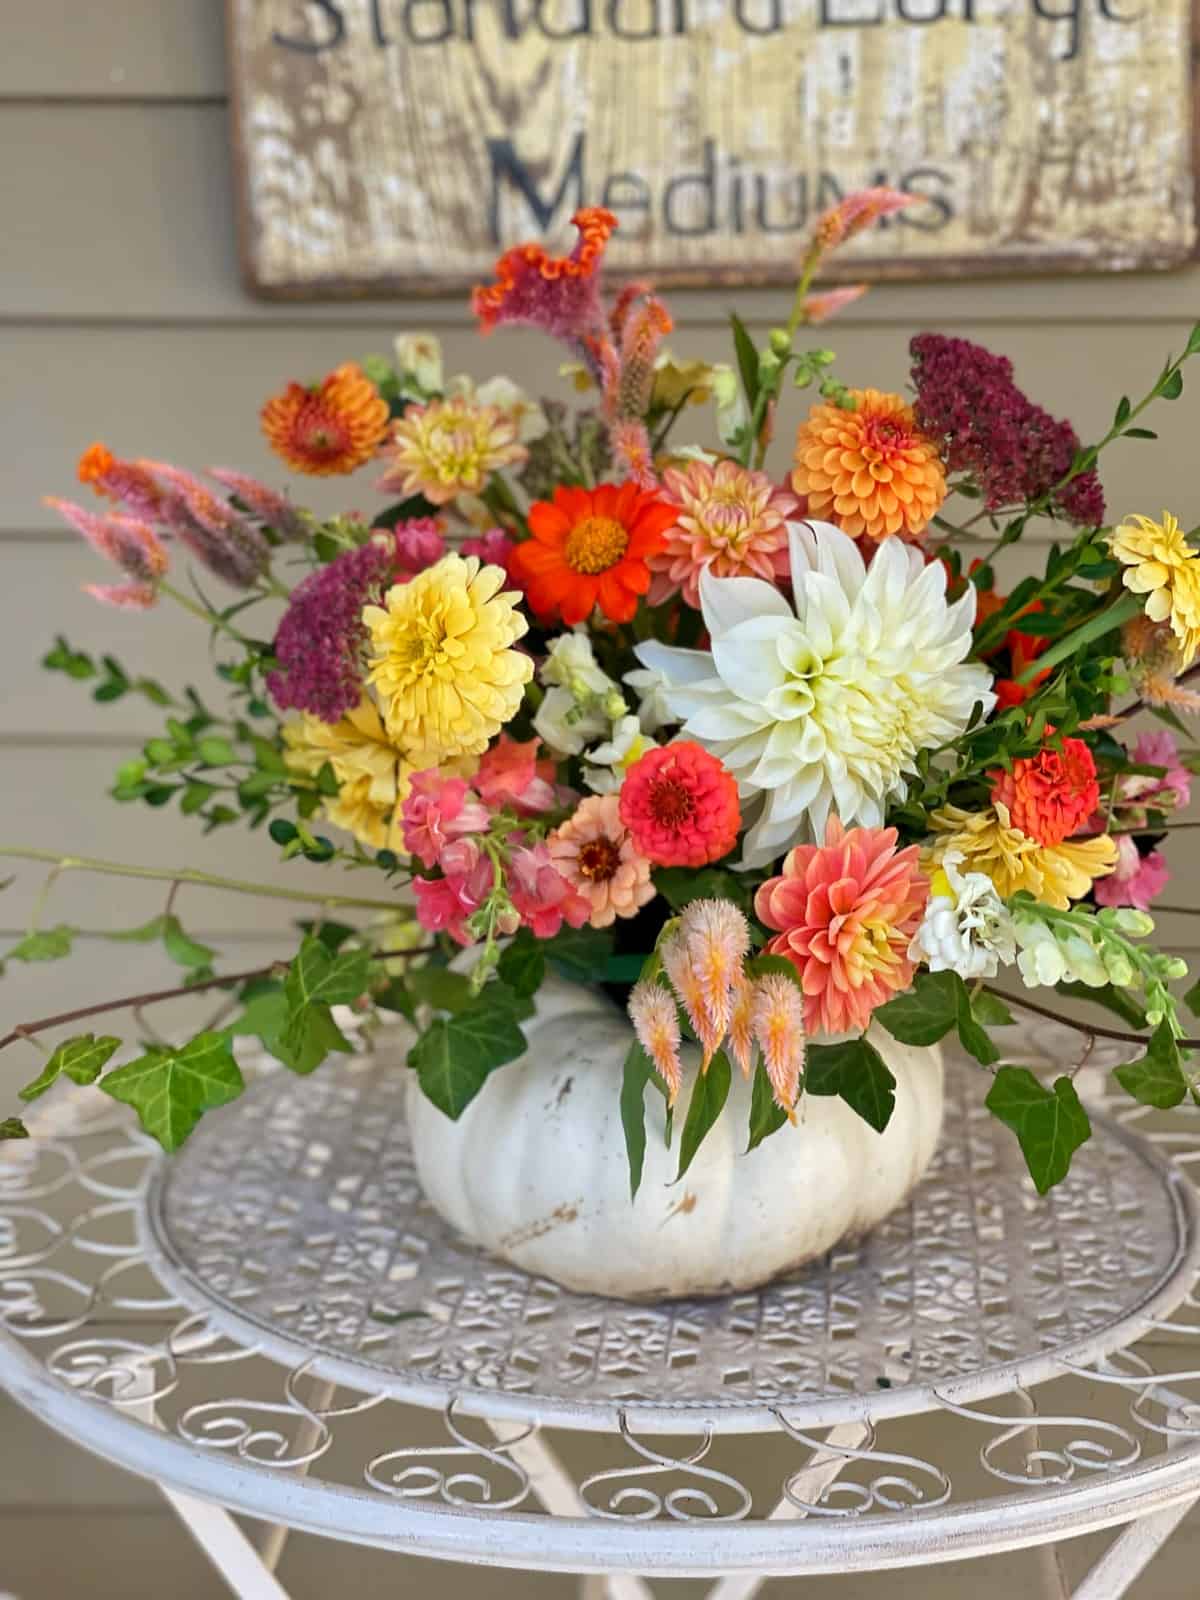
What do you think? I love how this turned out! Going no carve was WAY easier than cleaning out a whole pumpkin.
After making this no-carve pumpkin centerpiece, I recommend skipping the floral foam in a dish and maintain the integrity of the stem instead so you can anchor your floral foam right on it. To water, bring it over to your kitchen sink, water the foam, dry the bottom and maintain.
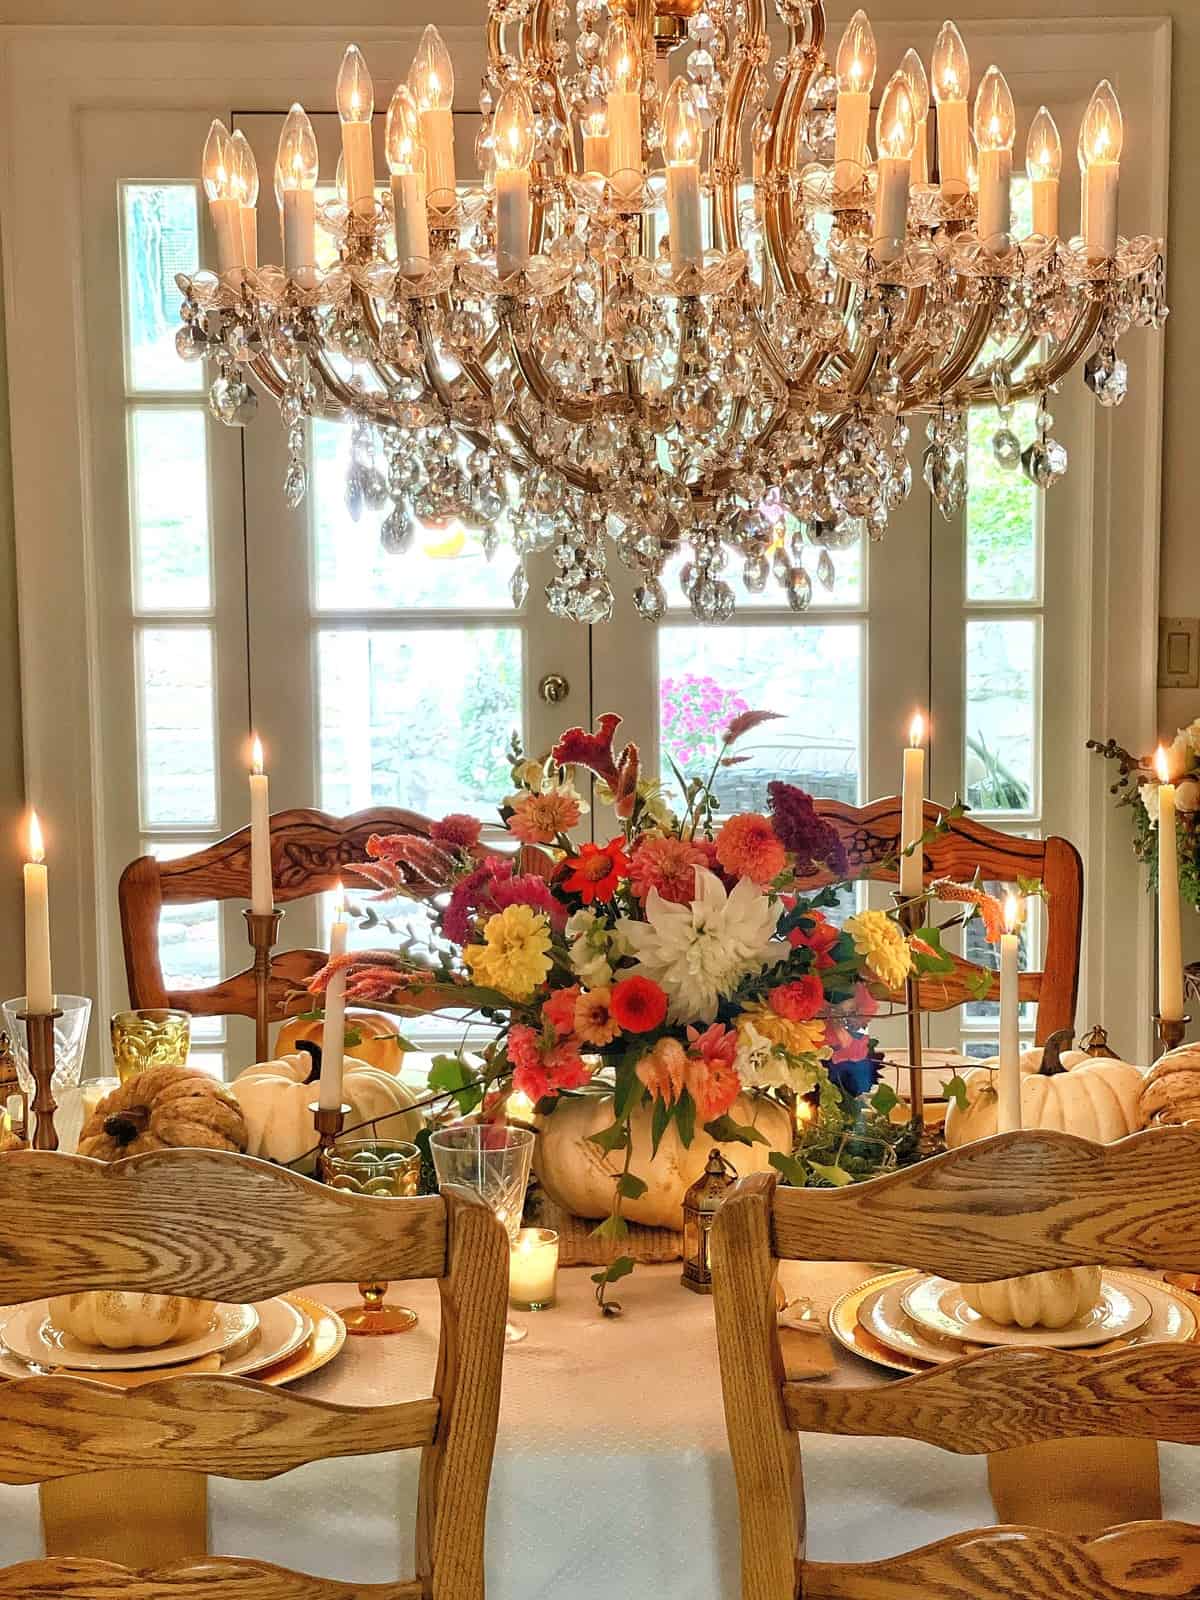
I can’t wait to show you how incredible it looks on my Friendsgiving table! To see more of it, you can check it out in this post.
Have you ever made a pumpkin centerpiece with flowers before? Will you try one this year? If you’ve made them before, do you have any tips you’d like to share? I would love to know more in the comments below.
Thank you for visiting the blog today!
Enjoy your day! xo

Want More Friendsgiving or Thanksgiving Ideas
If you are looking for more Thanksgiving Day ideas and inspiration, check out these posts. From hosting gifts to table decor, food, and menu ideas, I’ve got you covered.
- 101 Ideas for Thanksgiving
- The Best Thanksgiving Food and Fall Table Decor Ideas
- How to Set a Cozy Harvest Table
- The Best Recipe for Easy Apple Crisp
- Mouthwatering Pumpkin Dump Cake Recipe You Can’t Resist
- Easy Creamy Pumpkin Soup Recipe
- The Best Fall Pumpkin Spice Cocktail
- Thanksgiving Tablescape Idea
- How to Decorate for Fall and Christmas Before Thanksgiving
- How to Set a Thanksgiving Table
- Simple Centerpiece Idea For Your Thanksgiving Aesthetic


Friendsgiving Ideas & Inspiration
Check out these fall posts from some of my super talented friends!
Eleanor Rose Home | LeCultivateur | Green Valley Gable | Truemans Treasures
Pasha is Home | Living Large in a Small House | Cloches & Lavender | Open Doors Open Hearts
Robyn’s French Nest | White & Woodgrain | Bricks ‘n Blooms | Tatertots & Jello


Stacy, I love this centerpiece idea! Ive never seen a no-carve method, and it’s wonderful! Pinning for later!
Thank you so much Stacey! xo
Pumpkins and flowers. The perfect fall combination. I love this idea so much, Stacy!
thank you so much Kim! xoxo
Absolutely stunning, my friend. It’s the prettiest pumpkin floral arrangement that I have ever seen. You rock!
I appreciate you Renae thank you!
Stacy
This is a great idea. It turned out beautiful.
Thank you Rachel! xoxo