The Easiest Pumpkin Dump Cake You’ll Ever Make

Easy pumpkin dump cake recipe that is perfect for fall using fresh or canned pumpkin puree. Serve warm with ice cream, caramel sauce, and toffee bits for a tasty seasonal treat you can’t resist!
Fall is here, and that means it’s time for pumpkin everything! If you’ve got a bounty of fresh pumpkins from your garden (or you’re happy to grab a can from the store), I’ve got the perfect treat for you: my all-time favorite Pumpkin Dump Cake.
This recipe is ridiculously easy and so delicious. It’s the ideal fall dessert for cozy nights in or sharing with friends and family. Plus, it’s a fantastic way to use up those homegrown pumpkins.
Trust me, if you haven’t tried Pumpkin Dump Cake before, you’re in for a real treat! Let’s get baking.
(Posts on stacyling.com may contain affiliate links. Click HERE for full disclosure.)

What’s a Dump Cake, Anyway?
Before we dive into one of the easy pumpkin dessert recipes to make, let me clarify what a dump cake is. A dump cake is a tasty American dessert that’s incredibly simple to make. It’s similar to a cobbler but with a cake-like topping. You just “dump” one or more cans of fruit or pie filling into a baking dish, add a dry boxed cake mix and melted butter, and voilà, you have a scrumptious dessert in no time!
Why I Love This Pumpkin Dessert Recipe
You know what I love about this pumpkin dessert? It’s the perfect way to use those gorgeous pumpkins from my garden, and it’s so easy to whip up – even on a busy day! Plus, it’s incredibly versatile. You can play around with different fruit fillings and cake mixes to create your own signature combinations. This one’s a guaranteed crowd-pleaser, and I can’t wait for you to try it!

How to Make Pumpkin Dump Cake Recipe
Now, let’s get to the star of the show – the easiest Pumpkin Dump Cake recipe you’ll ever make! It’s so simple because you literally just dump the ingredients into a pan and bake.
Ingredients for Pumpkin Dump Cake With Yellow Cake mix
Here’s what you’ll need to make this mouthwatering pumpkin dump cake.
- Pumpkin puree
- Evaporated milk
- Eggs
- Light brown sugar
- Pumpkin pie spice
- Yellow cake mix (but I’ve seen recipes using a pumpkin cake mix too!)
- Butter sliced thin
- Crushed graham crackers
- Toffee Bits (for garnish)
- Caramel Syrup (for garnish)
- Vanilla Ice Cream
Remember to use pumpkin puree, not pumpkin pie filling, for this recipe. Pumpkin puree is just cooked and pureed pumpkin, while pie filling has added sweeteners and spices.


Baking and Serving Your Pumpkin Dump Cake With Yellow Cake Mix
- Preheat oven to 350°F. Coat a 9×12-inch baking dish with nonstick spray and set aside.
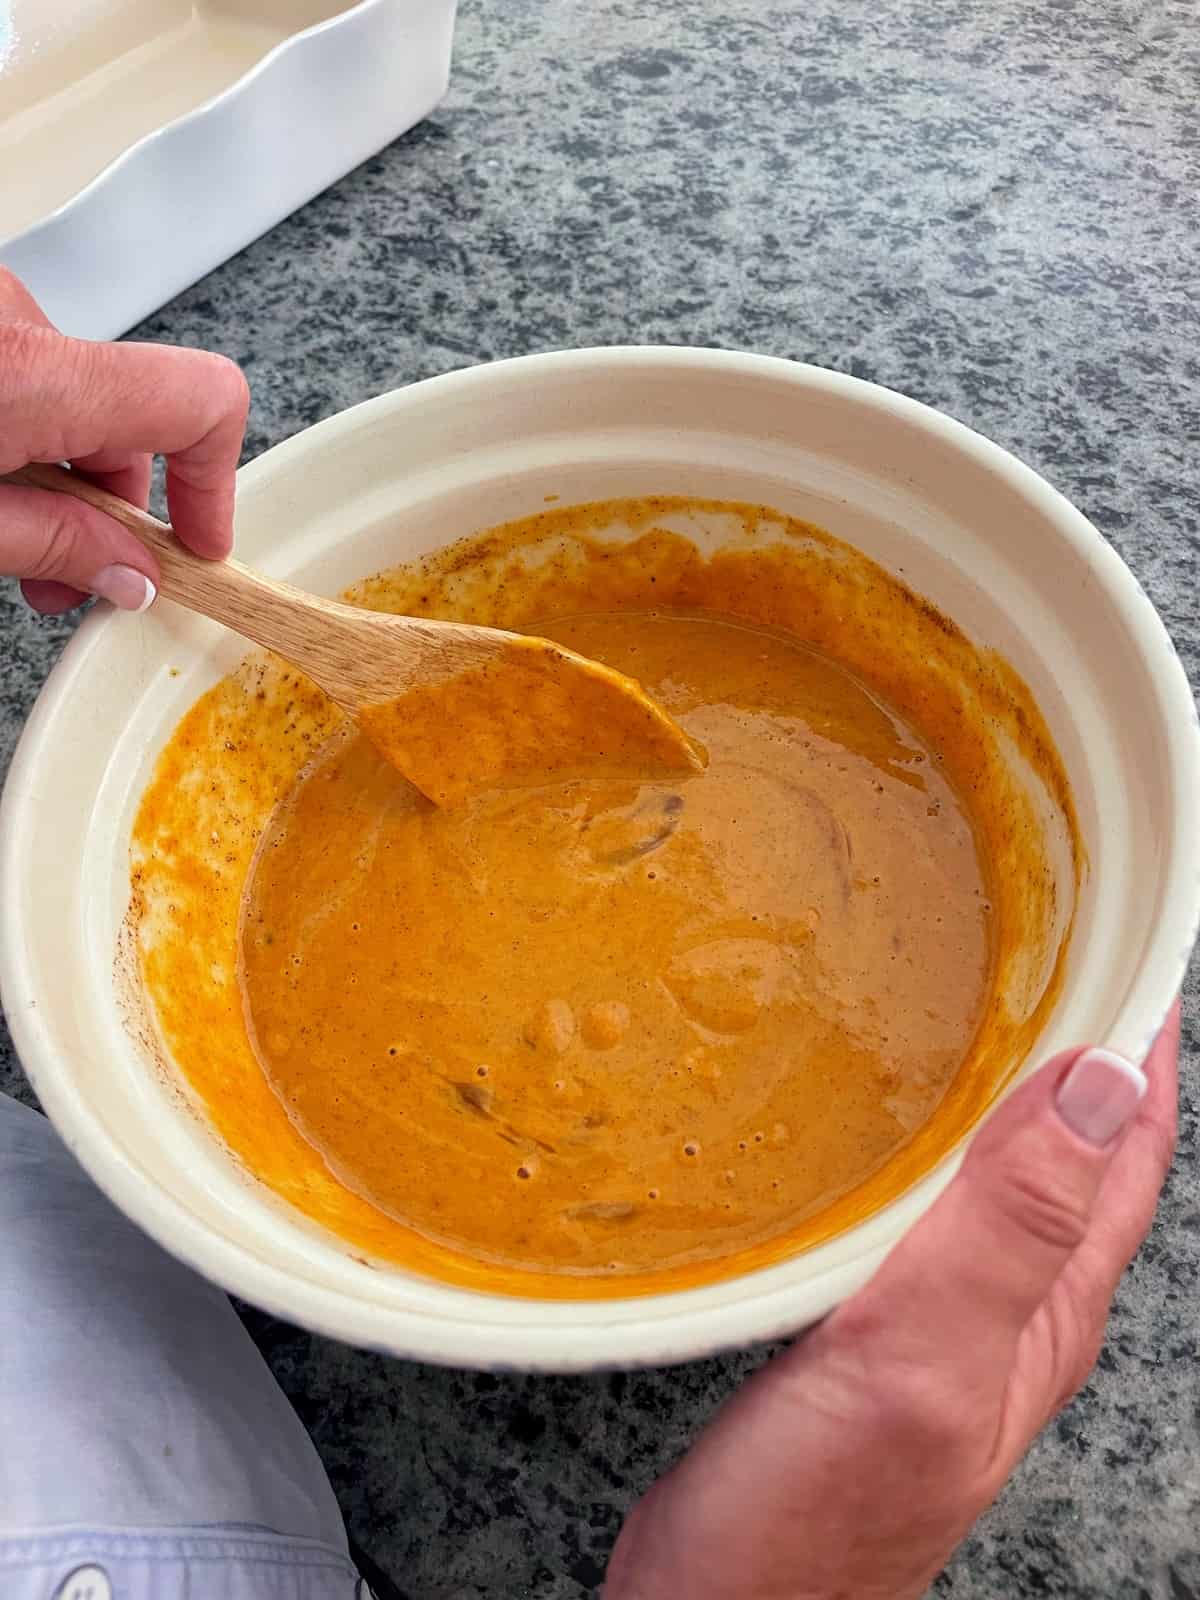
- Combine the pumpkin puree, evaporated milk, eggs, sugar, and pumpkin pie spice in a mixing bowl.
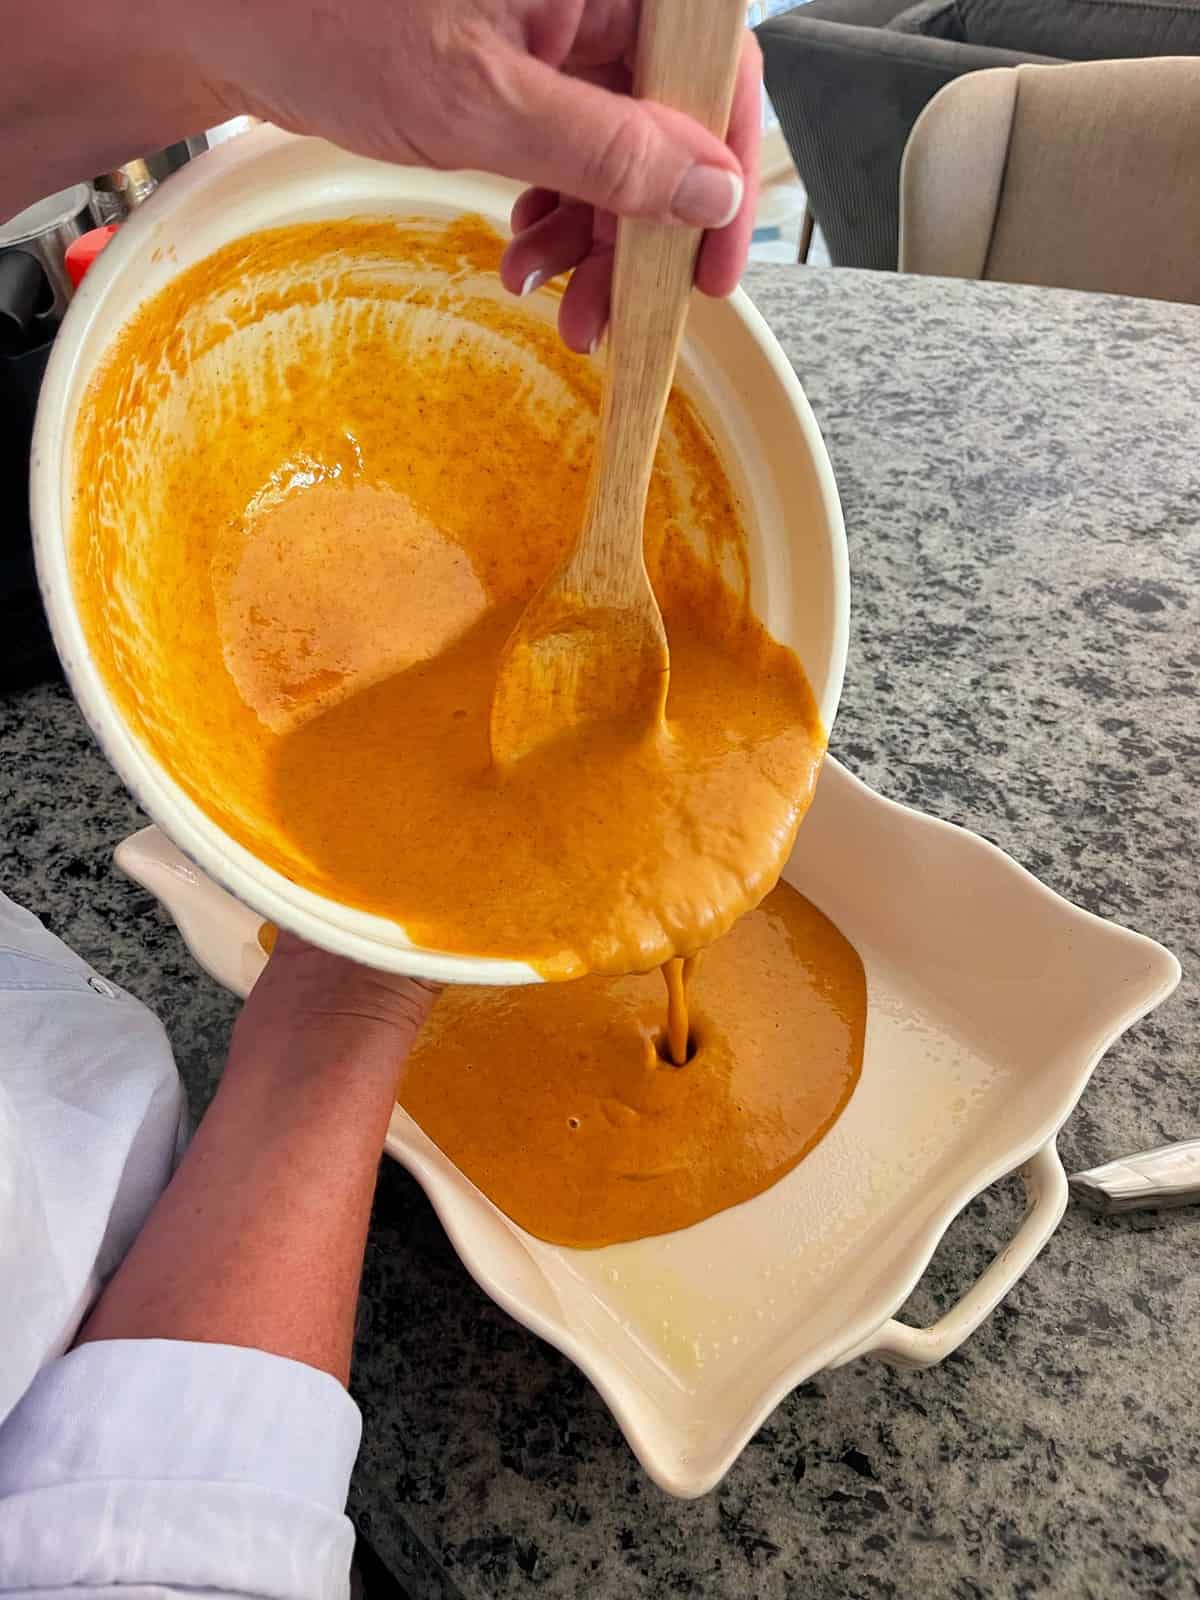
- Pour the batter into the prepared baking dish.
- Sprinkle dry cake mix evenly over the pumpkin layer, followed by your crushed graham crackers. Use the whole box of dry cake mix and make sure you have a full layer of crushed graham crackers.
- Cover the whole cake with sliced butter pieces.
- Bake in the preheated oven for 45-50 minutes until the center is set and the edges are lightly browned.
- Serve warm or at room temperature. I prefer it at room temperature as it sets more and serves easier.
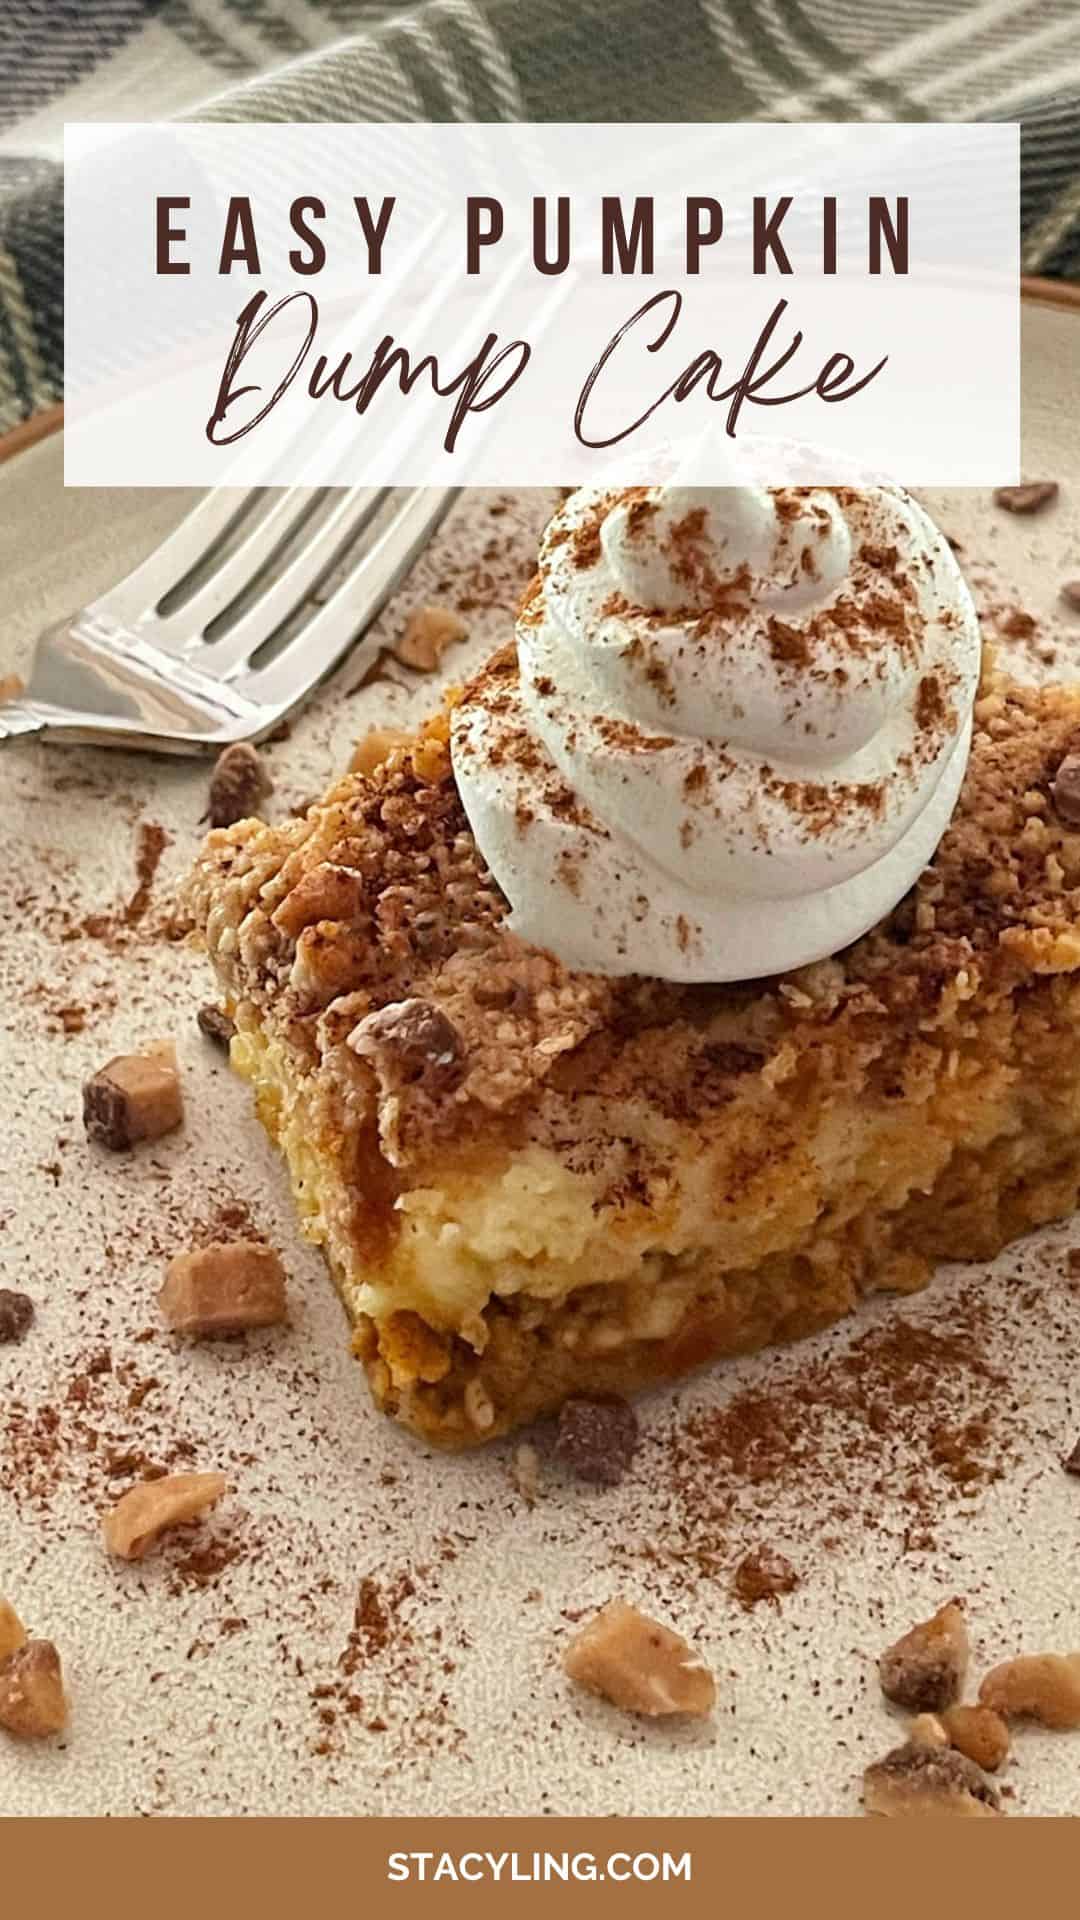
This cake is like a slice of heaven with a scoop of vanilla ice cream, whipped cream, caramel sauce, and toffee bits.


Storing Your Pumpkin Dump Cake Recipe
- Room Temperature: 1-2 days (covered)
- Refrigerate: Store leftover cake in an airtight container in the refrigerator for 3 days.
- Freeze: You can also freeze individual slices or the entire cake for up to 2 months but wrapped tightly. Thaw overnight in the refrigerator before serving.

Pumpkin Dump Cake Recipe Variations
While the classic pumpkin dump cake is a perfect fall dessert, it’s also incredibly versatile. Don’t be afraid to get creative with these simple variations to put your own spin on the recipe!
1. Cake Mix Variations
- Spice Cake: Swap the yellow cake mix for a spice cake mix to double down on those warm fall flavors of cinnamon, nutmeg, and cloves.
- Gingerbread Cake: For a holiday-themed twist, use a gingerbread cake mix. The molasses and ginger will add a delicious warmth that pairs wonderfully with the pumpkin.
- Butter Pecan: A butter pecan cake mix will add a nutty flavor and a buttery richness that makes the crust even more decadent.
2. Delicious Add-Ins
- Chocolate Chips: Sprinkle 1 cup of chocolate chips over the pumpkin filling before adding the cake mix for a decadent pumpkin and chocolate dessert.
- Toasted Nuts: For extra crunch and flavor, sprinkle 1/2 cup of chopped pecans or walnuts over the top of the cake mix before pouring the butter.
- Dried Cranberries: Add 1/2 cup of dried cranberries to the pumpkin layer for a tart contrast to the sweetness of the cake.
3. Simple Topping Ideas
- Caramel Drizzle: After the cake has cooled slightly, drizzle it with a store-bought or homemade caramel sauce.
- Powdered Sugar: For an easy and beautiful finish, use a sieve to dust the cooled cake with powdered sugar just before serving.
- Cream Cheese Frosting: For the ultimate indulgent treat, top the cooled cake with a simple cream cheese frosting.
4. Elevated Serving Suggestions
- A La Mode: Serve warm slices of the dump cake with a scoop of vanilla bean ice cream. The cold, creamy ice cream melting into the warm cake is pure heaven.
- Whipped Cream: A dollop of fresh whipped cream or a generous spoonful of cool whip is a perfect, light topping that balances the richness of the cake.
- Cinnamon Sugar: For a simple yet effective finish, sprinkle a mixture of cinnamon and sugar over the warm cake.

Storing Your Pumpkin Dump Cake Recipe
Properly storing your pumpkin dump cake is key to keeping it moist and delicious for days to come. Because of the ingredients, it’s important to refrigerate this dessert.
Refrigeration
- Cool Completely: Allow the dump cake to cool completely to room temperature before storing. This prevents condensation from forming, which can make the cake soggy.
- Airtight Container: Transfer the cake to an airtight container. If you’re keeping it in the pan, cover it tightly with plastic wrap or aluminum foil.
- Time: The cake will stay fresh in the refrigerator for up to 3-5 days.
Freezing
- Cool and Wrap: Make sure the cake is completely cooled. Cut it into individual slices or leave it whole. Wrap it tightly in a layer of plastic wrap, followed by a layer of aluminum foil.
- Freezer-Safe Container: Place the wrapped cake in a freezer-safe bag or container to protect it from freezer burn.
- Time: It can be stored in the freezer for up to 2-3 months. Thaw it overnight in the refrigerator before serving.
Reheating
To enjoy the cake warm again, you can heat individual slices in the microwave for 20-30 seconds, or place the entire cake in an oven at 300°F (150°C) for about 10-15 minutes, until heated through.
Make-Ahead Prep for Thanksgiving Dinner
This pumpkin dump cake is the perfect Thanksgiving dessert, not just because it’s so delicious, but because you can easily make it ahead of time. This saves you valuable oven space and lets you focus on the main meal, while the flavors of the cake get even better as they meld together.
Up to 2-3 Days Ahead
- Bake the Entire Cake: Follow the recipe exactly as written. Once it’s finished baking, allow it to cool completely on a wire rack. It is crucial that the cake is at room temperature before you store it.
- Cover and Refrigerate: Once cool, cover the baking dish tightly with a lid, plastic wrap, or aluminum foil. Store the covered cake in the refrigerator for up to 3 days.
On Thanksgiving Day
- Bring to Room Temperature: About 30-45 minutes before you plan to serve, take the cake out of the refrigerator to allow it to come to room temperature.
- Warm It Up (Optional): If you prefer to serve the dump cake warm, you can place the covered dish in a preheated oven at 300°F (150°C) for about 10-15 minutes.
- Add Toppings: Wait until just before serving to add any toppings, such as fresh whipped cream, a scoop of vanilla ice cream, or a dusting of cinnamon. This ensures they are fresh and won’t get soggy.
Making Your Own Pumpkin Puree (Optional)
While canned pumpkin puree is convenient, making your own allows you to control the flavor and sweetness. Plus, it’s a great way to use up leftover pumpkins from your garden or the farmer’s market.
Why Make Your Own Pumpkin Puree?
- Fresher flavor
- Control over sweetness
- Use up leftover pumpkins
Best Pumpkins for Baking
Sugar or pie pumpkins are the best types of pumpkin to use for baking and making pumpkin puree. These pumpkins are specifically cultivated for their sweet, tender flesh and are ideal for creating delicious pumpkin-based dishes.
While sugar and pie pumpkins are top choices, there are other pumpkin varieties and squash types that can also work well for baking if sugar pumpkins are not available. Varieties like Cinderella, Jarrahdale, and Orange Smoothie can be used as alternatives, as they have similar attributes in terms of flavor and texture.

Ingredients for Homemade Pumpkin Puree
- 1 sugar pumpkin (also called pie pumpkin)
Step-by-Step Instructions for Pumpkin Puree
While you can easily make this recipe using store-bought pumpkin puree, if you are growing your own pumpkins, it’s pretty easy to make your own!
- Preheat oven to 375°F (190°C)
- Wash pumpkins thoroughly to remove any dirt.
- Using a sharp knife, carefully cut off the top stem portion of each pumpkin, then cut the pumpkins in half from top to bottom.
- Scoop out the pulp and seeds. Save seeds if you want to roast them or use them for planting next year.
- Place the cleaned pumpkin halves, cut side down, on a baking sheet lined with aluminum foil or parchment paper.
- Bake for about 45 minutes to 1 hour, or until the pumpkin flesh is fork-tender. The exact time may vary depending on the size and type of pumpkin.
- Remove from the oven and allow the pumpkins to cool until you can handle them comfortably.
- Using a spoon, scrape the cooked pumpkin flesh away from the skin. It should come away easily and be quite soft.
- Transfer the pumpkin flesh to a blender or food processor. Blend until smooth and creamy. If the puree seems a little thick, add a small amount of water to thin it out.
You can use your homemade pumpkin puree immediately in recipes or store it for later use. For tips on harvesting and storing your pumpkins before you make homemade puree, read this article from the Penn State Cooperative Extension.
Cooking Tip: Choose small to medium-sized pumpkins that are specifically meant for cooking, such as sugar pumpkins or pie pumpkins. These varieties have sweeter and smoother flesh compared to carving pumpkins.
Storing Leftover Pumpkin Puree
- Refrigerate: Store leftover pumpkin puree in an airtight container in the refrigerator for up to 5 days.
- Freeze: For longer storage, freeze the puree in an airtight container or freezer-safe bag for up to 3 months.
Now you have homemade pumpkin puree ready to use in your favorite pumpkin recipes, whether it’s pumpkin pie, pumpkin soup, or this delicious pumpkin dump cake!

Pumpkin Dump Cake Recipe FAQs
Why does pumpkin dump cake work?
The magic happens as it bakes! The fruit filling heats up while the butter melts. The dry cake mix absorbs moisture from both, creating a cakey top, a gooey fruit layer, and a buttery crust.
What is the biggest mistake to avoid when making a dump cake?
Don’t mix the layers! This is crucial for achieving the desired textures: a crusty top, gooey interior, and buttery bottom.
Why is my pumpkin dump cake still powdery?
This usually happens due to uneven ingredient distribution, dry cake mix clumps, or inadequate butter coverage. To fix it, add a bit more butter to the powdery areas and bake for a few more minutes.
Is pumpkin dump cake supposed to be gooey?
Yes, dump cakes are generally gooey. However, pumpkin dump cake is less gooey than other types, with a more custard-like bottom layer and a cakey top. This allows it to evenly distribute throughout the cake mix layer and it’s just easier with less of a mess.

More About This Mouthwatering Pumpkin Dump Cake Recipe
This pumpkin dump cake recipe is my go-to dessert during fall, not just because it’s incredibly delicious, but because it’s so darn easy to whip up!!! I can throw it together in minutes, even on the busiest days, and it’s always a huge hit at gatherings.
My friends and family rave about it, and I love seeing their faces light up when I bring it along. It’s the perfect combination of warm, comforting flavors and effortless preparation, making it a true fall staple in our home.
Have you ever had a pumpkin dump cake recipe before? Would you try making this recipe? I would love to know more in the comments below.
Thank you so much for following along.
Enjoy a beautiful day! xo

The Easiest Pumpkin Dump Cake You’ll Ever Make
Equipment
Ingredients
- 15 Ounce Pumpkin Puree can, or 1 3/4 Cup Homemade Pumpkin Puree
- 12 Ounce Evaporated Milk
- 3 Large Eggs
- 1 Cup Light Brown Sugar
- 3 Teaspoon Pumpkin Pie Spice
- 1 Box Yellow Cake Mix
- 2 Sticks Butter salted, sliced
- 1 Cup Graham Crackers coursely chopped
- ½ Cup Toffee Bits for Garnish
- 1 Tablespoon Caramel Syrup for Garnish
- 1 Scoop Vanilla Ice Cream
Instructions
- Preheat oven to 350°F. Coat a 9×12-inch baking dish with nonstick spray and set aside.
- Combine the pumpkin puree, evaporated milk, eggs, sugar, and pumpkin pie spice in a large mixing bowl. Stir to combine and pour into your prepared dish.

- Sprinkle a whole box of dry cake mix evenly over the pumpkin layer, followed by your crushed graham crackers.
- Spread sliced butter pieces all over the cake mix making sure to cover as much of the dry mix as possible.
- Bake in the preheated oven for 45-50 minutes until the center is set and the edges are lightly browned.
- Serve warm or at room temperature. Top with ice cream, caramel sauce and toffee bits.


Nutrition


Get My FREE Thanksgiving Essentials Ebook
Getting ready for Thanksgiving or Friendsgiving? CLICK HERE to get my free 25-page downloadable Thanksgiving Essentials Ebook that shares decorating ideas, hosting tips, recipes, and ways guests can support hosts.

More Fall Recipes You Might Enjoy
Looking for more quick and easy recipe ideas for fall? Wait until you try these flavorful dishes.
- The Best Pumpkin Spice Cocktail
- Creamy Pumpkin Soup Recipe
- The Best Recipe for Pasta Fagioli Soup
- How to Make Sunday Sauce with Meatballs
- How to Make Meatballs in the Oven Recipe
- Best Homemade Chicken Soup Recipe
- Easy Corn Chowder Recipe
- Creamy Balsamic Tomato Soup Recipe


How do you know when “the center is set” and when it’s ready to be taken out? Tried this for the max time suggested and it still seemed undercooked.
Did you try sticking a toothpick in or knife to see if anything comes off on it? Every oven is different so cooking times may vary.
I don’t usually bring a dessert to a gathering without testing it first. But I did for this cake and I’m sorry I did, as I only got to eat one slice! It was literally gone in 20 minutes…pan empty! Now I’m baking one just for us 😉 TY for this delicious recipe.
I AM SO GLAD YOU LOVE IT!!! Isnt it good? Same here – it goes! Thank you Sharyn!!!!!
I made this recipe and my family said that it was the best cake ever! A huge hit! Thank you!
Mary Ellen I am so glad you tried it!!! So easy and so good! Thank you so much for trying it and letting me know! I appreciate it! Enjoy your weekend!
So unhealthy!!
Thanks for dropping by! LOL!
Really good! I will make it again. But I may add more pumpkin pie spice, just to amp that particular layer up. I really love the addition of graham cracker crumbs – it takes it over-the-top good!!
You can never have too much pumpking spice Carrie!!! Thank you so much for trying it out and letting me know what you think! Happy Fall!