The Lazy Person’s Guide to Spider Plant Care

Spider plants (Chlorophytum Comosum) are practically impossible to kill! This foolproof guide shares everything you need to know for vibrant growth, how to avoid brown tips, and ways to keep your spiderettes thriving. Follow these tips for spider plant care.
Spider plants are one of the most popular houseplants, and for good reason! They are incredibly easy to grow, making them a perfect no-fail option even if you don’t have a green thumb. These resilient plants can handle a variety of conditions, help clean the air we breathe, and propagate so readily you can easily expand your collection or share them as gifts.
Hi, I’m Stacy Ling, a trained Master Gardener here in New Jersey. My own spider plant is over 15 years old and has given me countless new plants that I now have all over my home. I love sharing beginner-friendly tips, and I highly recommend this plant if you’re new to indoor gardening or think you kill everything.
Want to learn more? Wait until you see how simple spider plant care truly is.
If you are just starting out with houseplants, please check out my houseplant care basics guide here.
(Posts on stacyling.com may contain affiliate links. Click HERE for full disclosure.)

Spider Plant Care at a Glance
For those who want a quick overview, here are the basic care requirements for a happy and healthy spider plant.
About Spider Plants
Spider Plants (Chlorophytum Comosum) are popular, easy-to-grow, and low-maintenance indoor plants. It is named for its long, spider-like leaves that grow from the plant’s center. Mature spider plants produce small white or yellow flowers on long stems and offsets (baby spider plants) that can be rooted to create new spider plants. I’ve actually only seen mine bloom a few times in the span that I’ve been growing it.
Spider plants are well-known for its air-purifying properties because it absorbs chemicals including formaldehyde, xylene, benzene, and carbon monoxide.
They are also non-toxic to dogs and cats making them a great addition in a pet-friendly home. I think it’s a great starter plant to have around pets because it looks fairly entertaining and you can try to train them to leave your houseplants alone.
Benefits of Growing Spider Plants
If you are interested in expanding your houseplant collection with more easy-care plants, look no further than the spider plant. Here are 5 reasons you should grow them.
- Air-Purifying: As mentioned above, they can improve indoor air quality.
- Low Maintenance: These hardy plants are easy to care for, making them perfect for beginners or those with busy schedules.
- Versatile: Spider plants can be grown in various ways, including in pots, hanging baskets, or as outdoor ground cover in suitable climates.
- Easy to Propagate: They produce “baby” offshoots that can be easily rooted to create new plants for free, making them a budget-friendly way to expand your collection or share with others.
- Attractive: With their long, arching leaves, variegated foliage, and occasional small white flowers, spider plants add lush aesthetic to any space.

How to Grow Spider Plant
While spider plant care is relatively simple to do, here are some tips to keep in mind so you grow a healthy spider plant for years to come.
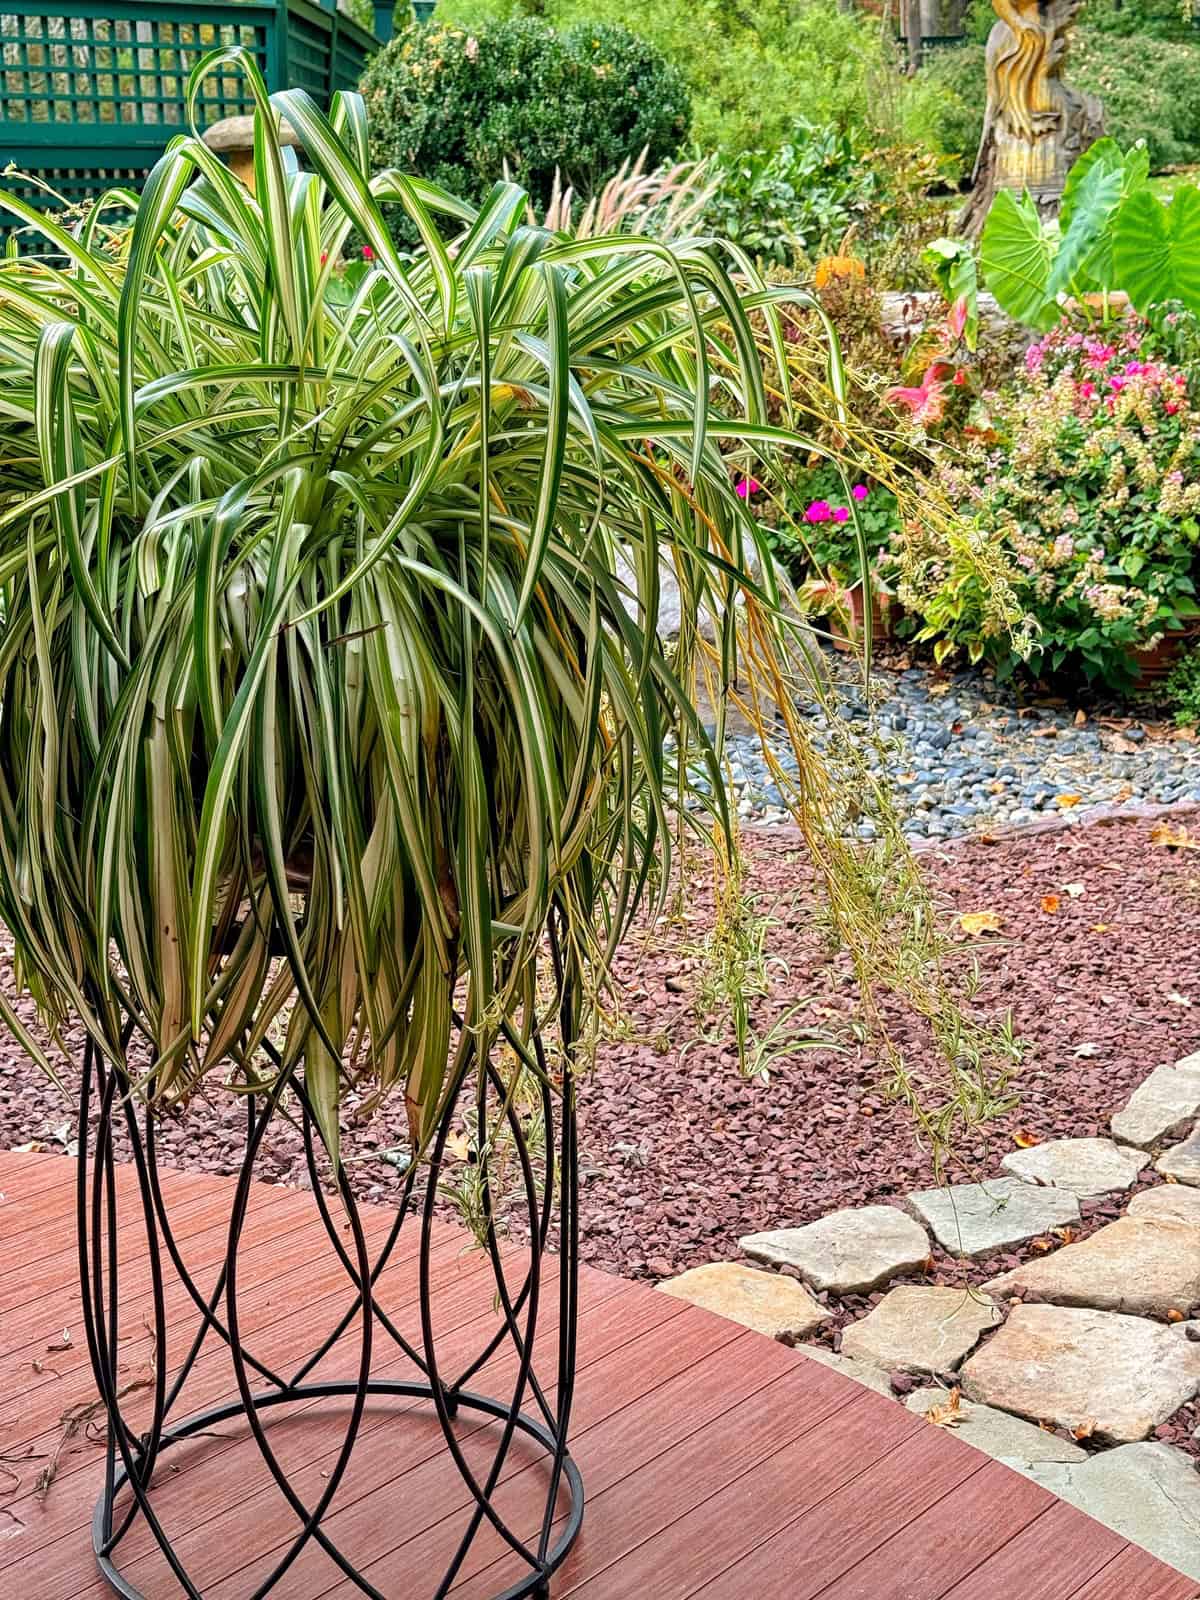
The foliage is really long and elegant. A mature plant might grow 36″ tall and 20″ wide (including the container) so give them room to grow indoors. I recommend using a plant stand or hang them with macrame pot holders because of the foliage length. This will allow space for those beautiful spiderettes to grow.
It’s a moderate to fast-growing indoor plant depending on the growing conditions. I bring mine outdoors to summer in New Jersey every season and it puts on the most growth during its summer vacation.

Light Requirements for Spider Plants
Spider Plants are adaptable but thrive in medium to bright, indirect sunlight. Avoid intense, direct sun, which can scorch the leaves.
Ideal Placement:
- A few feet from a sunny window (south or west-facing).
- Directly in an east-facing window.
- A sheer curtain can filter intense light from south or west-facing windows.
As a plant enthusiast, I’ve successfully grown spider plants in a variety of conditions, even in the sometimes-challenging climate of New Jersey, where we experience a wide range of seasons and temperatures.
- Like many owners, I move my plants outdoors for a summer vacation after all danger of frost has passed, where they put on a lot of healthy new growth.
- I’ve grown them for years in front of south-facing windows—you just need to make sure the window isn’t so hot that it scorches the foliage.
- My current plants are doing well in a north-side sunroom with large windows on three sides, and they look great even during winter dormancy.
From my experience growing them, I recommend testing it out in your home to see where they do best.

Temperature Needs
Spider plants prefer temperatures between 60-75°F (15-24°C), and can tolerate lower temperatures but not below 50°F (10°C). This is important to know in case you bring your plants outdoors for summer vacation. I start bringing my houseplants back inside when the temperatures start to dip below 60 degrees overnight.
Humidity
Spider plants prefer moderate humidity but can adapt to a range of conditions. During winter months when humidity is low, you can bump it up using a humidifier or grouping several houseplants together to create a more humid microclimate.

Soil
Use well-draining potting soil and ensure adequate drainage by using a container with a drainage hole. I like to use a homemade mix of organic potting soil, orchid bark, and perlite for a mix that drains well. If you prefer not to mix your own, there are pre-made chunky soil mixes like this that you can use instead.
Water
Don’t water on a strict schedule. Before watering, check 1-2″ down into the soil. If it’s dry, it’s time to water. To determine whether the soil is dry you can either use your finger, a plastic knife, popsicle stick, or a moisture meter like this one. When you water, make sure it flows freely from the drainage hole.
It’s important to let them dry out between waterings too so the soil doesn’t become waterlogged. When spider plants are overwatered, they are more susceptible to pest and disease problems, so instead of watering on the same day every week, check the soil before watering.
Watering Tip: Spider plants can be sensitive to fluoride and chlorine often found in tap water, which can contribute to brown tips. For best results, consider using distilled water, rainwater, or allowing your tap water to sit out overnight before using.

Fertilizer
It is generally recommended to fertilize during the growing season (spring and summer) with a balanced, slow-release fertilizer like this. It is a set-and-forget approach to fertilizing that makes it much easier to feed them. And then stop fertilizing in the fall and allow the plant to go dormant during the winter months.
Over-fertilizing spider plants may decrease the number of spiderettes. And too much fertilizer may cause the foliage tips to brown.
While this has been my approach for most of my gardening life, this year I decided to do things differently. I started using this organic liquid fertilizer all year round every time that I water my plants. As a result, they have been rewarding me with lots of healthy foliage all year round. They still slow their growth rate down in the winter as they go dormant, but they don’t look nearly as sad as when not feeding them at all.

Troubleshooting Common Spider Plant Problems
Even though spider plants are famously easy-going, you might encounter a few issues from time to time. Don’t worry! This is usually your plant’s way of telling you it needs a small adjustment. Here’s how to diagnose and fix the most common problems.
Problem: The Leaf Tips are Brown and Crispy
This is by far the most frequent issue spider plant owners face. It’s rarely a sign of a serious problem and is usually easy to fix once you identify the cause. Ask yourself these questions:
Is the soil bone dry? This can be a simple sign of underwatering.
- The Fix: Water your plant thoroughly until it runs from the drainage holes. Try to maintain a more consistent watering schedule, not allowing the soil to dry out completely for long periods.
Is the air in your home very dry? Low humidity is a primary cause of brown tips, especially in winter.
- The Fix: Mist the leaves with water every few days, group it with other plants, or place its pot on a tray filled with pebbles and a little water to increase local humidity.
Are you using unfiltered tap water? Spider plants are sensitive to the fluoride, chlorine, and other minerals often found in municipal water.
- The Fix: Switch to distilled water, rainwater, or simply allow your tap water to sit out uncovered for 24 hours before using. This allows some of the chemicals to dissipate.
Do you see a white crust on the soil? This can indicate a buildup of fertilizer salts in the soil.
- The Fix: Once every few months, “flush” the soil by placing the plant in a sink or shower and watering it thoroughly, letting the excess water drain completely away.
Pro Tip: You can snip off the brown tips with a pair of clean, sharp scissors for purely aesthetic reasons. This will not harm the plant.

Problem: The Leaves are Turning Yellow
Yellowing leaves are most often a sign of a watering issue. Here’s how to tell what’s wrong:
Does the soil feel soggy or constantly wet? The most likely culprit is overwatering, which can lead to root rot.
- The Fix: Immediately stop watering and allow the top 1-2 inches of soil to dry out before watering again. Always ensure your pot has excellent drainage. If the soil is heavily waterlogged, you may need to repot it into fresh, dry soil.
Is your plant in a very sunny spot? Too much direct, harsh sunlight can scorch the leaves, causing them to fade or turn yellow.
- The Fix: Move the plant to a spot where it receives bright, but indirect, light.
Problem: You See Tiny Bugs or Sticky Residue
While generally pest-resistant, spider plants can occasionally attract common houseplant pests like spider mites, mealybugs, or aphids.
- The Fix: The first step is to isolate your spider plant to prevent pests from spreading to your other houseplants. You can often handle a minor issue by simply wiping the leaves (top and bottom) with a damp cloth. For a more persistent infestation, treat the entire plant with a store-bought insecticidal soap or neem oil, making sure to follow the product’s instructions carefully.

When and How to Repot Your Spider Plant
Spider plants grow best and produce more spider babies when slightly pot-bound. Because they grow quickly and the roots can easily become too crowded, spider plants require frequent repotting.
And let me just say, repotting can feel like a big step, but it’s a positive sign of a healthy, growing plant! Over time, your spider plant’s roots will fill its container, and it will need more space to thrive and access fresh nutrients in new soil. The best time to repot is during the spring, at the start of the growing season.
Some recommend repotting every 2-3 years or as needed in a new container to provide adequate space for the roots to grow, but I almost never do that! I usually lift the plant out of it’s container and check the root ball to see how it’s going.
Spider Plant Care: How to Know When It’s Time to Repot
Your spider plant will give you a few clear signs that it’s ready for a new home. Look for one or more of these signals:
- Roots are growing out of the drainage holes. This is the most obvious sign that your plant is out of room!
- Growth has slowed or stopped. If it’s spring or summer and your plant isn’t producing new leaves or baby “spiderettes,” it may be root-bound.
- The plant needs water constantly. If you find that water runs straight through the pot instantly or the soil dries out very quickly, it’s likely because the pot contains more roots than soil.
- The root system is a dense mass. If you gently lift the plant from its pot, you’ll be able to see the root ball. If it’s a tightly wound mass of roots with very little visible soil, it’s definitely time to repot.
A Simple Step-by-Step Guide to Repotting
Once you’ve determined your plant is ready, follow these simple steps:
1. Choose the Right New Pot: Select a new container that is only 1-2 inches larger in diameter than the current one. It’s tempting to give it a huge new home, but a pot that’s too big can hold excess moisture and lead to root rot. Most importantly, ensure the new pot has drainage holes. I recommend planting in clear nursery pots like these so you can see root system health and soil moisture without ever disturbing your plant. Then drop it in whatever decorative container you wish!
2. Prepare Your Pot: Fill the bottom third of the new pot with a fresh, high-quality, well-draining potting mix.
3. Gently Remove the Plant: Tip the current pot on its side and gently slide the plant out. Try to avoid pulling it by its leaves. If it’s a bit stuck, you can tap the sides and bottom of the pot to help loosen it.
4. Inspect and Loosen the Roots: Take a look at the root ball. If it’s tightly wound, gently tease the bottom roots apart with your fingers. You don’t need to unravel the whole thing, but this will encourage the roots to grow outward into the new soil.
5. Position and Backfill: Place your spider plant in the center of the new pot. The top of the root ball should sit about an inch below the rim of the pot. Fill in the space around the root ball with more fresh potting soil, gently patting it down to eliminate air pockets.
6. Water Thoroughly: Give your newly repotted plant a good, deep drink of water. This helps settle the new soil and reduces the stress of transplant shock. Allow all the excess water to drain away.
Spider Plant Care: Propagation Methods
Spider plants are easy to propagate, and there are several methods you can use to expand your collection. If you are new to propagating plants, the spider plant is an easy one to get your feet wet on.
Propagation by Baby Plants
Spider plants produce small plantlets called spiderettes which can be easily propagated by potting them up and giving them time to root. And to me, this is the easiest way to propagate spider plants. I’ve propagated several spider plants this way, and it couldn’t be easier to do.
Baby Spider Plant Propagation Directions
Here’s what you need to do.
- Look for offsets, or small spider plant babies, growing from mature plants and gently remove them with a sharp, clean knife or scissors.
- Fill a small pot with well-draining soil and plant the offset, making sure to cover the roots and the cut end.
- Water the offset thoroughly and place it in a bright, warm location, in indirect light.
- Water well but allow it to dry out between waterings.
In a few weeks, new growth should emerge and roots should establish. You’ll know the plant is rooted when you give a gentle tug and feel some resistance.

Propagation by Stolon Method
Set the mother plant next to a smaller container filled with well-draining potting soil. Find a baby spiderette and plant it in the adjacent smaller container until it roots. Maintain the moisture but don’t waterlog the baby plant. After the plant roots, cut the stem from the mother plant.
Spider Plant Propagation by Water
Similar to propagating the baby plants directly in the soil, you can also drop them in a mason jar of water until they root and plant them after. Baby plants can be grown in water for a while, but you’ll need to keep the water clean by changing it out once a week.

Water Propagation Method Directions
While there are a few different methods for propagating, growing a spider plant in water is another easy way to expand your spider plant collection. Propagating spider plants using the water method develops the plant roots first before planting them in soil.
Here’s how to do it.
- Fill a mason jar or vase with fresh clean water. But give it about an hour for the water to come to room temperature and dechlorinate before dropping your baby spider plant in.
- Cut a healthy and mature spider plant stem that has a spiderette with a pair of scissors or garden snips. Leave a few inches of the stolon.
- Drop the spiderette in the jar but don’t allow any leaves to sit in the water.
- Move the jar with your new spider plant to a location with indirect sunlight.
- Change the water when it gets murky and give it some time for roots to form. When you have a good grouping of roots, remove the new spider plant from the water.
- When the roots are about 2-3 inches long, you can transfer the spider plant to a pot with an indoor potting mix that is well-draining. Gently remove the stem from the water and plant it in well-drained soil, covering the roots completely.
- Water the soil and keep it in bright indirect sunlight.
Over time, the new spider plant will start to grow and produce new shoots and leaves within a few weeks.

Propagation by Division
This method involves dividing the mother plant into several smaller plants. Carefully remove the plant from its pot and gently separate the roots into smaller sections, making sure each section has some leaves and roots. Repot the divided sections into their own pots with fresh potting soil that is well draining and water regularly.
Because other propagation methods are much easier and less messy, I suggest only doing it this way when you are repotting the plant and making a mess anyway.

More on Growing Houseplants Indoors
The spider plant is one of those plants that quietly multiplies until it’s woven into every corner of your home — and that’s exactly the kind of living, growing relationship with plants that my new book Filling Your Home with Life celebrates. If you’re ready to go further with your indoor garden, grab your copy here.
Final Thoughts on Growing Spider Plants
Spider plants really are the gift that keeps on giving. After growing them for years, I can confidently say they are one of the most forgiving houseplants you can own. Whether they’re in a bright room or a lower light corner, they adapt easily and continue to produce those signature baby spiderettes with very little effort.
I’ve shared more spider plant babies than I can count over the years, and it never gets old. It’s one of the easiest ways to grow your collection or pass plants along to friends and family, which makes indoor gardening feel even more rewarding.
If you’re new to houseplants or just want something reliable, this is one of the first plants I recommend starting with. And if you want to build on that success, my houseplant care guide walks through the basics of light, watering, and soil so you can keep all your indoor plants thriving, not just your spider plants.
Between their easy care, fast growth, and ability to bounce back from the occasional mistake, spider plants are a great reminder that growing houseplants doesn’t have to be complicated to be successful.
Have you grown a spider plant before? And if not, will you try growing one now? Tell me about it in the comments below. Let’s talk about it!
For more information about growing spider plants, read this article from the University of Wisconsin Cooperative Extension.
Happy Gardening!
Thank you so much for following along.
Enjoy a beautiful day! xo
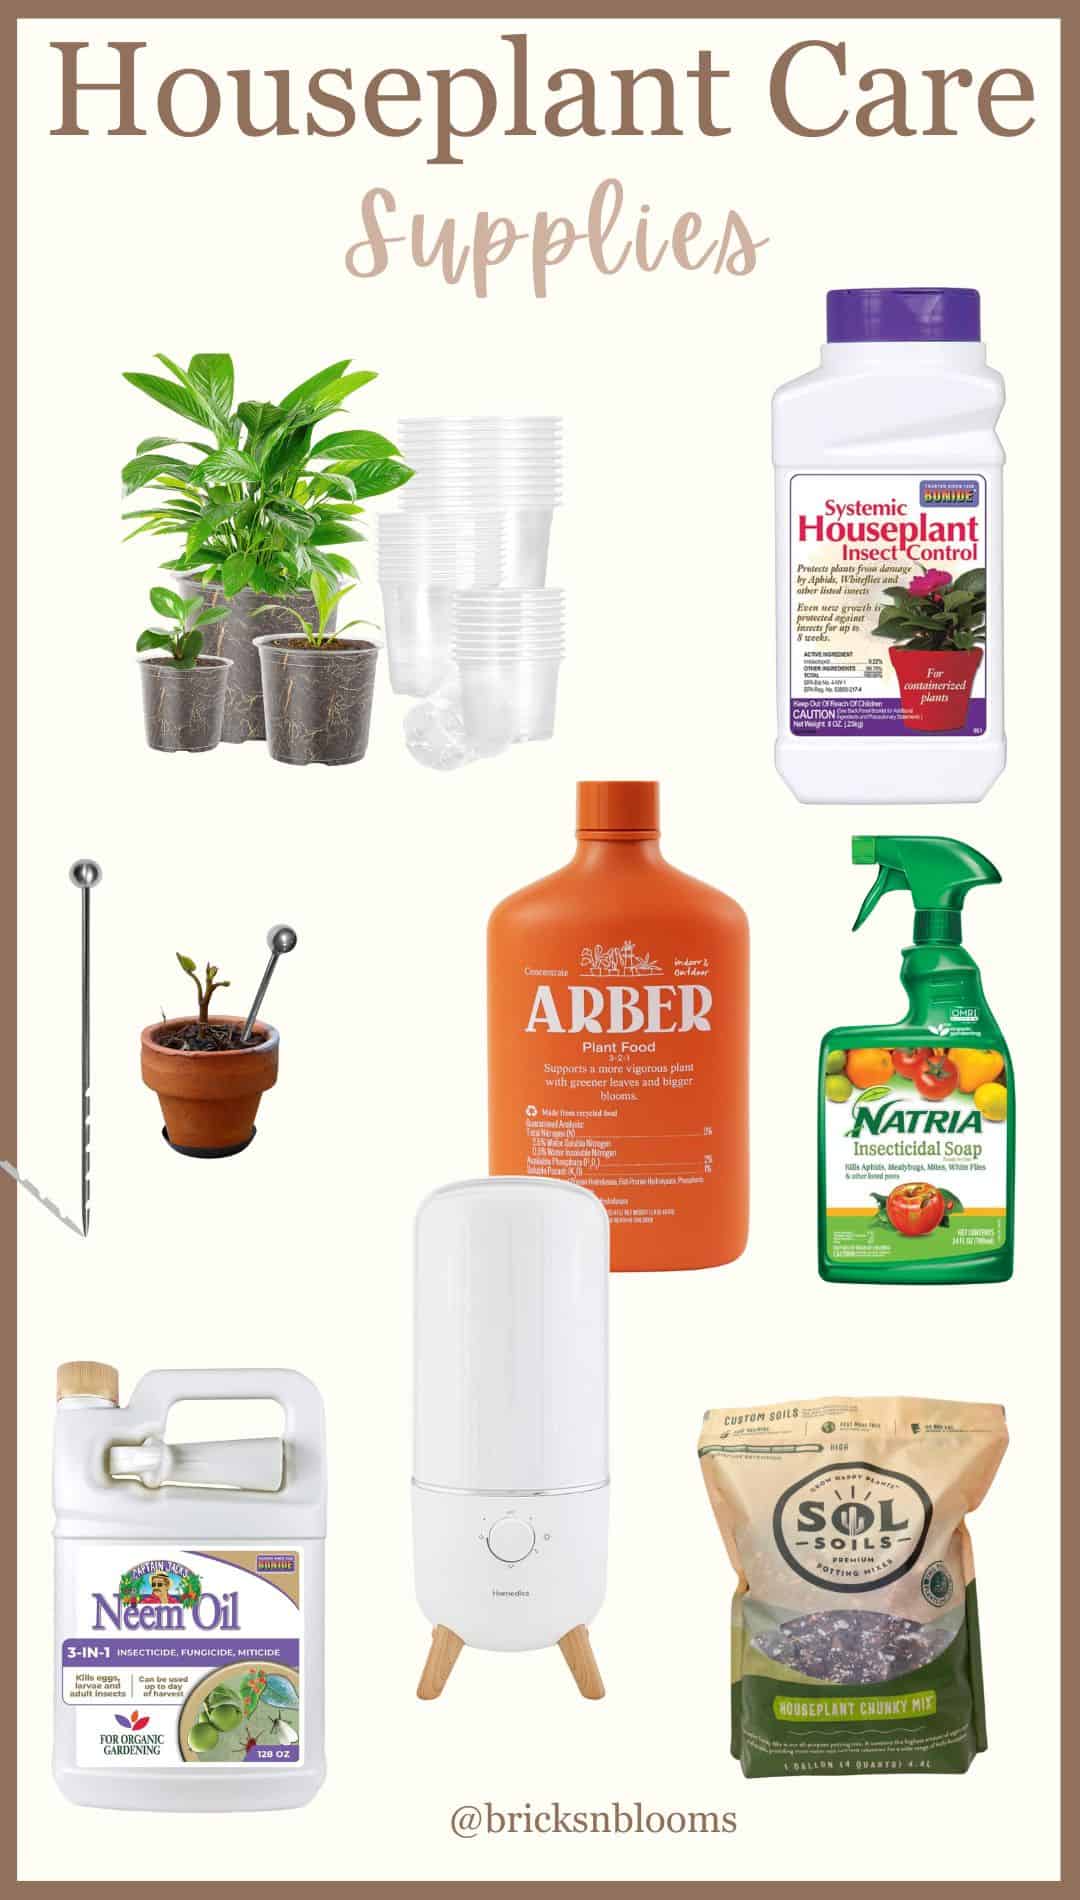
Shop the Post
Snag the supplies I regularly use on all my houseplants here

More Houseplant Care Tips and Tricks
- 7 Simple Ways to Keep Your Houseplants Alive
- How to Revive Plants to Save Them
- How to Style Your Houseplants
- Monstera Plants and Why You Should Grow One
- Pilea Plant Care
- Snake Plant Care
- Propagating Pothos Plant
- 7 Easy Indoor Gardening Ideas for Beginners
- What You Need to Know About Easy Care Houseplants that Purify the Air
- The Secret to Keeping Houseplants Alive
- How to Propagate Pothos Plant
- Have a Green Thumb With These Indoor Gardening Ideas
- Christmas Cactus Care
- Dividing an Aloe Plant
- Amaryllis Care
I’ve always loved spider plants and had them in the house growing up. I may get brave enough to get one of my own someday. Thanks for all the great plant care tips.
They are so fun to grow! I have a few now from that one plant. And I’ve had a spiderette sitting in water for about 9 months now. I really need to pot her up. LOL