Hosta Care Made Easy: A Complete Guide to Growing Hostas in Shade

Hosta care made easy! Learn how to grow healthy hostas in shade gardens, including planting, watering, pest control, and expert tips.
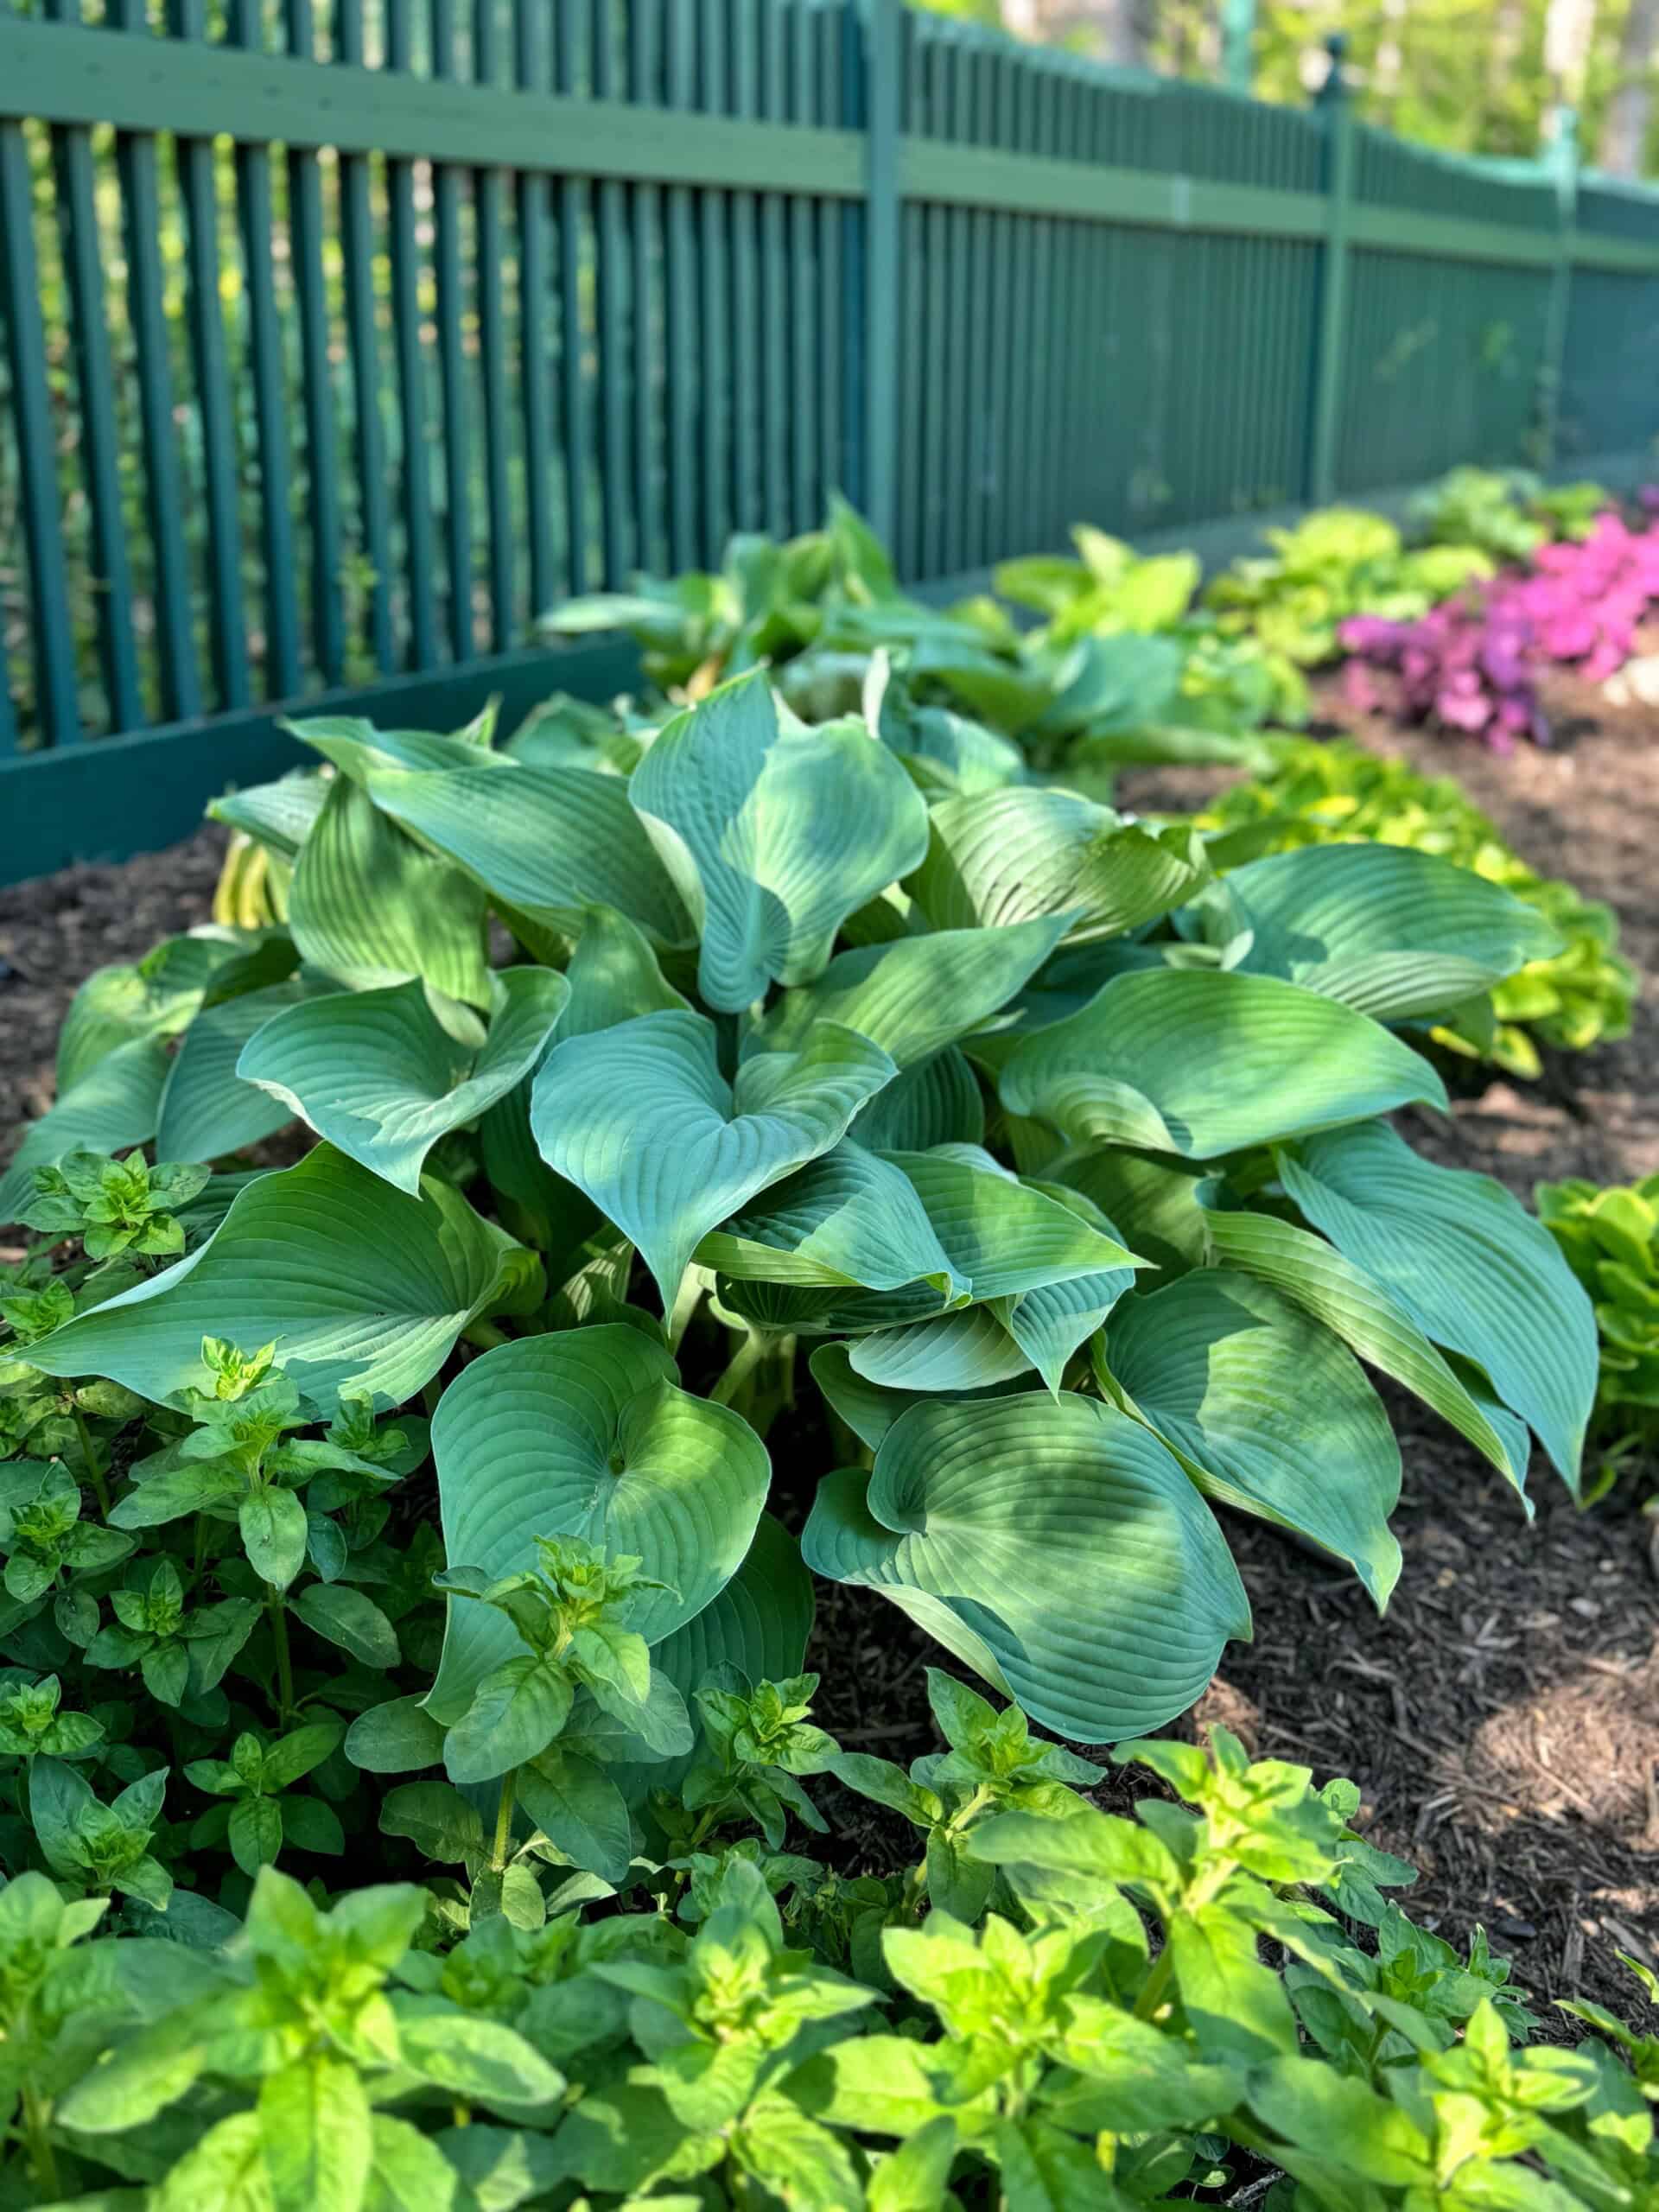
Hostas are hardy perennial plants prized for their lush foliage and ability to thrive in shade to partial shade. They grow best in moist, well-draining soil, benefit from regular watering during dry periods, and require minimal maintenance once established. With the right site selection and basic care, hostas are among the easiest plants to grow in shade gardens.
I’ve been growing hostas since I first started gardening nearly 30 years ago, in gardens with everything from limited shade to heavily shaded beds and persistent deer pressure. In my former garden, hostas required constant protection due to roaming deer and minimal fencing. In my current gardens, where I’ve been growing and expanding since 2021, I grow hostas both in protected, fenced spaces and in open areas where they’ll quickly be devoured if I don’t use deer repellent. Those different growing conditions have shaped how I care for hostas today and what I recommend to other gardeners.
In this complete guide to hosta care, you’ll learn how to grow healthy, vibrant hostas in shade gardens, from choosing the right location and preparing the soil to watering properly, managing pests, and dividing plants as they mature. I’ll also share practical tips from growing a wide range of hosta varieties, so you can enjoy lush foliage, beautiful texture, and reliable performance season after season — whether you’re new to hostas or refining an established shade garden.
(Posts on stacyling.com may contain affiliate links. Click HERE for full disclosure.)

Understanding Hostas: Plant Basics and Growing Conditions
Hostas (also known as plantain lilies) are popular perennial plants prized for their striking foliage and ability to thrive in shady areas. Hardy in USDA zones 3–9, hostas range in size from compact varieties to impressive giant cultivars. While they’re grown primarily for their foliage, plantain lilies also produce summer blooms that add seasonal interest to shade gardens.
Understanding the basic growing requirements of hostas makes caring for them much easier and helps ensure long-term success.
- Common Name: Hosta
- Plant Type: Perennial
- Hardiness Zone: 3-9
- Light: Partial to full shade
- Soil Requirements: Well-drained, rich, moist
- Height: 1-3 feet
- Width: 1-4 feet
- Flower Color: White, lavender, purple
- Foliage Color: Green, blue, variegated
- Bloom Time: Summer


Why Gardeners Love Growing Hostas
ostas are a favorite in shade gardens for good reason. Their combination of beauty, resilience, and ease of care makes them one of the most reliable perennials for low-light areas.
- Striking Foliage: Hostas offer an impressive range of leaf colors, textures, and and variegation that add structure and visual interest to shade gardens.
- Seasonal Blooms: Tubular flowers appear in summer and attract pollinators like bees and hummingbirds, adding subtle color and movement.
- Easy Care: Once established, hostas are hardy, low-maintenance plants that thrive with minimal attention.
- Long-Lasting Interest: Enjoy lush foliage from spring through fall, with summer blooms providing an extra layer of appeal.
- Wildlife-Friendly: While grown primarily for foliage, hostas support beneficial insects and provide shelter within the garden ecosystem.

Where Do Hostas Grow Best?
Low-maintenance hostas are shade-loving perennials native to wooded areas of East Asia, where they naturally grow in moist, fertile soil with filtered or dappled sunlight. Understanding their natural growing conditions makes it much easier to choose the right spot in your garden.
Hostas grow best when you provide the following conditions:
- Light: Plant hostas in partial to full shade. Direct sunlight, especially afternoon sun, can scorch their leaves. Filtered or dappled light under trees or near tall shrubs is ideal for most varieties.
- Soil: Hostas prefer moist, well-draining soil that is rich in organic matter. Slightly acidic to neutral soil (around pH 6.5–7.5) supports the healthiest growth.
- Garden Placement: Hostas are excellent underplantings for tree canopies and work beautifully in woodland gardens.
- Spacing: Give hostas plenty of room to grow. Over time, they form large clumps, so avoid overcrowding and space plants according to their mature size to promote good air circulation.

How to Plant Hostas
Planting hostas correctly from the start helps them establish quickly and grow vigorously.
- Choose the Right Location: Select a shaded or partially shaded area with dappled sunlight. Avoid locations with intense afternoon sun.
- Prepare the Soil: Amend the soil with compost or other organic matter to improve drainage and fertility.
- Spacing: Space hostas 1–3 feet apart, depending on the variety’s mature size.
- Planting Depth: Dig a hole twice as wide as the root ball and as deep as the root ball. Position the plant so the crown sits level with the soil surface.
- Watering: Water thoroughly after planting and keep the soil consistently moist (but not soggy) while plants establish.

When to Plant Hostas
The best time to plant hostas depends on your climate and growing conditions, but spring and fall are generally the ideal seasons. I’ve planted hostas at both times for decades, and each has its advantages.
Spring Planting
Spring is one of the easiest times to plant hostas, especially when the soil has thawed and can be worked. Planting early in the season — while hostas are still dormant — allows roots to establish before active growth begins. This often results in stronger plants during their first growing season.
Fall Planting (My Go-To)
Fall is an excellent time to plant hostas, and it’s often when I add the most to my gardens. Because I typically wait for nursery stock to go on sale, I’ve planted hostas and other perennials well into fall — sometimes as late as late October or even early November. As long as the ground hasn’t frozen and plants are given time to settle in, hostas establish beautifully. Cooler temperatures and consistent moisture actually reduce transplant stress.

Summer Planting Considerations
Hostas are not typically planted during the hottest part of summer, as high temperatures and intense sunlight can stress newly planted roots. While summer planting is possible, it requires extra care with watering and shading to prevent setbacks.
No matter when you plant, the key is to water thoroughly after planting and maintain consistent moisture while hostas establish. With proper timing and care, hostas are forgiving plants that adapt well and reward gardeners with lush foliage for years to come.

Hosta Plant Care Tips
Caring for hostas is straightforward once you understand what they need to thrive. Most hostas prefer well-drained soil rich in organic matter and grow best in shady to partially shaded locations. While many varieties tolerate gentle morning sun, too much direct sunlight, especially in the afternoon, can scorch their leaves and dull foliage color.
Watering Tips for Thriving Hostas
Hostas benefit from consistent moisture, especially during their first growing season and during dry periods. Newly planted hostas should be watered regularly until they are well established, but it’s important not to overwater. How often you water will depend on your climate, rainfall, and soil conditions.
Because I typically plant hostas in spring or fall, I often rely on natural rainfall during establishment. Cooler temperatures and seasonal rain usually provide enough moisture without extra effort. Once established, hostas are fairly drought-tolerant and usually only need deep watering once or twice a week, depending on weather conditions.
During periods of extreme heat or prolonged drought, supplemental watering may be necessary to keep plants healthy and prevent stress.
For more of my best watering practices, please visit: Watering Wisdom For Your Flower Garden

Fertilizing Hostas
Plantain lilies do not require regular fertilizing to thrive. In my gardens, I focus on building healthy soil rather than feeding plants with fertilizer. Each year, I amend beds with high-quality compost, leaf mold, and mulch, which provides all the nutrients hostas need.
The only time I fertilize hostas is when they are grown in containers, where nutrients are depleted more quickly than in garden beds.

Dividing Hostas
Dividing hostas is an easy way to propagate plants, rejuvenate mature clumps, and keep them growing vigorously. Hostas respond well to division and can be split in early spring, just as new growth begins, or in fall, as long as the ground can still be worked before it freezes.
From years of dividing hostas, I’ve found that timing divisions around rainfall makes the process much easier. Dividing after a good rain—or just before one is expected—helps soften the soil, reduces stress on the plant, and improves establishment of new divisions.
While hostas have some specific considerations, the basic process follows the same principles used for dividing many perennial plants. For a complete, step-by-step guide that applies to hostas and other perennials, you can follow my detailed tutorial here: How to Divide Perennials
Regular division helps prevent overcrowding, improves airflow, and gives you extra plants to expand your garden or share with friends.mily.
Cutting Back Hostas
Hostas can be cut back in fall after the first frost or in early spring before new growth appears. To tidy plants, remove yellowing or dead foliage and cut remaining leaves down to a few inches above the ground.
That said, I often leave hostas intact through winter. Old foliage can provide protection for overwintering insects, add winter interest to the garden, and help feed beneficial soil microbes as it breaks down naturally.
What happens if you don’t cut hostas back?
Nothing harmful. Hostas are tough, resilient plants and won’t suffer if foliage is left in place. I actually enjoy the soft, autumnal colors hostas add to the garden as they die back and settle into dormancy.
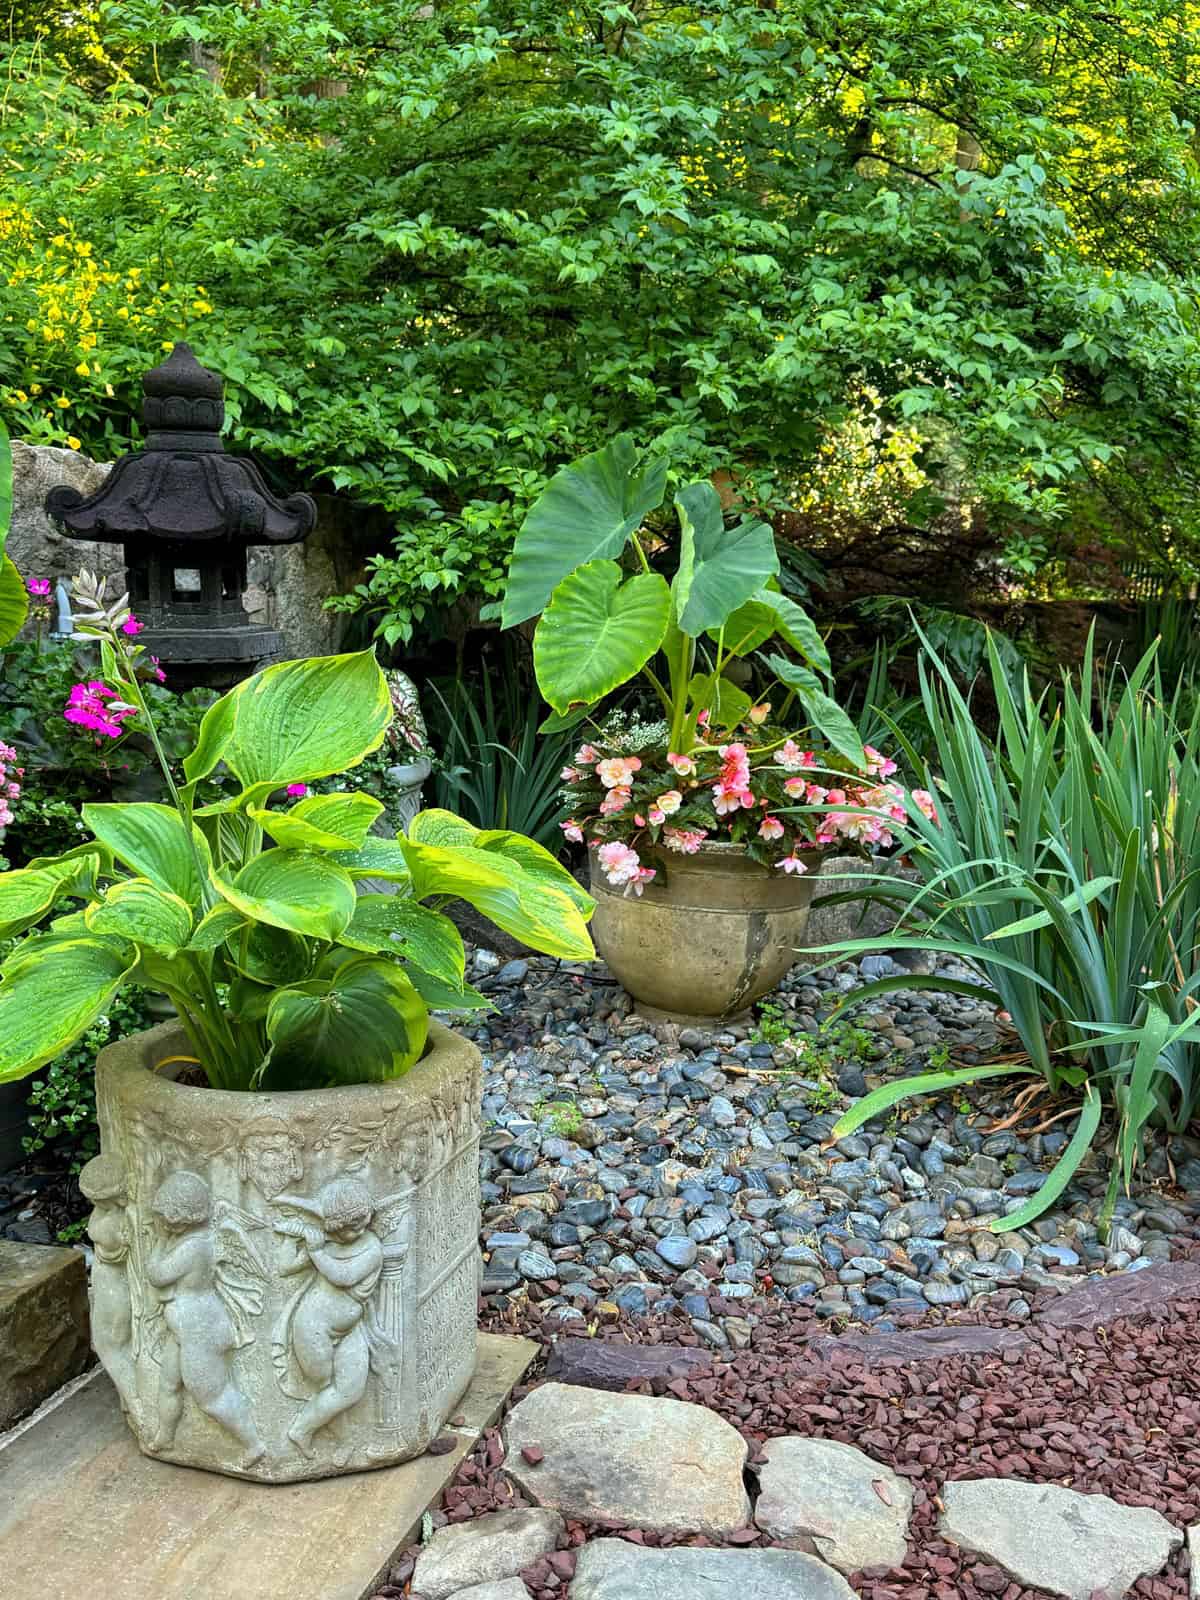
Growing Hostas in Pots
Hostas look beautiful in containers, with their graceful foliage spilling over the edges of pots. I especially love using them to soften patios, porches, and shaded seating areas. That said, if you want to grow hostas in containers for more than a year or two, they’ll need a little extra attention compared to those planted in the ground.
To keep container-grown hostas healthy long term, you’ll either need to plant them in the garden eventually or repot them with fresh potting soil. When repotting, gently remove as much old soil from the roots as possible before placing the plant into fresh mix. You can reuse the same container or move up one size to give roots more room.
In colder climates, overwintering hostas in pots requires some planning. I recommend choosing varieties that are hardy to at least two zones colder than your garden zone. For example, if you garden in Zone 6, look for hostas rated to Zone 4 to improve winter survival.
When growing hostas in containers, keep these basics in mind:
- Container Size: Choose a pot at least 12 inches wide and deep, depending on the mature size of the hosta. Always use containers with drainage holes to prevent waterlogged soil.
- Soil: Use a high-quality, well-draining potting mix. Plant one hosta per container for best growth.
- Light: Grow hostas in part shade to full shade. Rotate containers occasionally to ensure even light exposure if needed.
- Watering: Containers dry out faster than garden beds, so check soil moisture regularly. Allow the top inch of soil to dry slightly between watering, and avoid soggy soil. To make watering easier, I often place my containers on a drip irrigation system with a timer so it’s truly set-and-forget.
- Fertilizing: Fertilize hostas in pots in spring using a balanced, slow-release fertilizer, following package directions.
If you want a complete, step-by-step guide—including overwintering strategies and variety recommendations—you can find all the details here: How to Grow Hostas in Pots

Common Pests and Diseases That Affect Hostas
Hostas are generally resilient, but they can still face several pest and disease challenges. Deer pressure has been one of the biggest challenges I’ve faced growing hostas over the years, especially in unfenced areas, which has shaped how I protect and place them in my gardens.
Here are some common issues with hostas and how to address them:
- Slugs and Snails: These pests can cause significant damage by chewing holes in the leaves. Use iron phosphate-based slug pellets like these, set up beer traps, or create barriers with copper tape to deter them.
- Deer and Rabbits: These animals find hostas appetizing. Use deer repellents, fencing, or plant varieties that are less attractive to them. This deer repellent works well on both!
- Foliar Nematodes: These microscopic worms can cause yellow streaks on the leaves. Infected plants should be removed and destroyed to prevent the spread.
- Crown Rot: Often caused by poor drainage, this fungal disease leads to rotting at the plant’s base. Ensure proper soil drainage and avoid overwatering.
- Virus X: This virus causes mottled, twisted leaves. There is no cure, so infected plants must be removed and destroyed.

Deer and Rabbit Damage on Hostas
While some hosta varieties are considered more deer-resistant than others, hostas are generally a smorgasbord for deer. In areas with heavy deer populations, damage is often unavoidable without protection.
The good news is that hostas can still be grown successfully with the right strategy. I grow hostas in both fully fenced gardens and completely open spaces, and protection makes all the difference.
Ways to protect hostas from deer include:
- Physical barriers: Fencing or netting can be very effective, especially in high-pressure areas.
- Strategic planting: Using less-palatable plants around hostas can sometimes reduce browsing.
- Deer repellents:
I’ve had excellent results using Plantskydd, which is both topical and systemic, meaning it’s absorbed by the plant. I’ve also used Deer Out for several years with great success. For added protection, granular repellents like Deer Scram can be used as a perimeter barrier.
The key to repellents is timing. I begin spraying hostas as soon as they emerge from the ground so deer learn early that the plants are not palatable. I continue spraying a few times as the plants grow, then switch to maintenance applications once hostas reach mature size. Because Plantskydd is systemic, it typically requires fewer applications than topical sprays.
For more of best tips for protecting deer from wildlife, please visit: How to Deer Proof Your Garden and How to Keep Rabbits Out of Your Garden

Slug Damage on Hostas
Slugs are another common issue for hostas, but they’re generally easy to manage with consistent monitoring.
Here are several effective ways to protect hostas from slug damage:
- Organic slug bait: I use an organic slug bait to keep populations under control.
- Handpicking: Check plants at night with a flashlight and remove slugs by hand, dropping them into soapy water.
- Copper barriers: Copper tape or wire creates a barrier slugs won’t cross.
- Mulching deterrents: Crushed eggshells, diatomaceous earth, or coffee grounds can help discourage slugs.
- Encouraging predators: Birds, toads, and other natural predators help reduce slug populations when habitat is available.
Regular inspection is important. Catching slug damage early prevents holes from ruining otherwise beautiful foliage.

Favorite Hosta Varieties for Shade Gardens
With so many hosta varieties available, choosing the right ones can feel overwhelming. These are some of my favorite hostas that have performed well in my gardens and offer a range of sizes, colors, and textures for shade gardens.
- ‘Sum and Substance’
- ‘Frances Williams’
- ‘June’
- ‘Patriot’
- ‘Guacamole’
- ‘Halcyon’
- ‘Stained Glass’
- ‘First Frost’
- ‘Empress Wu’
- ‘Hadspen Blue’
- Proven Winners ‘Shadowland Diamond Lake’
- Proven Winners ‘Shadowland Echo the Sun’
- Proven Winners ‘Shadowland Voices in the Wind’
- Proven Winners ‘Shadowland Wheee!’

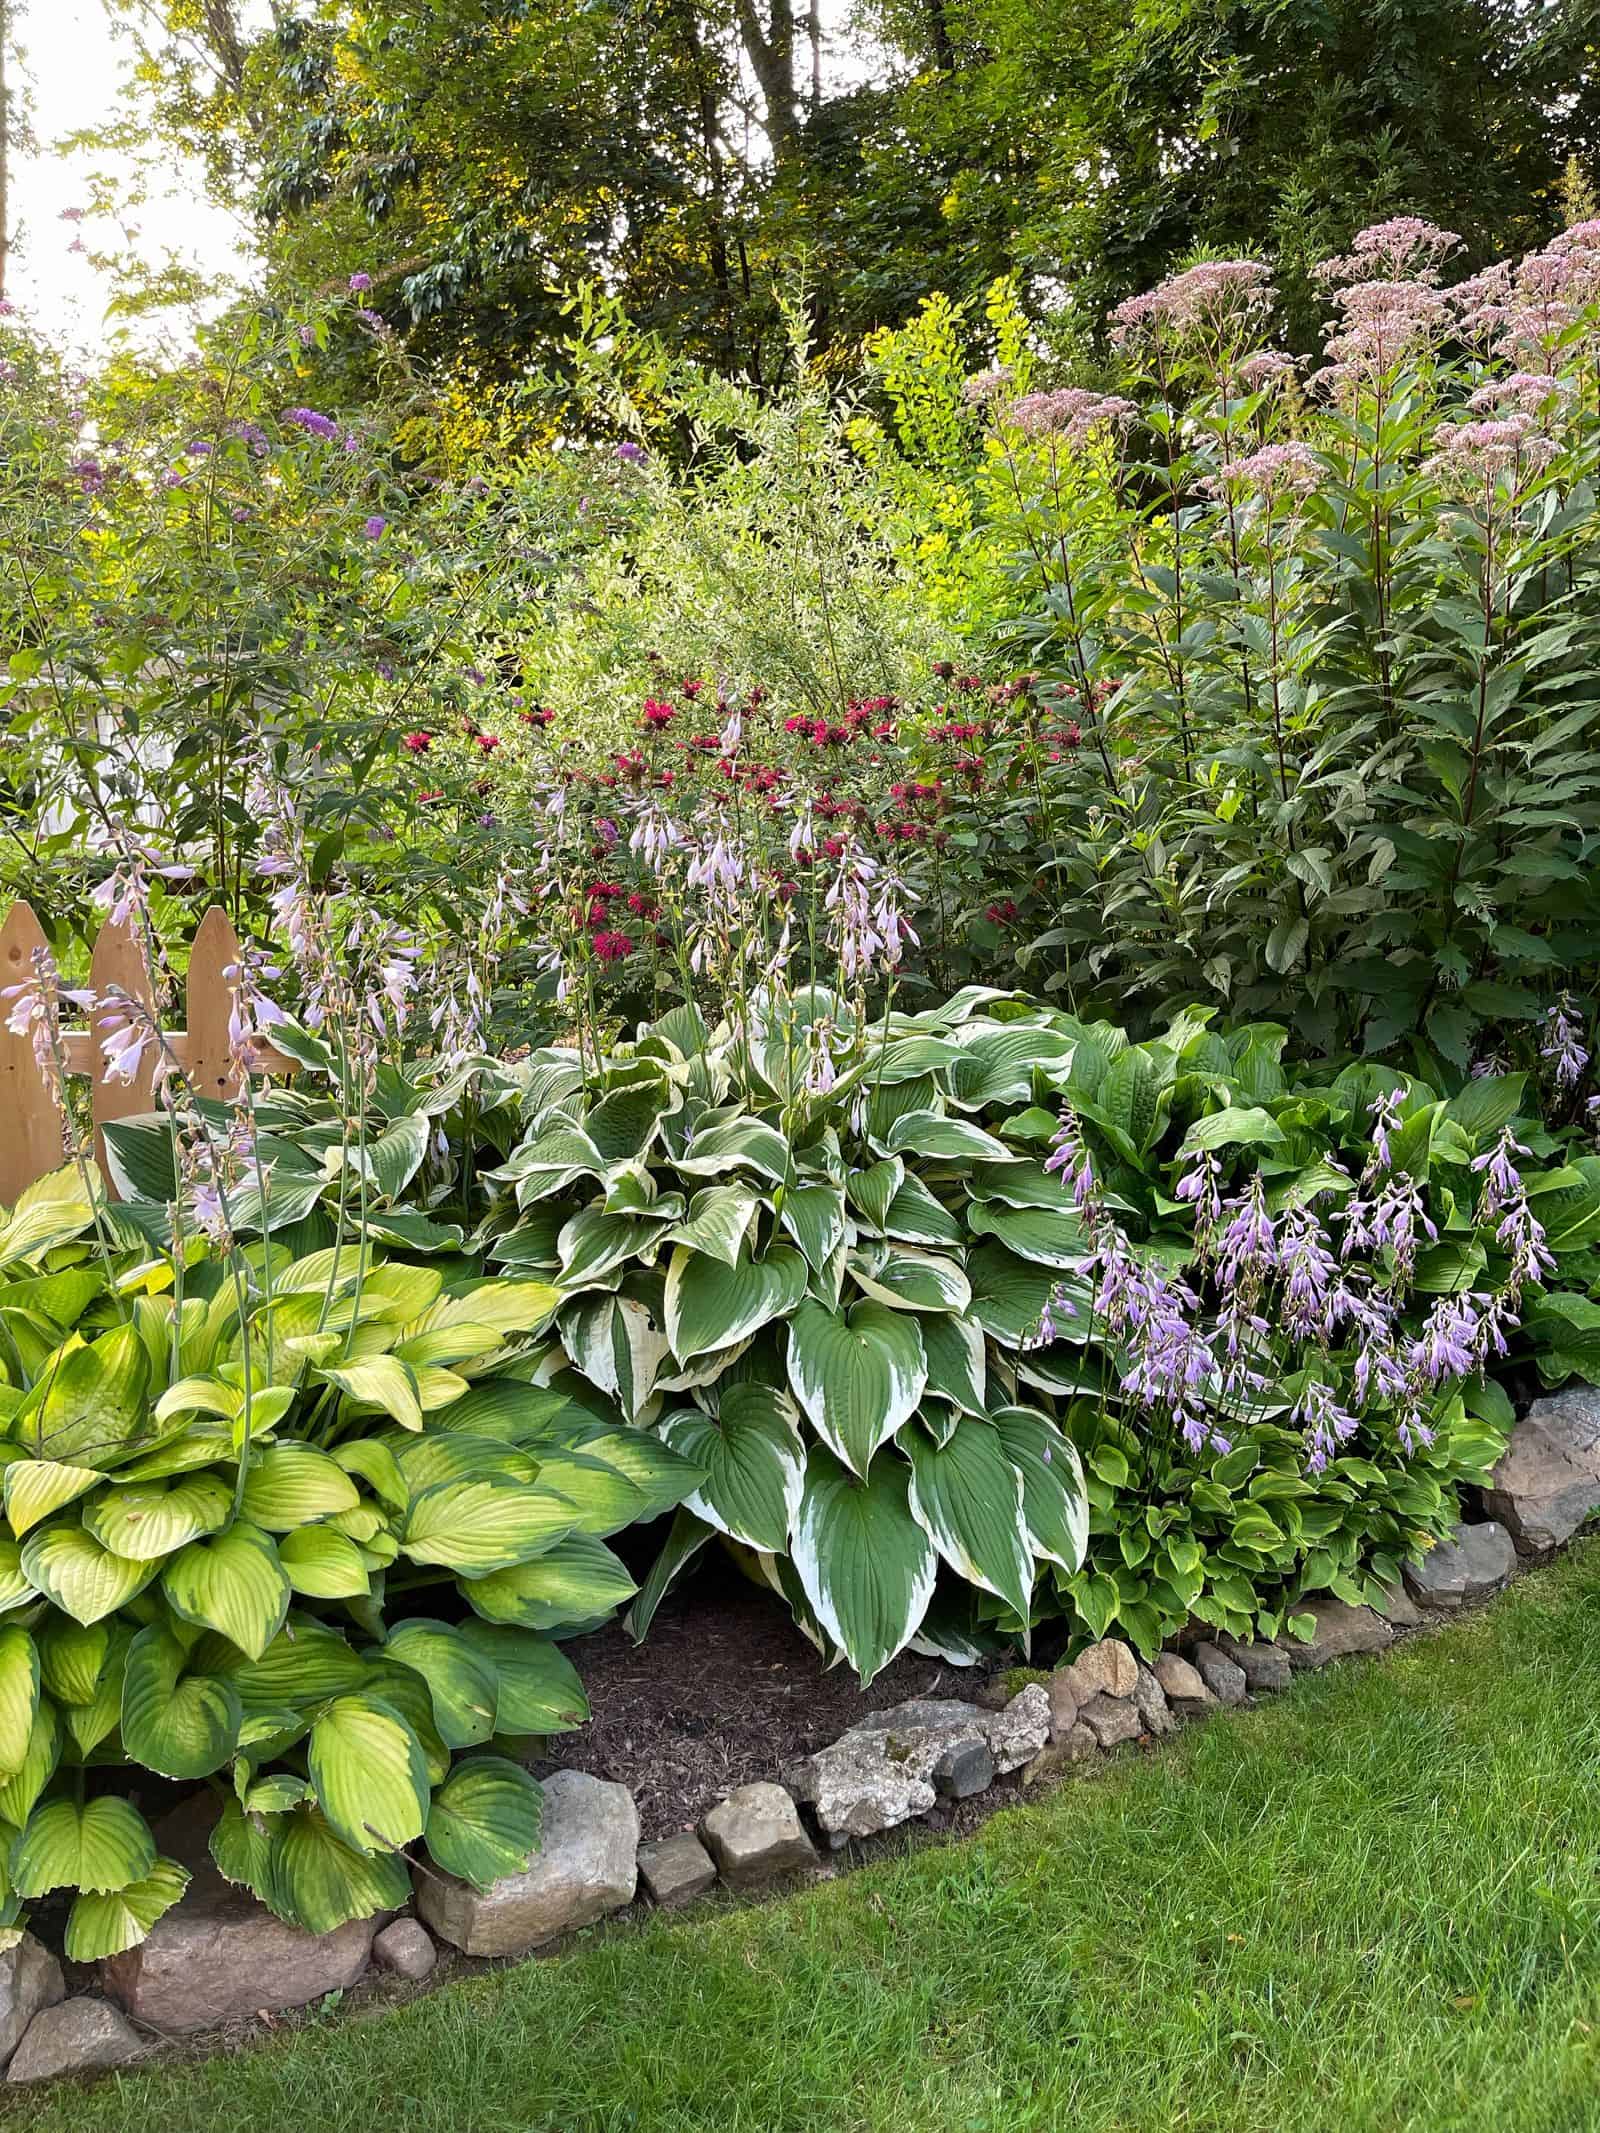
Companion Planting with Hostas
Hostas pair beautifully with a wide range of shade-loving plants, making them easy to incorporate into layered garden designs. Choosing the right companions not only enhances visual interest but can also improve plant health by creating balanced growing conditions.
Some popular companion plants for hostas include:
- Ferns: Their airy fronds contrast nicely with hosta foliage and thrive in similar light and moisture conditions.
- Astilbe: Adds colorful, feathery blooms and enjoys the same rich, moist soil.
- Heuchera (Coral Bells): Offers vibrant foliage colors that complement hostas throughout the season.
- Brunnera: Brings spring flowers and heart-shaped leaves that work well in shade gardens.
- Hydrangeas: Larger shrubs provide structure and pair well with hostas in partially shaded landscapes.
I’ve grown hostas alongside many of these plants over the years, and the key is matching light, moisture, and soil preferences so everything thrives together.
For more detailed pairing ideas and design tips, you can explore my complete guide to companion planting for hostas here: Companion Planting for Hostas

Frequently Asked Questions About Growing Hostas
Do Hostas Grow Back Every Year?
Yes, hostas are perennial plants, which means they come back year after year when grown in suitable conditions. While the foliage dies back in winter, hostas go dormant and re-emerge in spring, producing new leaves from their underground rhizomes.
Hostas are hardy perennials in many regions, depending on the variety and climate, and are known for their long lifespan. I planted hostas when we first moved to our family home over 23 years ago, and they’re still thriving today — a testament to how durable and long-lived these plants can be with proper care.
Can Hostas Take Full Sun?
In general, hostas are shade-loving plants best suited for partial to full shade. That said, some varieties can tolerate more sun depending on the climate, location, and cultivar.
Hostas with lighter-colored or variegated foliage, as well as those with thicker leaves, are often more sun-tolerant than darker green, thin-leaved varieties. Plants grown in cooler climates may also handle more sun than those in hot, sunny regions.
I don’t recommend planting hostas in full sun, especially where they receive strong afternoon sunlight, which can scorch foliage. However, gardening always involves some experimentation. If you do try hostas in sunnier conditions, aim for morning sun, mulch well to retain moisture, and monitor plants closely for stress. If leaves begin to burn or wilt, relocating them to a shadier spot will help them recover.


Final Thoughts About Hosta Plant Care
After nearly 30 years of growing hostas across very different gardens, I can confidently say they’re one of my favorite plants for shade. Since moving to this property in 2021, where shade is abundant, I’ve been able to grow hostas on a much larger scale and experiment with a wide range of varieties, planting methods, and protection strategies. That hands-on experience has shown me just how adaptable, resilient, and rewarding hostas can be when they’re given the right conditions.
If you’re looking to create a low-maintenance, visually rich shade garden, hostas are hard to beat. With proper planting, consistent care, and a plan for common challenges like deer and slugs, these perennials will thrive for years—often decades—in the same spot.
Whether you’re growing hostas in garden beds or containers, dividing mature plants to expand your collection, or pairing them with other shade-loving companions, a thoughtful approach makes all the difference. You may also find these guides helpful as you continue growing:
- Growing hostas in containers for patios and small spaces
- How to divide perennials to keep plants healthy and vigorous
- Companion planting for hostas to create layered, cohesive shade gardens
With time, observation, and a bit of experimentation, you’ll quickly see why so many gardeners, including me, come to rely on hostas as the backbone of their shade gardens.
For more information about growing hostas, see these university extension articles:
Do you have a favorite hosta variety you love to grow? I would love to know more in the comments below.
Thank you for visiting the blog today!
Enjoy your day! xo

Stacy
I plan to take your advice and split some of my Hosta plants this week.
Now is the time! Awesome!
These are such great tips, Stacy! We’re sharing them with our subscribers on Simply Stated this week. Happy Spring!
I appreciate that so much thank you! xoxoxo
Hostas are such cool plants. I wish I had more shady spaces in my garden.
Are you full sun on the whole property?
Also you can eat the new fresh growth just like asparagus!!!
I’ve not heard that before!