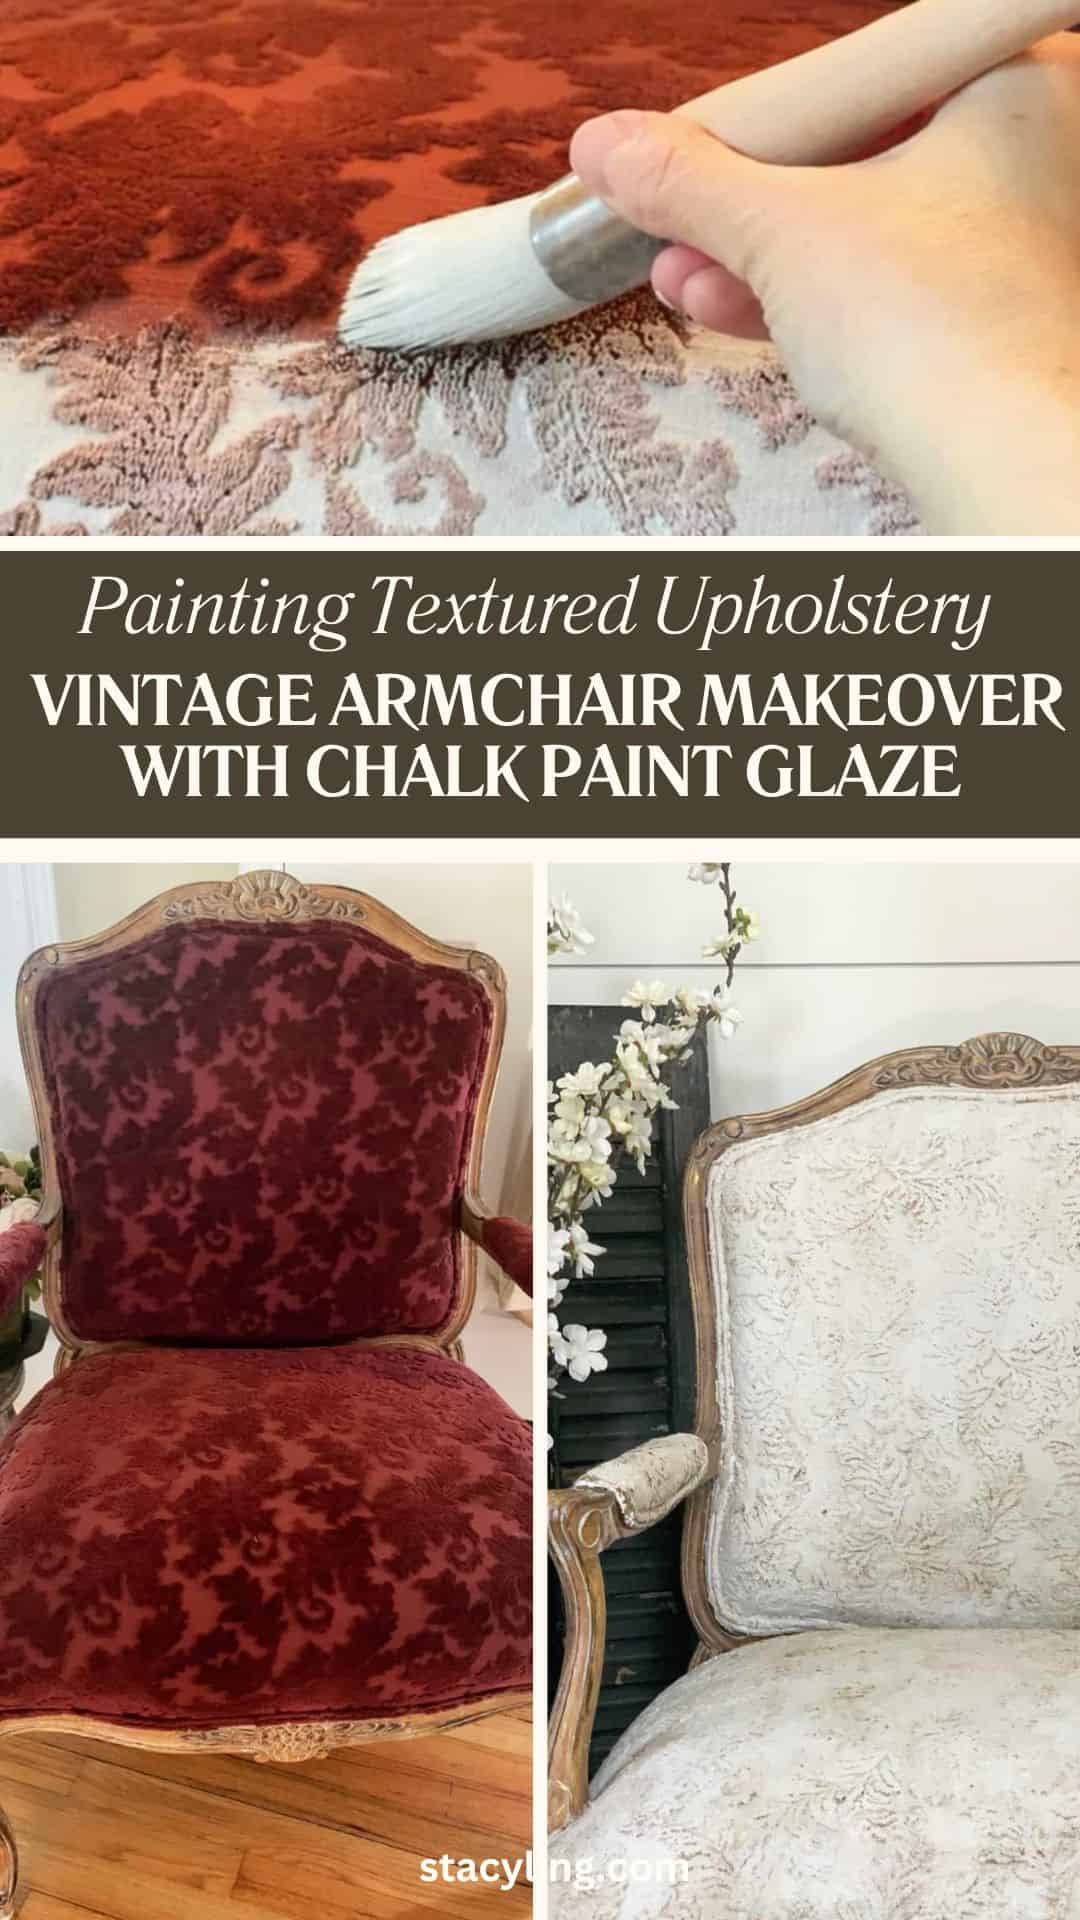
Painting Textured Upholstery: Vintage Armchair Makeover with Chalk Paint Glaze

Learn how to smooth and paint textured upholstery fabric with chalk paint. Includes a step-by-step guide to applying an antique aging glaze.
Hi! I’m Stacy Ling, a dedicated home & garden DIYer and the author of the Bricks ‘n Blooms blog. After successfully tackling a few upholstery projects in my 1850 farmhouse (like my famous heirloom bench makeover!), I can confidently tell you that no fabric is off limits—but some require a little more elbow grease!
When I found this vintage armchair on Facebook Marketplace for $10, I knew the dated upholstery fabric needed a change. It had a heavy, woven texture that, frankly, was a bit intimidating. I’ve since learned the specific steps required for properly painting textured upholstery fabric to avoid a rough, stiff finish.
This post is a case study on that project. It details the essential sanding technique needed for thick fabrics and includes a bonus: my step-by-step guide to applying an antique aged glaze to bring out the chair’s beautiful vintage character.
Need the basics? This post assumes you know the fundamentals. For the full supply list, mixing ratios, and general FAQs on painting fabric, please start with my definitive resource: The Ultimate Guide to Painting Upholstery Fabric.
Now, let’s chat about the unique challenges of a textured fabric and how to make it feel smooth!
(Posts on stacyling.com may contain affiliate links. Click HERE for full disclosure.)

The Textured Upholstery Challenge
Upholstered furniture can serve as the centerpiece of a room, and the idea of painting it might seem unconventional, but it’s a cost-effective, eco-friendly approach. The key to a stunning result lies in adjusting your technique for the fabric you’re working with.
This armchair had a raised, woven texture. It wasn’t horrible by any means, but was a little dark for my home’s aesthetic so I decided to give it a makeover.
While you can paint any fabric, painting textured upholstery fabric is a bit trickier because the paint tends to sit on the raised surface, which can lead to a stiffer, rougher finish once dry.


My Experience: The Prep & Application Secret
The process of painting this chair reinforced my two biggest tips for working with texture:
- Uniform Application is Key: If you are working with raised, textured fabric, I highly recommend applying paint in one single direction. The paint will harden a bit when it dries, and applying it uniformly ensures a smoother, less messy, and less stiff finished surface. For this project, I loved using a Zibra 2″ round brush, as the long, soft bristles helped push the paint into the texture without excessive effort.
- Sanding is Essential: Because this fabric had a heavy texture, I applied three coats of paint. The moment the painted fabric hardens, it can feel like rough canvas. Sanding down the fabric between coats is non-negotiable to achieve the final smooth, durable, “leathery” feel.


Step-by-Step: Applying the Aged Glaze
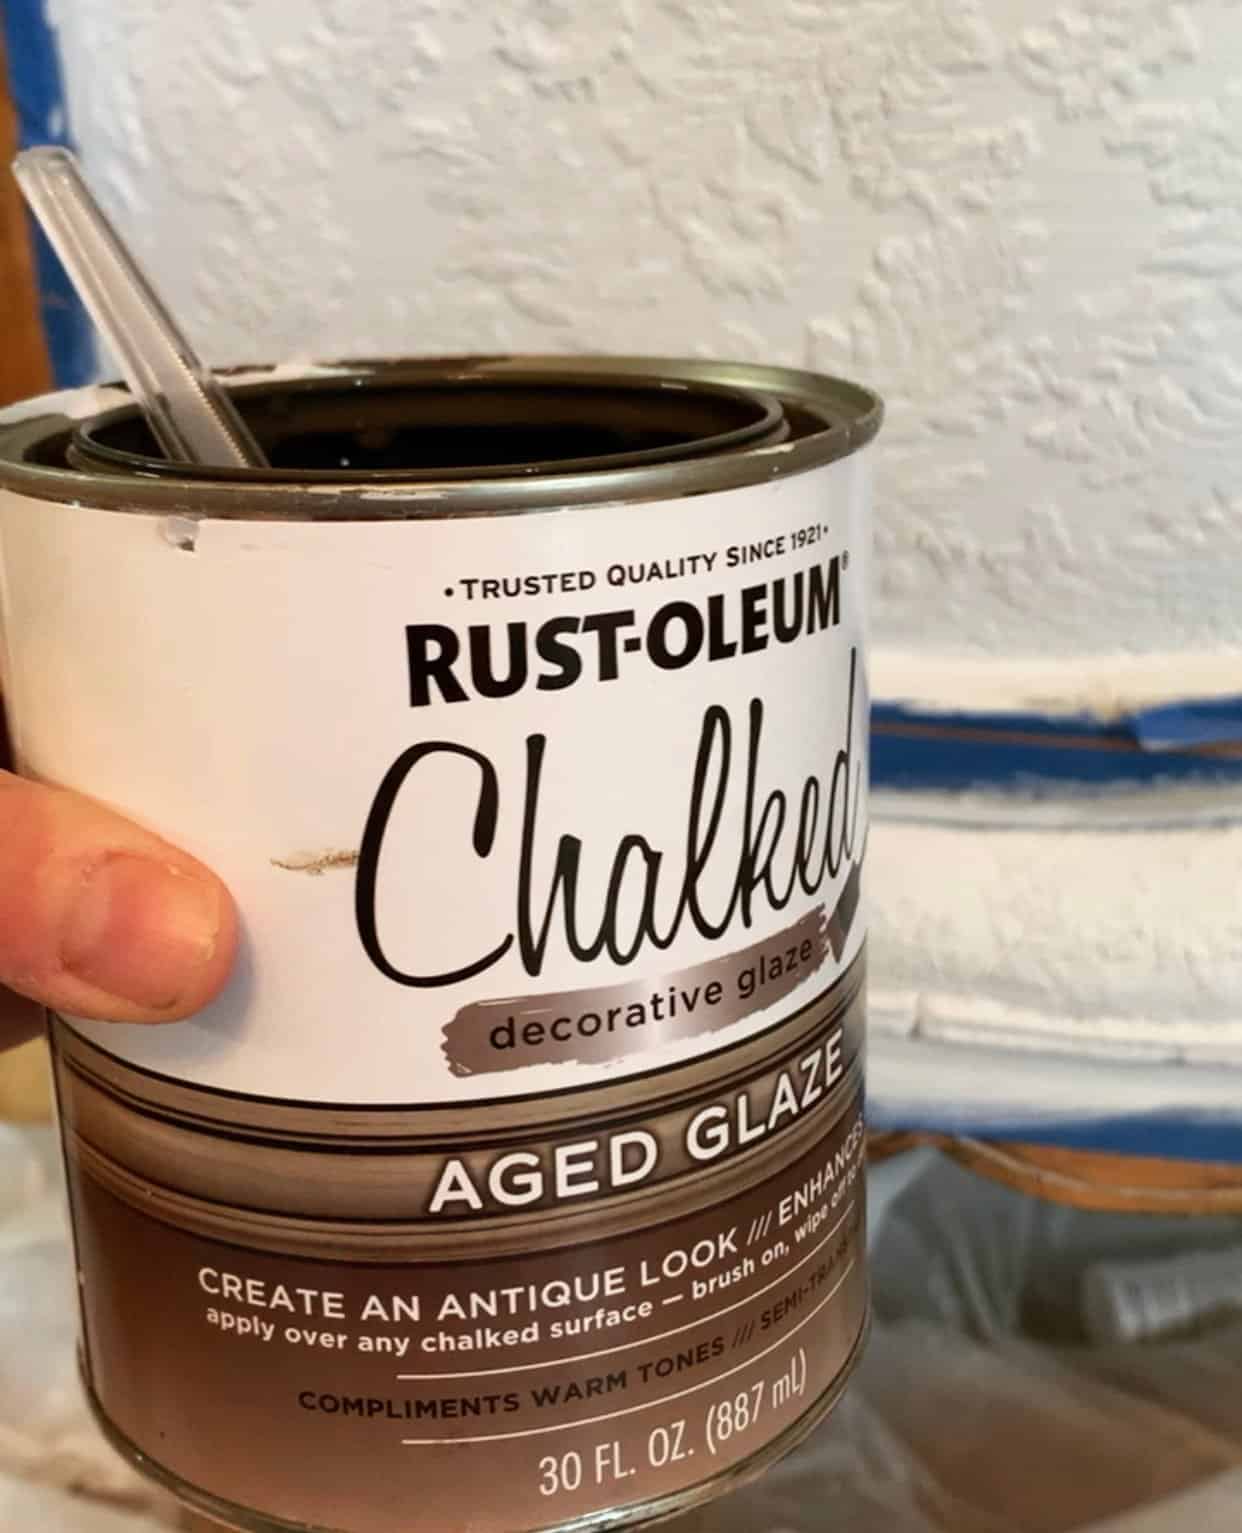
Before applying the final protective wax topcoat, I decided to enhance the piece’s texture and give it more of a vintage, antique vibe by using an aged glaze (this is what I used). This step brought out the pretty details of the textured fabric and complemented the antique frame beautifully.
If you want to try this unique finishing technique, here is how I did it:
- Prepare the Glaze: Dampen a paper towel, dip it into the aged glaze, and dab it onto a section of the piece.
- Wipe Immediately: Immediately wipe off the excess glaze with a wet rag or a brush. Since this fabric was so heavy, I used my round brush to help wipe off the extra glaze and push the color into the crevices.
- Customize the Look: Apply and wipe off as much or as little as you want until you achieve the desired antique effect. You can always add more!
- Cure Time: Allow the fabric to fully dry for 24 hours before moving to the final waxing step.

Final Thoughts: A Transformation Worth the Effort
Doesn’t it look amazing? I am so happy I took the time to glaze the fabric after painting it; the antique frame really complimented the chalk paint on the fabric. The finished product perfectly coordinates with my neutral home decor. The results achieved through this method showcase the potential for reinventing furniture without needing an extensive budget.


Next time you consider replacing worn upholstery, remember the artistic possibilities of paint!
Have you ever painted upholstery fabric before? What’s been your experience? Would you try this DIY? Let’s chat more about it in the comments below!
My Other Chalk Paint Projects
- Facing a dark pattern? Check out my tutorial on How to Cover a Dark Floral Bench and why I needed three full coats.
- Need the full step-by-step instructions, mixing ratios, and FAQs? Jump back to my Ultimate Guide to Painting Upholstery Fabric.
Thank you for visiting the blog today!
Enjoy your day! xo

I enjoyed this post but the link to the vintage armchair glazing process takes me right back to this same post. It does not lead me to a glazing process. Can you help?
Hi Kim! I looked in the post and am not sure which link is not working right? Can you please tell me where it is in the post?