Vintage Toolbox Winter Centerpiece Ideas Using Faux Greens (Garden-Inspired & Low-Maintenance)

Create a low-maintenance winter centerpiece using faux greens in a vintage toolbox. Garden-inspired, budget-friendly, and perfect for winter décor.
Hi! I’m Stacy Ling, a trained Master Gardener gardening in Zone 6B here in New Jersey. As much as I love using fresh evergreens and cut flowers from the garden, winter can make it tough to keep arrangements looking vibrant for long. Especially when you don’t have a lot of options to cut from your landscape.
This was the problem I had in my former home and garden. So I often turned to high-quality faux greens to create low-maintenance, garden-inspired centerpieces that still feel lush, natural, and full of seasonal charm.
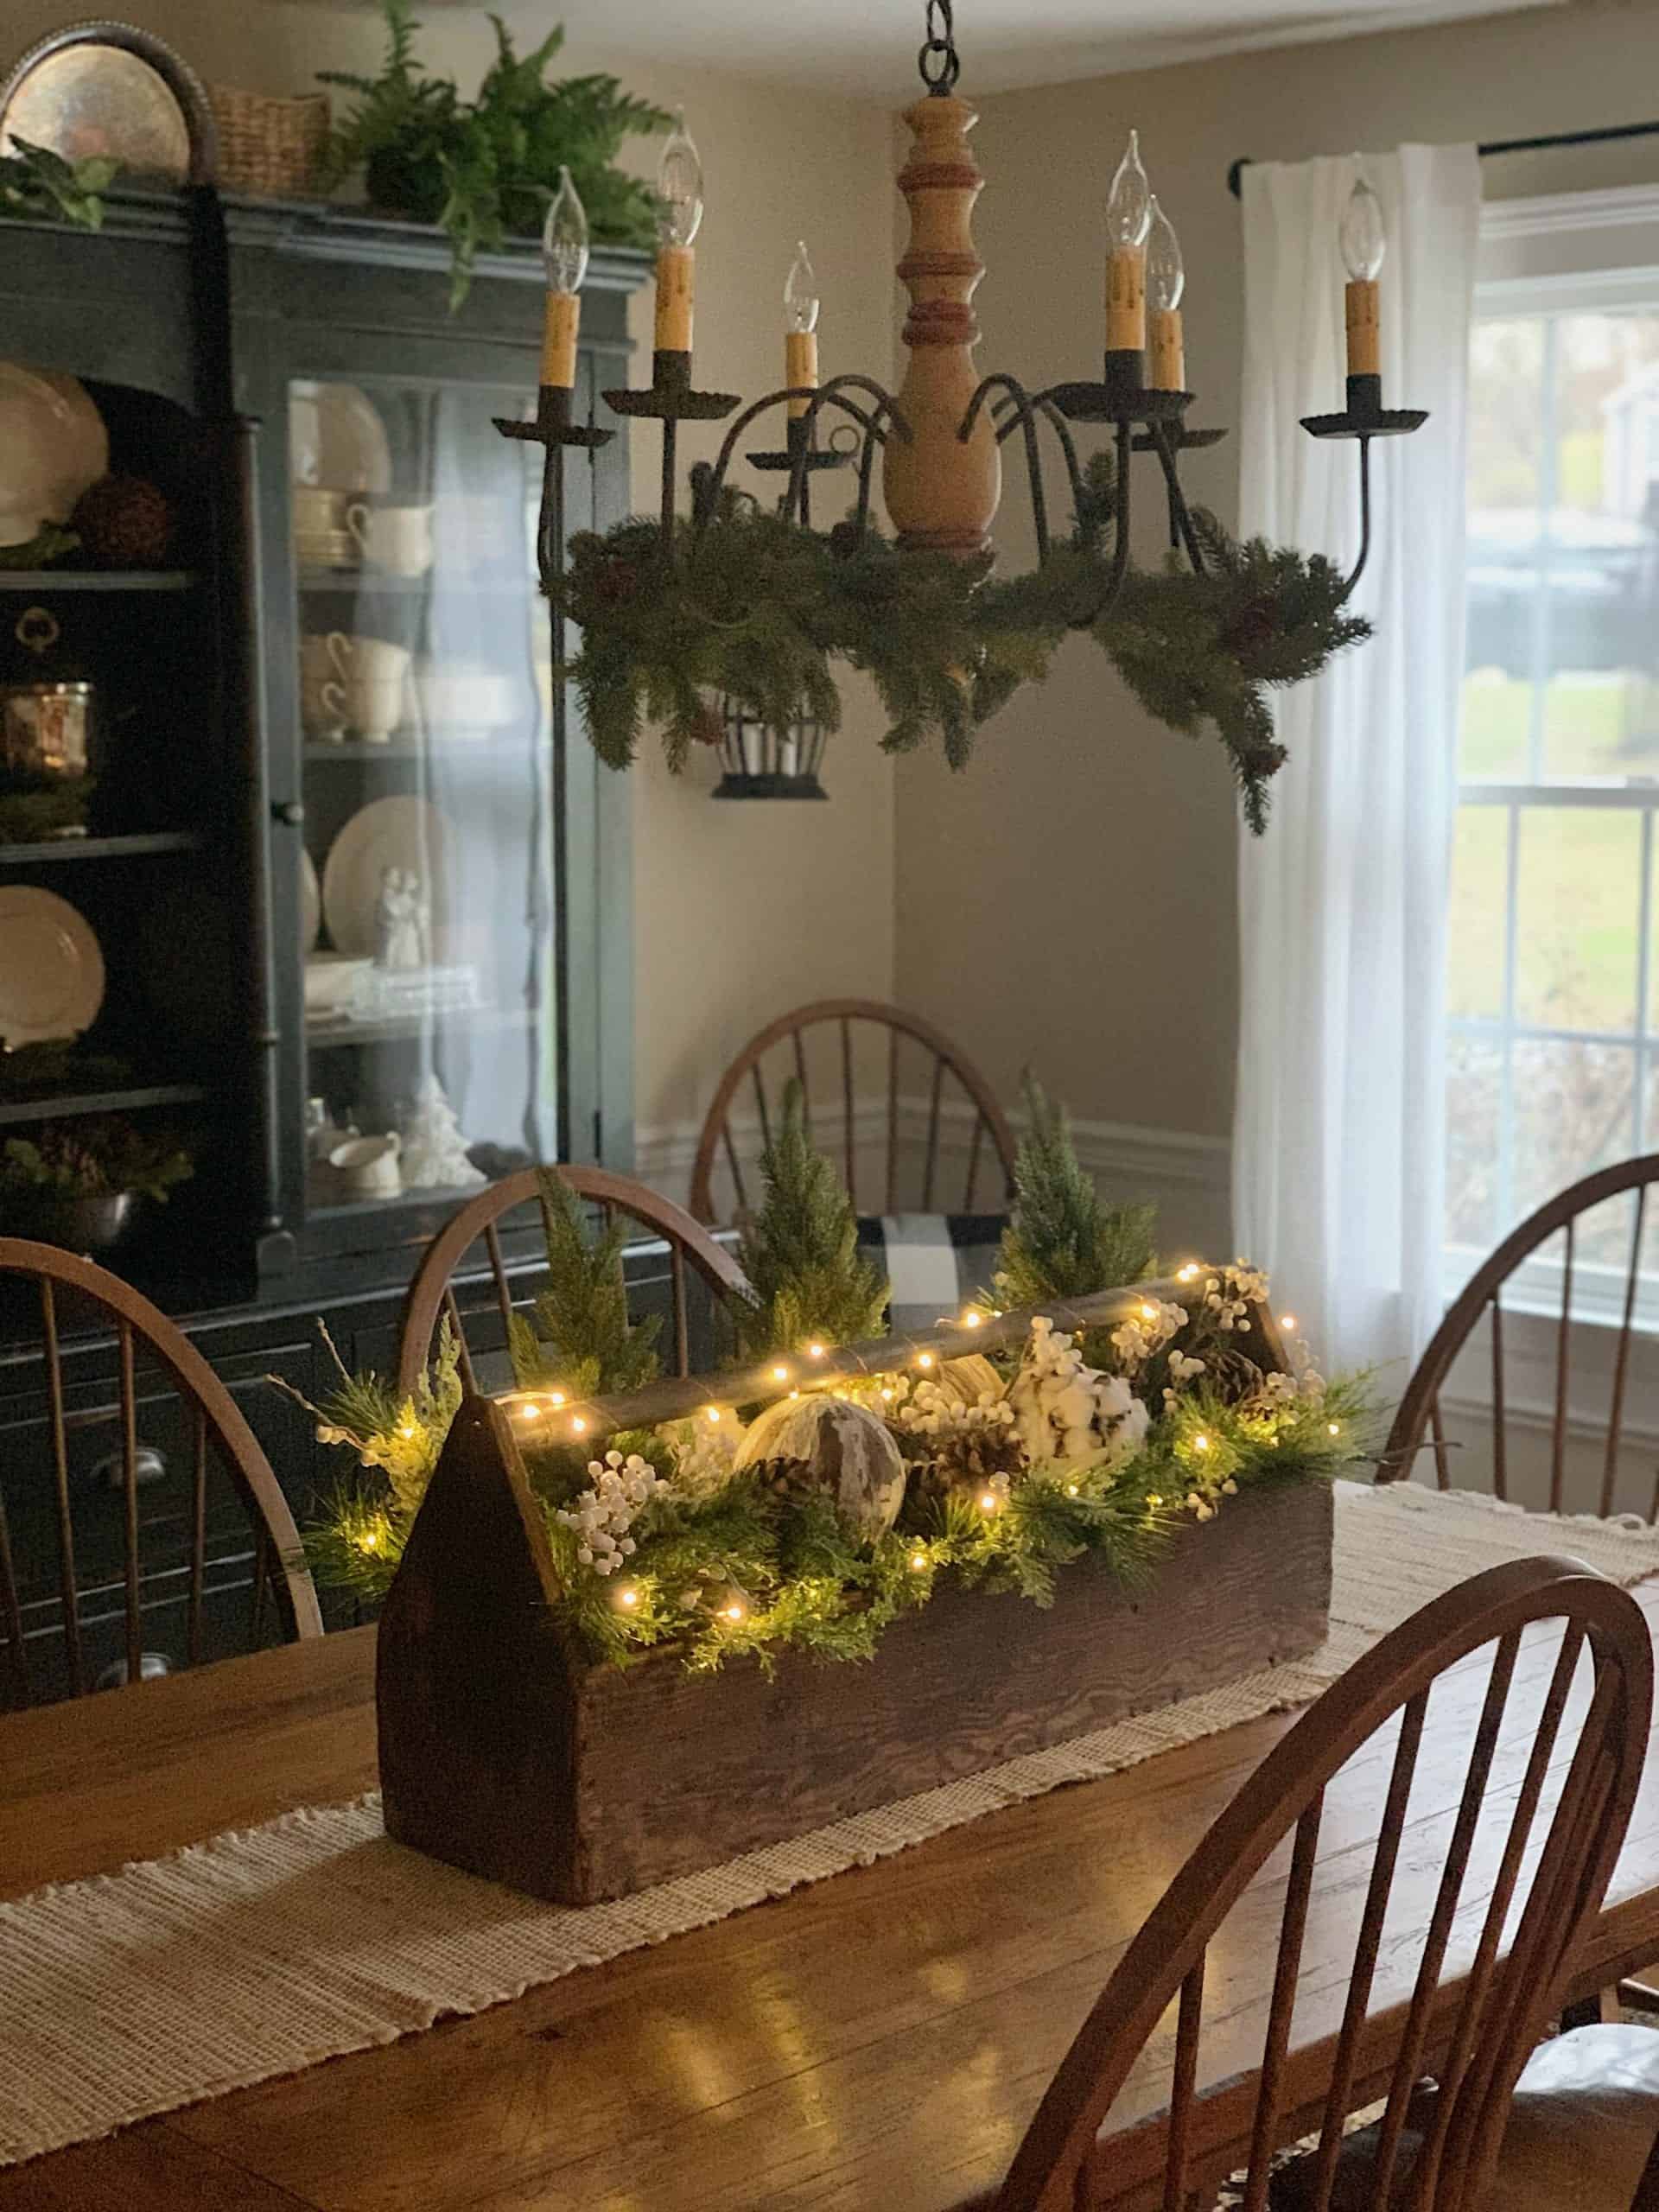
Today I’m sharing how I styled this vintage toolbox for winter using faux greenery to get the look of a fresh arrangement, without the upkeep.
(Posts on stacyling.com may contain affiliate links. Click HERE for full disclosure.)

Vintage Toolbox Winter Centerpiece Ideas
When I started planning my Thanksgiving centerpiece for the dining table, I envisioned an arrangement that could easily be changed to suit the next few holidays.
Although it was still technically fall, I wanted to use winter greens as the base to have the ability to swap out seasonal decor items over the next several months.
Check out the photos below to see how this winter centerpiece transitioned through the season.
Choosing the Perfect Vessel + Materials You’ll Need
One of my favorite parts of creating a winter centerpiece is choosing the vessel. You don’t need a traditional planter or vase to make a beautiful arrangement—almost anything can work if it inspires you. I’m always drawn to pieces with character and patina that remind me of the garden, even during the colder months.
For this project, I used a vintage wooden toolbox I found at an antique store in Vermont for about $15. The moment I spotted it, I knew it would make a gorgeous winter centerpiece. Its long shape, rustic wood, and garden-shed charm make it an ideal base for seasonal greens—faux or fresh.
When choosing your own vessel, look for items that spark joy or carry a little history. You might already have something tucked away in a closet, or you can explore thrift stores, flea markets, or antique shops to find the perfect piece.
Great vessels for winter centerpieces include:
- vintage toolboxes or wooden caddies
- old crocks, stoneware jars, or pottery
- rustic crates or wood boxes
- baskets lined with a container
- reclaimed metal tins or sap buckets
- enamel pitchers or teapots
- trays, dough bowls, or shallow boxes
- small suitcases or decorative boxes
Choose a piece that fits the size of your table and complements your winter decor. There’s truly no right or wrong—just choose something you love and build the arrangement around it.
I love to thrift for these types of pieces. Get all my tips and what I look for to contain my plants and flowers for a song here: 10 Vintage Finds I Always Buy For Planters, Backdrops, & Outdoor Styling.

Materials You’ll Need
To create this cozy, garden-inspired winter centerpiece, you only need a few simple materials. You can customize the look using either faux greens for low maintenance or real evergreens from your garden.
Vintage Vessel
- A vintage toolbox, wooden caddy, or rustic crate
(Any long, narrow vessel works beautifully for winter arrangements.)
Greenery & Florals
- Faux winter greens such as pine, spruce, cedar, or fir
- Faux eucalyptus, berries, or frosted stems (optional)
- Faux winter florals like white blooms or seasonal picks
- OR real fresh evergreens if you’re customizing the arrangement
Fillers & Decorative Accents
- Pinecones
- Dried oranges or cinnamon sticks
- Birch branches
- Faux snow-dusted stems
- Small ornaments or bells (optional)
Tools & Basics
- Ribbon or twine for finishing touches
- Floral foam, mason jars, or a watertight liner (helps keep stems in place)
- Wire cutters or floral snips
- Floral picks or floral wire (for shaping and securing stems)
Shop for Vintage Toolbox


How to Create a Winter Centerpiece Using Faux Greens
Creating a beautiful winter centerpiece is easier than it looks. With a vintage vessel and a few winter greens, you can pull together a cozy, garden-inspired arrangement in minutes. Here’s how to build it step by step.
Step 1: Start With a Liner or Base
Before adding any greenery, place a watertight liner, mason jars, or floral foam inside your toolbox.
This helps:
- hold stems upright
- protect the vintage wood
- make rearranging easier
If your toolbox has an open bottom, floral foam or jars work especially well.
Step 2: Add Your Longest Faux Greens First
Begin filling the vessel with your longest faux evergreen stems (like pine or spruce).
These create:
- the height
- the structure
- the overall shape of the arrangement
Fan them out toward the ends to give the centerpiece a natural, draping look.
Step 3: Layer In Medium and Shorter Greens
Next, tuck in shorter cedar, fir, or juniper stems to add fullness and texture.
This step creates that lush, garden-inspired feel.
Tip: Alternate textures (needle-like greens, flat cedar, soft spruce) to mimic the look of real freshly cut foliage.

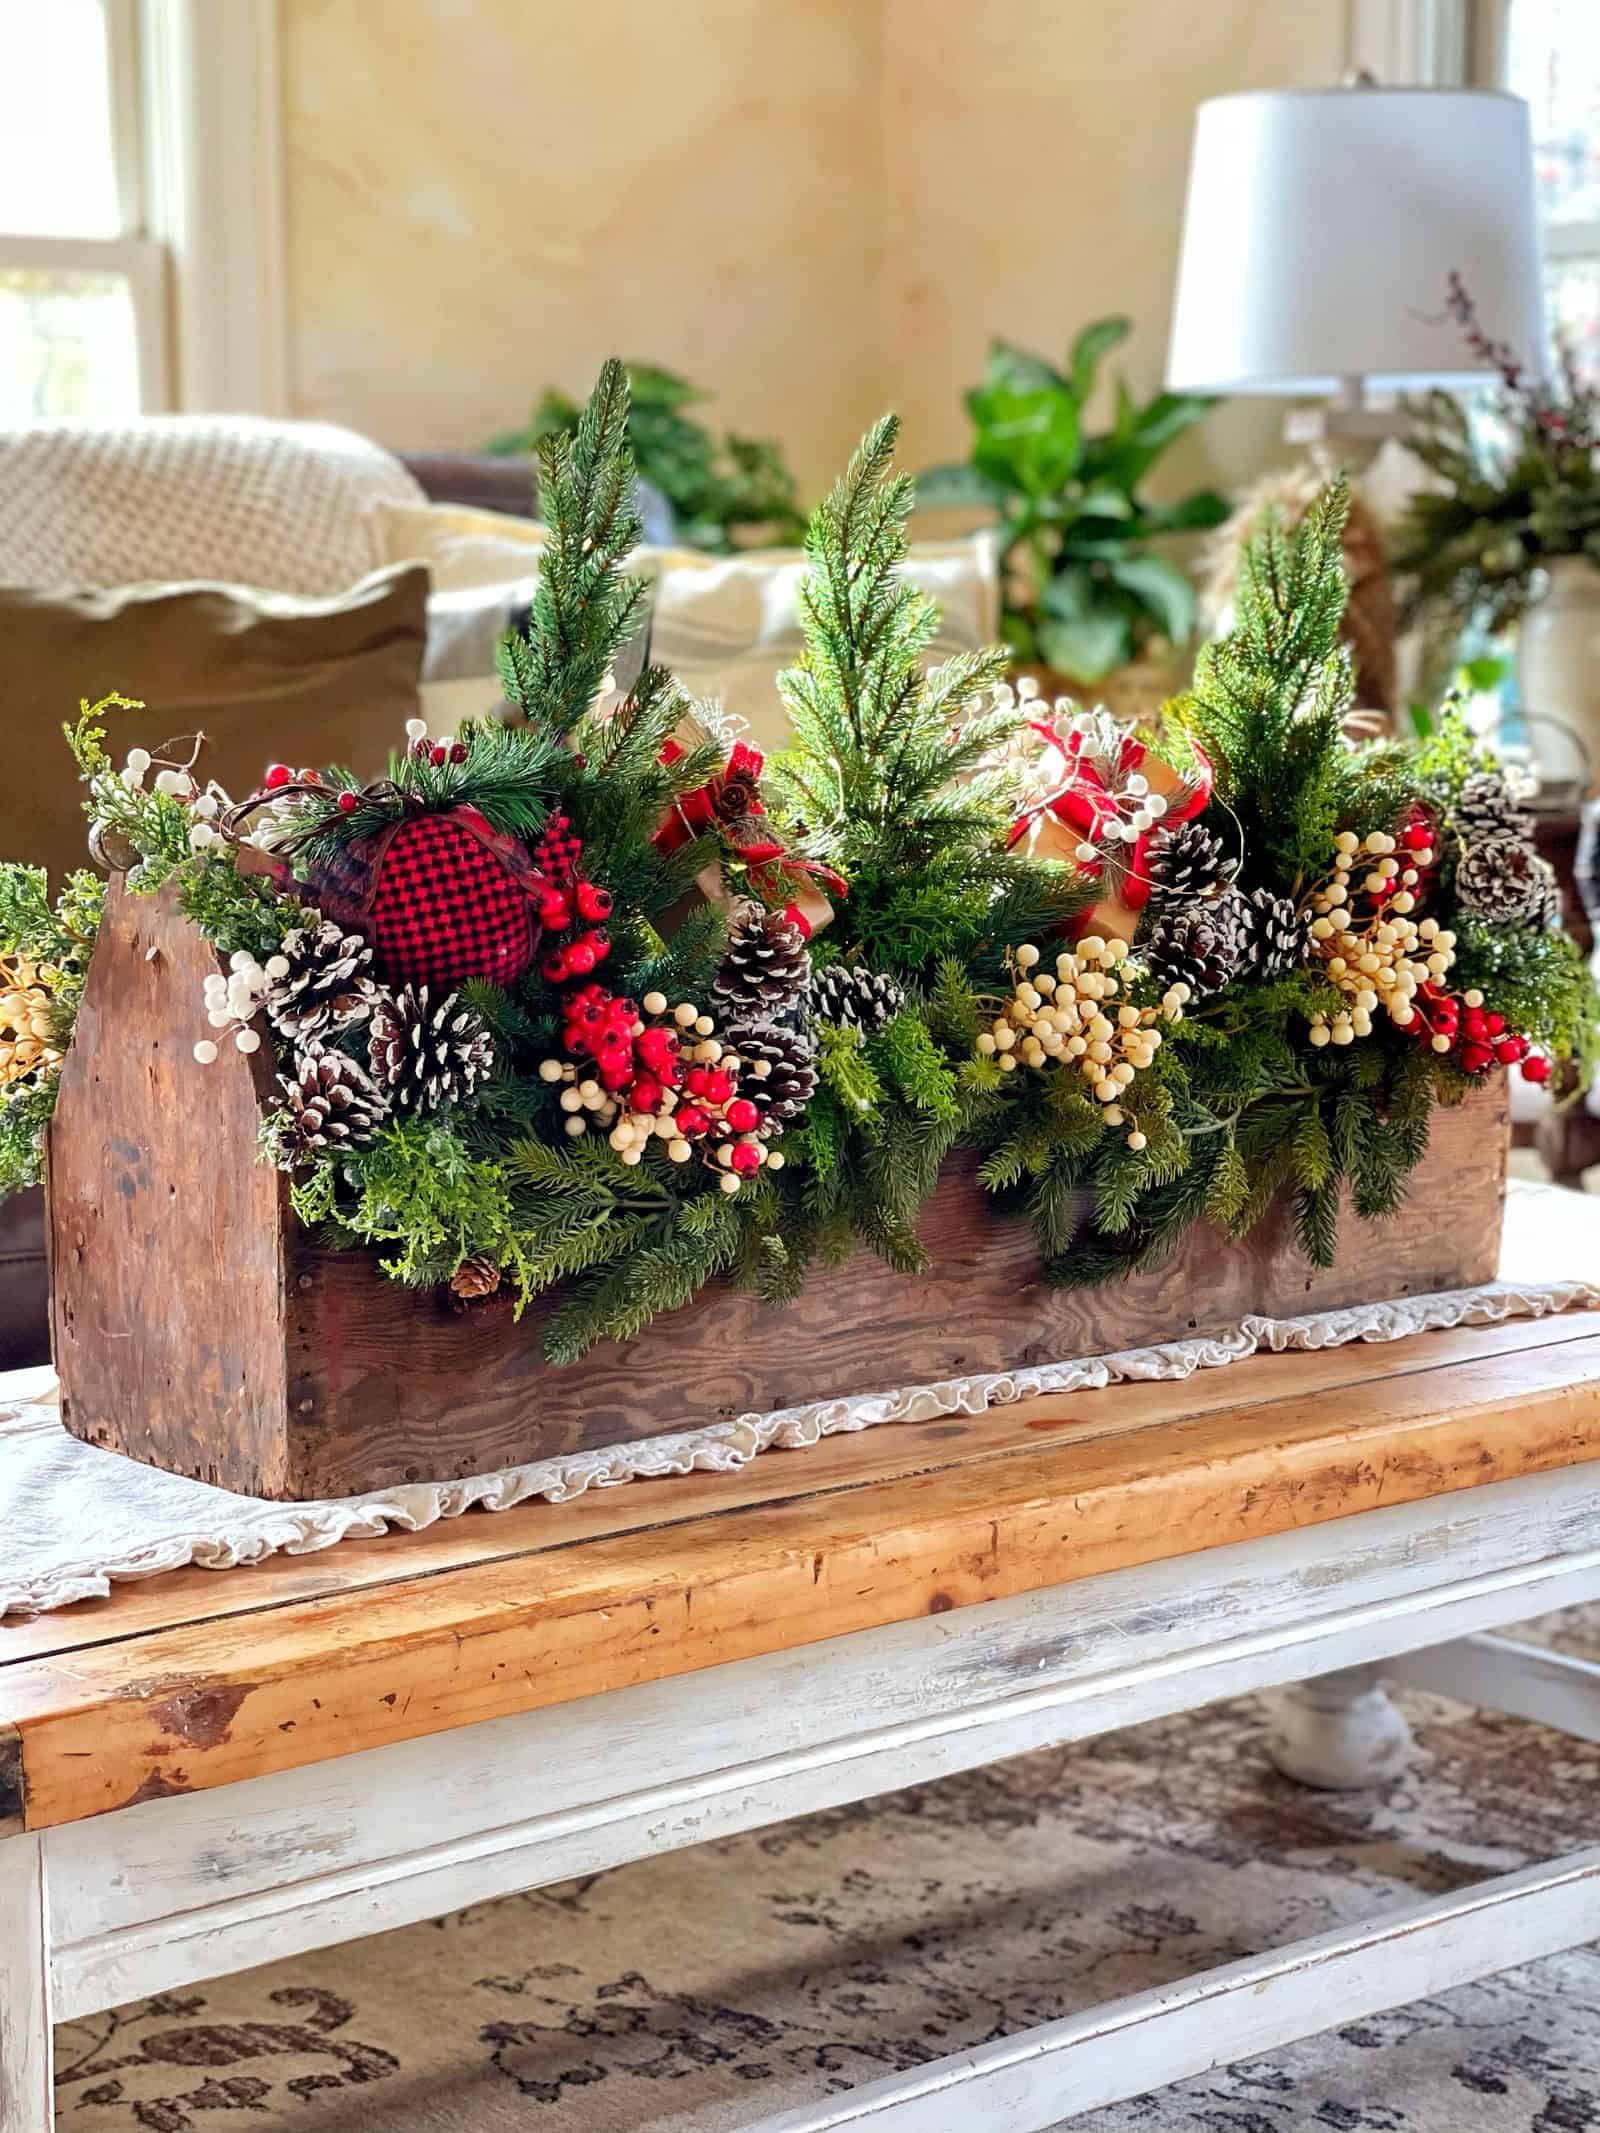
Step 4: Add Accent Stems for Color and Interest
Once the greens are in, layer in a few accent pieces such as:
- frosted stems
- winter berries
- eucalyptus
- small faux blooms
- seeded branches
These accents break up all the green and add dimension to the arrangement.
Step 5: Nestle in Natural Elements
To make the centerpiece feel even more garden-inspired, add a few natural or nature-inspired elements:
- pinecones
- birch branches
- dried orange slices
- cinnamon sticks
Group them in clusters so they look intentionally placed rather than scattered.
Step 6: Fill Any Gaps and Fluff the Arrangement
Step back and take a look at your centerpiece from every angle.
Fill in any sparse spots with smaller sprigs or greenery.
Lift, bend, and “fluff” the faux stems so they look more organic and less stiff.
This is the step that makes a faux arrangement feel real.
Step 7: Add Finishing Touches
Tie a bit of ribbon, velvet, or twine around a handle or tuck a small ornament inside the arrangement for a subtle winter touch.
Your finished centerpiece should feel:
- full
- natural
- warm
- and beautifully rustic
Perfect for winter decorating on a dining table, kitchen island, entryway, or sideboard.

Tips for Making Faux Greens Look More Realistic
Using faux greens is a smart choice for winter because they stay beautiful all season, but with a few simple tricks, you can make them look almost indistinguishable from the real thing. Here’s how to elevate the look of your winter centerpiece:
Tip 1: Mix Multiple Green Textures
Real evergreens aren’t uniform, so your faux arrangement shouldn’t be either.
Combine:
- pine
- cedar
- spruce
- juniper
- eucalyptus
The variation makes the arrangement feel lush and natural.
Tip 2: Bend and Shape Every Stem
Most faux stems come straight out of the package stiff.
Before placing them:
- bend
- arc
- twist
- fluff
Give each stem movement so it mimics how real greens drape and fall.
Tip 3: Add a Few Natural Elements
Even one or two real accents dramatically elevate a faux arrangement.
Try adding:
- pinecones
- birch twigs
- dried oranges
- cinnamon sticks
- small branches from the yard
This instantly blends the faux with nature.
Tip 4: Avoid Overly Shiny Plastics
If any pieces have a glossy finish, dust lightly with:
- matte floral spray
- baby powder (just a touch!)
- or tuck them deeper into the arrangement
Real greens are matte, not shiny.
Tip 5: Use Odd Numbers for Grouping
Cluster stems and accents in groups of 3 or 5.
It looks more organic and less “placed.”

Tip 6: Trim Stems to Vary the Height
Real arrangements have staggered heights.
Cut or bend faux stems so they’re not all the same length — this is key to faking fresh greens.
Tip 7: Blend in One Real Stem (Optional)
A single branch of real pine or cedar can trick the eye and nose.
Place it near the top or edges where people will notice it.
Tip 8: Hide the Mechanics
Make sure floral foam, jars, or liners are completely concealed.
Faux greens look their best when the “base” disappears.


How to Customize This Centerpiece with Real Greens
If you prefer using fresh evergreens from your garden, it’s easy to adapt this vintage toolbox centerpiece. As a Master Gardener in Zone 6B, I rely heavily on long-lasting winter greens that hold up beautifully indoors and outdoors. Here are some great options and tips:
Best Garden Greens for Winter Arrangements
- Boxwood – long-lasting, soft texture, easy to tuck in
- Eastern White Pine – drapes naturally and smells amazing
- Spruce – sturdy, structured, great for shape
- Arborvitae – bright green and very long-lasting
- Juniper – adds beautiful blue berries
- Holly – festive pop of red, iconic winter foliage
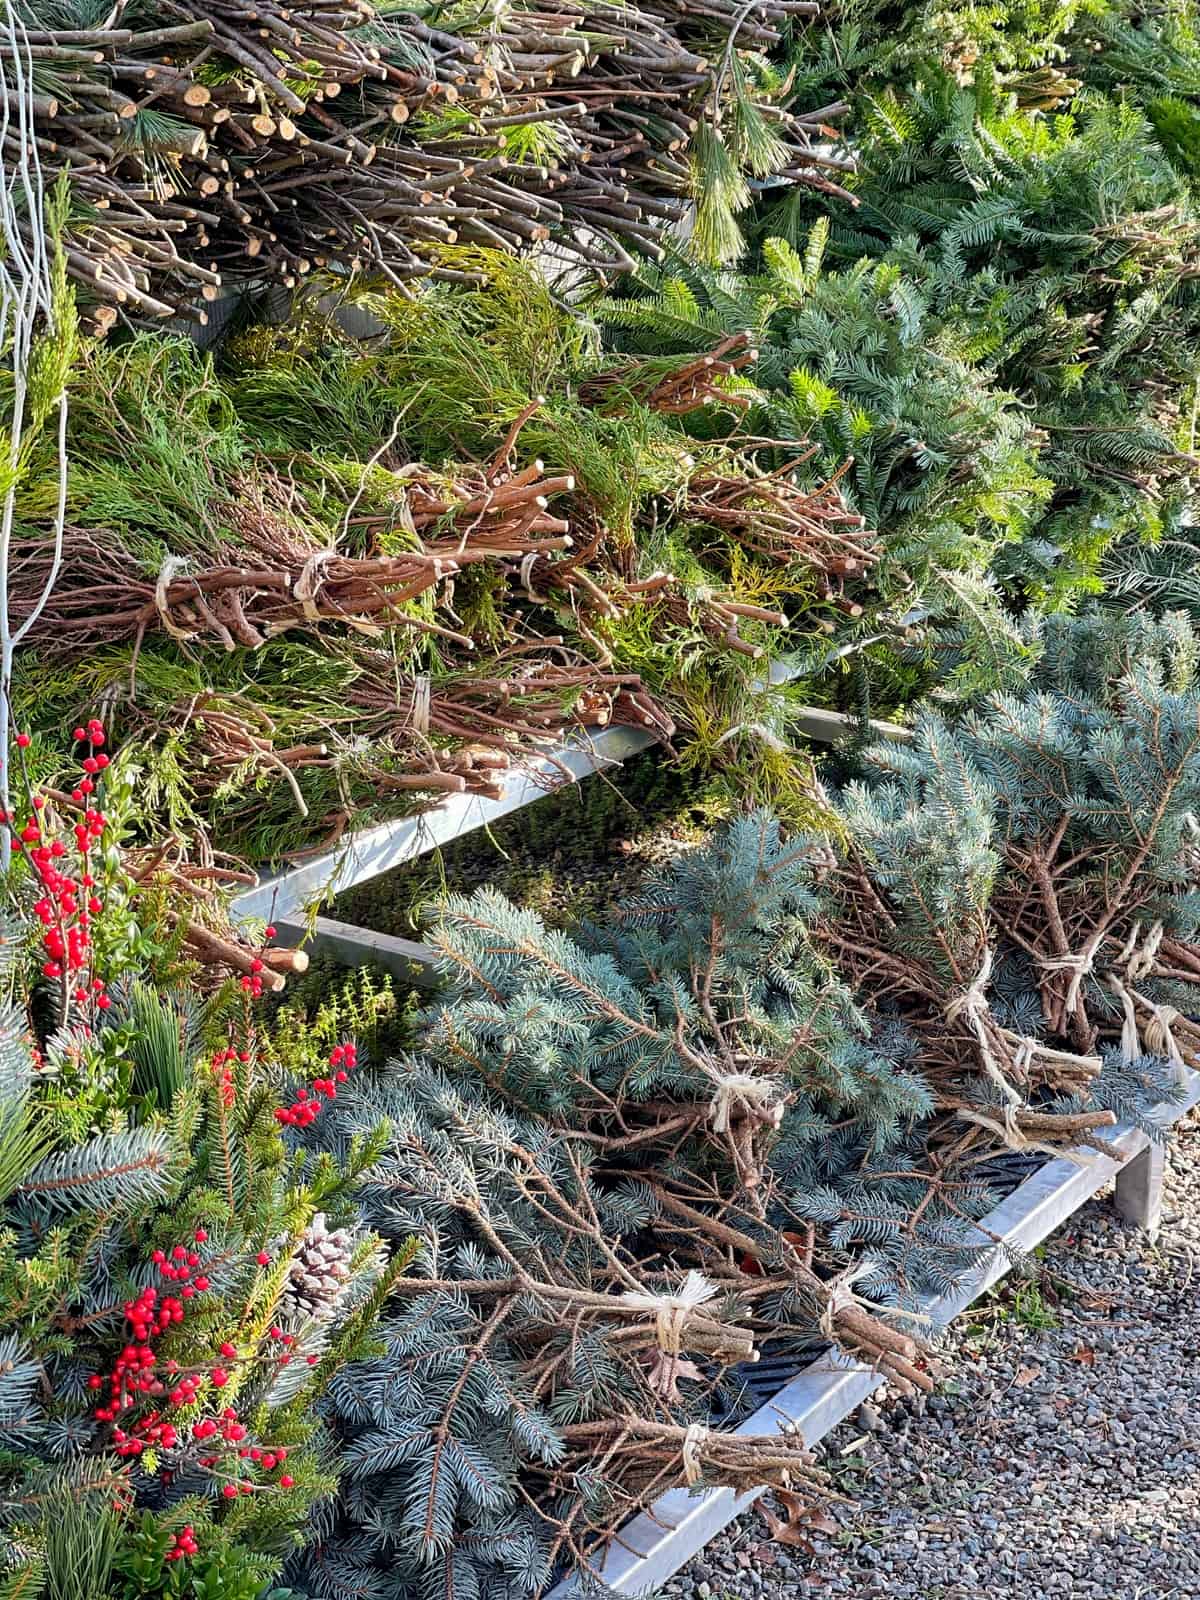
How to Prep Fresh Greens
- Cut stems on a diagonal for better water uptake
- Condition them in a bucket of warm water for a few hours
- Mist the greens every few days if indoors
- Use floral picks or wet floral foam for easy arranging
- Keep away from heating vents or direct sun to prolong freshness
Where to Gather Greens
- From your own garden beds and shrubs
- Trimmings from holiday tree lots
- Prunings after fall cleanup (boxwood and holly especially)
Tip for Longevity Indoors
Fresh greens last 2–4 weeks indoors depending on temperature and humidity.
Using a vintage toolbox means you can:
- Slip a watertight liner inside
- Use mason jars or floral foam blocks
- Swap out individual stems as needed
This lets you enjoy a garden-fresh look throughout the winter season.

Where to Display Your Vintage Toolbox Winter Centerpiece
A garden-inspired winter centerpiece like this is incredibly versatile, and a vintage toolbox adds charm no matter where you place it. Here are a few of my favorite spots to display it throughout the season:
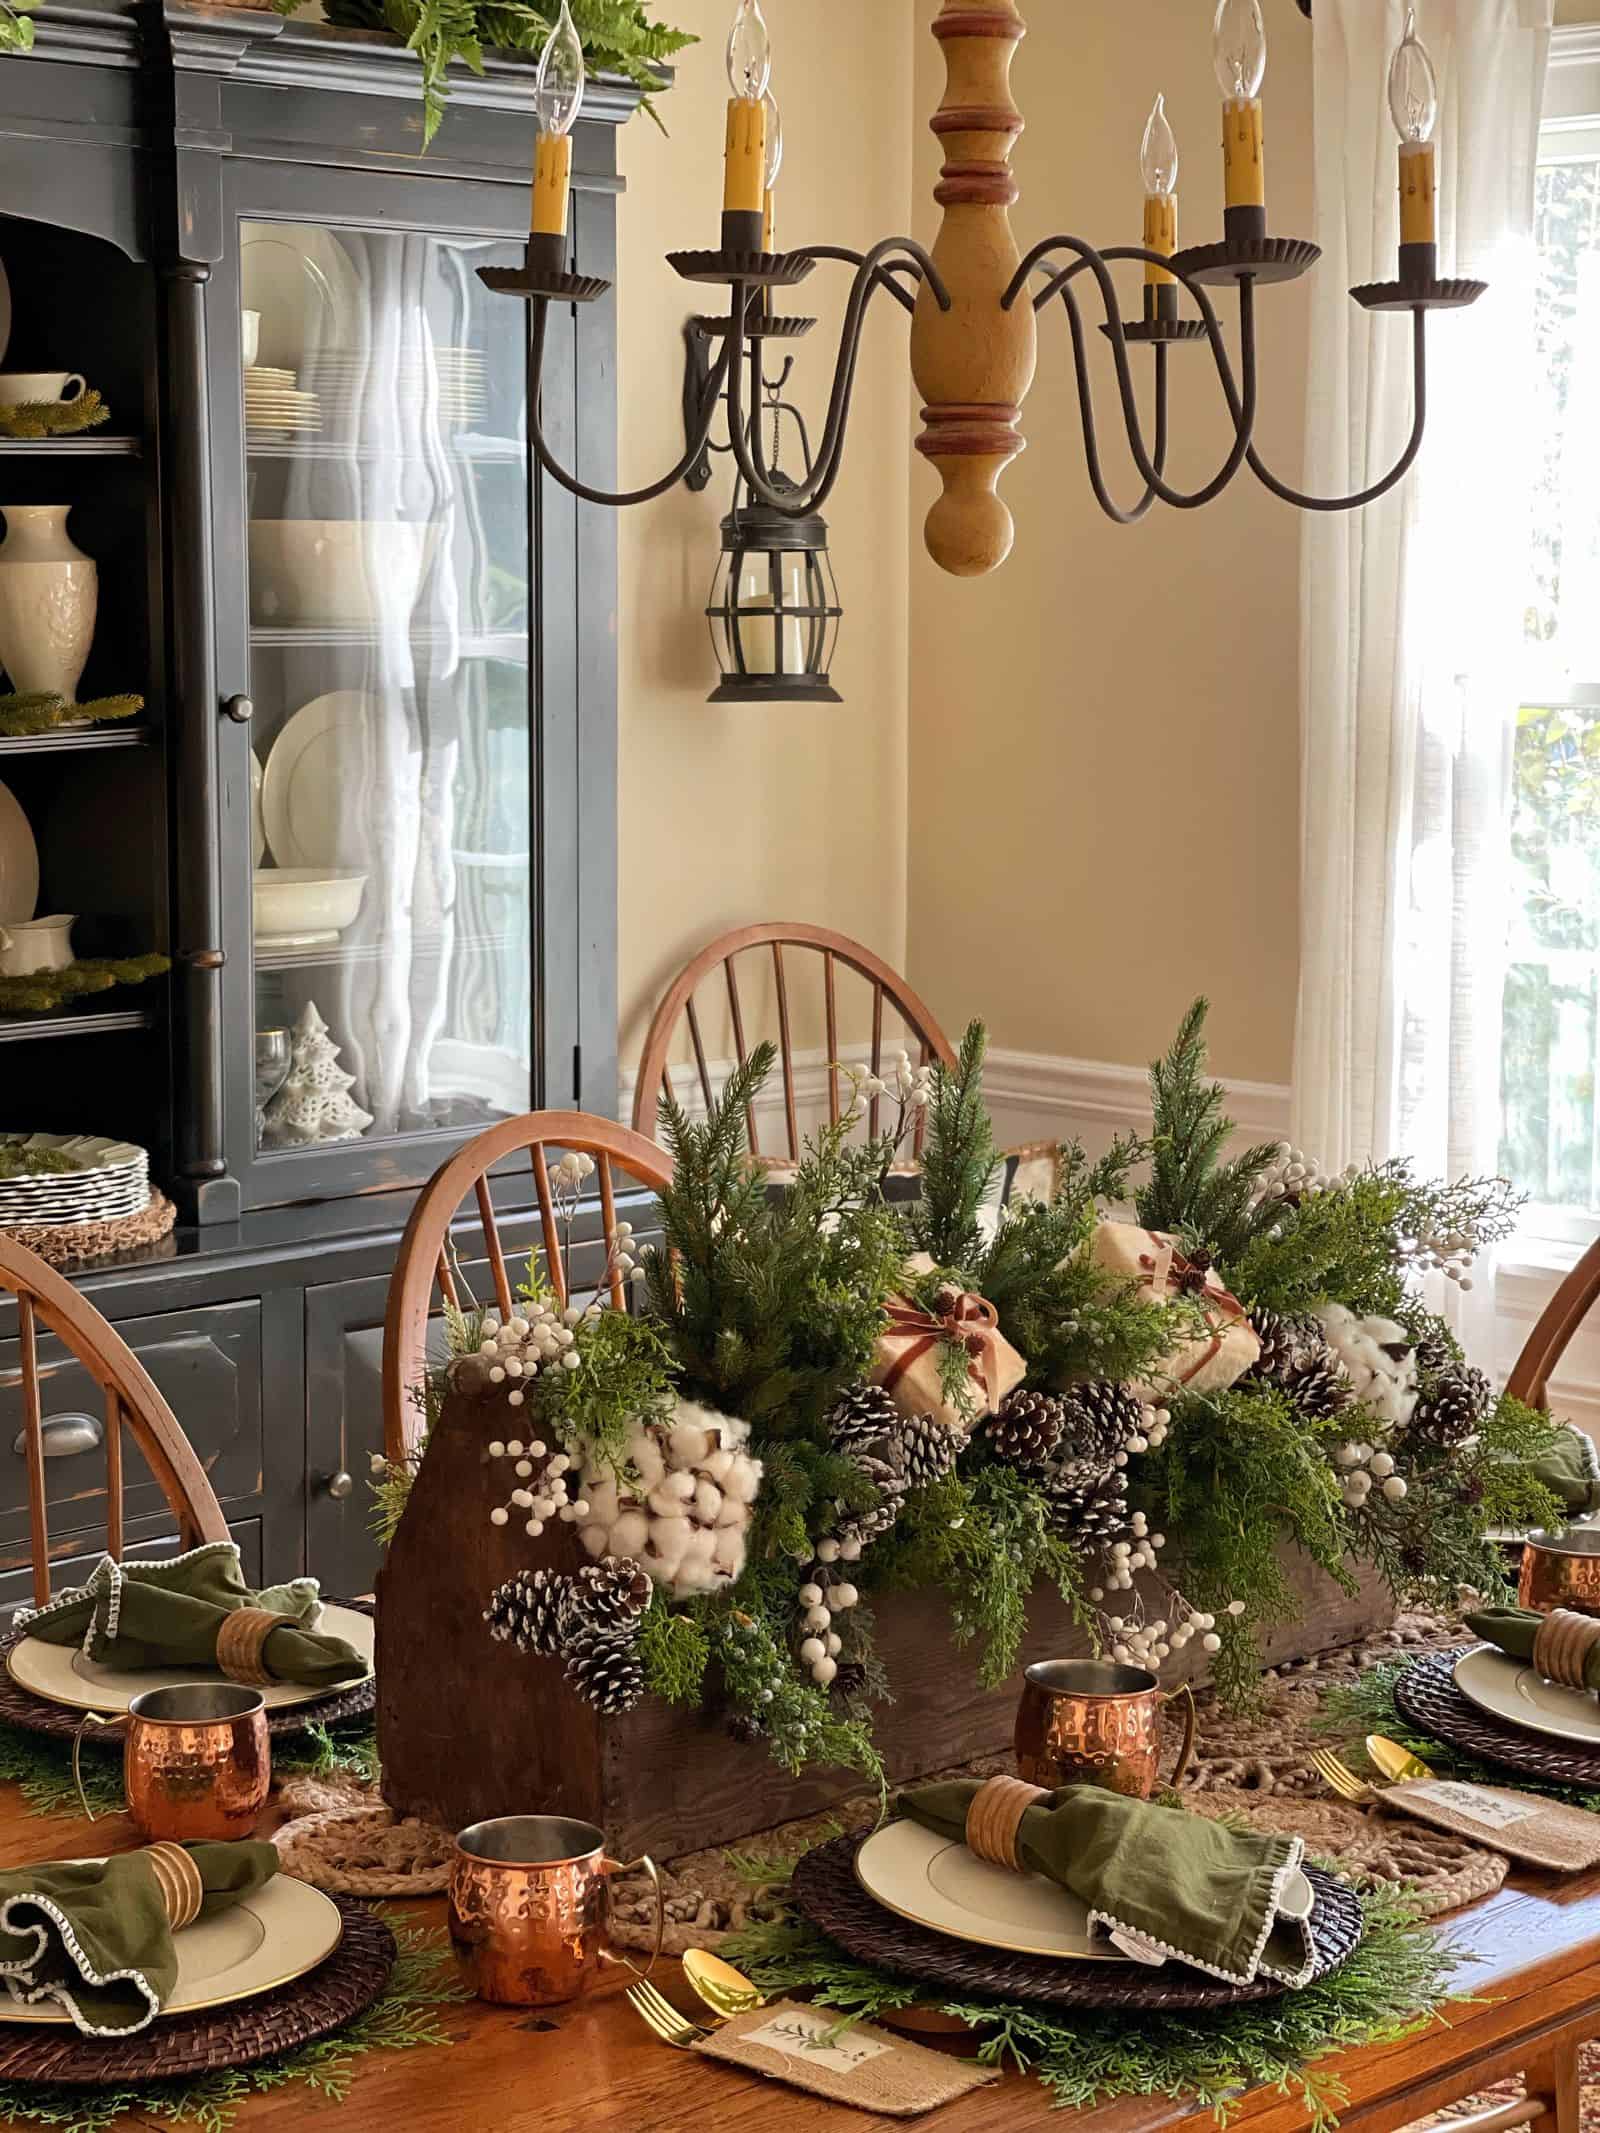
Dining Table
Its long, narrow shape makes it the perfect anchor for a winter tablescape. Pair it with candles, simple linens, or place settings for a cozy, collected look.
Kitchen Island
Center it on your island to add warmth and greenery to the heart of your home. It brings a garden-fresh feel into an otherwise busy space.
Entryway or Foyer Table
Welcome guests with an inviting winter focal point as soon as they walk through the door. The rustic charm of the toolbox makes a great first impression.
Living Room Console or Sideboard
Layer it with artwork, stacked books, or lamps for a curated, cottage-style vignette.
Covered Porch or Sunroom
If protected from harsh weather, this centerpiece looks beautiful on a porch coffee table or bench — bringing a touch of the garden into your winter outdoor living spaces.
Coffee Table
Just add a tray beneath it to ground the arrangement and protect the surface. It instantly makes the living room feel cozy and seasonal.
Wherever you place it, this centerpiece becomes a natural focal point that blends garden style with winter charm.
Final Thoughts About Making Winter Centerpieces
Winter is one of my favorite seasons to get creative with arrangements because it challenges me to bring the garden indoors in new ways. Whether you use fresh cuttings from your garden or high-quality faux greens for a low-maintenance option, vintage vessels like toolboxes add warmth, texture, and personality to your winter décor.
As a Master Gardener who gardens year-round in Zone 6B, I truly believe that nature-inspired styling doesn’t have to stop when the beds go dormant. With a few thoughtful touches, you can enjoy the beauty and spirit of the garden all winter long—right on your dining table, foyer, or kitchen island.
Do you prefer fresh or faux for winter table centerpieces? Let’s chat more in the comments below.
Thank you for visiting the blog today!
Enjoy your day! xo
Watch this video for more tips to buying faux winter greens and florals.

Want to Learn More About Designing Centerpiece Ideas for the Dining Table?
- Learn how to design beautiful centerpieces.
- Find seasonal centerpiece inspiration here.
- Learn the basics of container design.
- Design easy outdoor planters for winter with these great tips.
I love a centerpiece that can be easily tweaked to get a whole new look. By stocking up on some simple greens, this centerpiece mirrors the season with very little money and effort.
Pin and Save It on Pinterest!
If you like this post, please share and pin it on Pinterest. (If you hover over the images, the Pinterest button will be in the upper left corner.)
I’ve created the below-custom pins for this post.


Subscribe to the blog to gain free access to special home and garden content not available to the general public.
Thank you for visiting the blog today!
Enjoy your day! xo