How to Arrange a China Cabinet Hutch: 7 Steps for a Stunning Display

Master china cabinet hutch arrangement. Discover expert tips for stylish display & organization. Showcase your treasures beautifully.
I get it. Styling a china cabinet and hutch is not easy and is a little intimidating. To be forthright, I struggled with my china cabinet display for years. I had a red spode collection that wasn’t very large and couldn’t figure out how to make it look right so it was visually appealing. Eventually, I came up with a design that was just OK.
But I love how it looks now! And that’s because I now display my collection of fine china.
Whether you have a collection of fine china, ironstone, or other decor, how do you display it without looking like a cluttered, jumbled mess? Wait until you see how easy it is to display a collection of something you love!
(Posts on stacyling.com may contain affiliate links. Click HERE for full disclosure.)

Arranging Your China Cabinet: 7 Steps at a Glance
Before we dive into the details, here is a quick overview of the simple steps to create a beautifully styled hutch that you’ll love.
About China Cabinets and Hutches
China cabinets are typically used for dining table decor storage and display. For some, the china cabinet hutch is a catchall for things they use to entertain guests in the dining room. And for others, it’s more for display than storage.
Whatever the purpose is, dining room hutch shelving can be a daunting task to style. But learning how to set up a china cabinet is actually pretty easy once you learn the basics. So whether you have a large or small china cabinet, these tips will help you level up the dining hutch.
What Should Be Displayed in a China Cabinet?
Whenever I’m asked what should be displayed in a china cabinet, the answer is simple. Everything you need to entertain guests for dinner.
Of course, you can add other items, but if your china hutch cabinet is for storage like mine? It’s much easier to use it for both decor and storage. From dinnerware to stemware, table decor, and more, the possibilities of what should be displayed in a china cabinet are endless.
To learn more about what can be displayed in a china cabinet hutch, CLICK HERE.

What is the Proper Way to Display China in a China Cabinet
Displaying china in a dining room hutch is a great way to showcase your collection while keeping it protected and organized. Here are some tips on the proper way to display china in a china cabinet.
- Clean and prepare your china before styling.
- Group similar items so it’s easier to find and appreciate individual pieces.
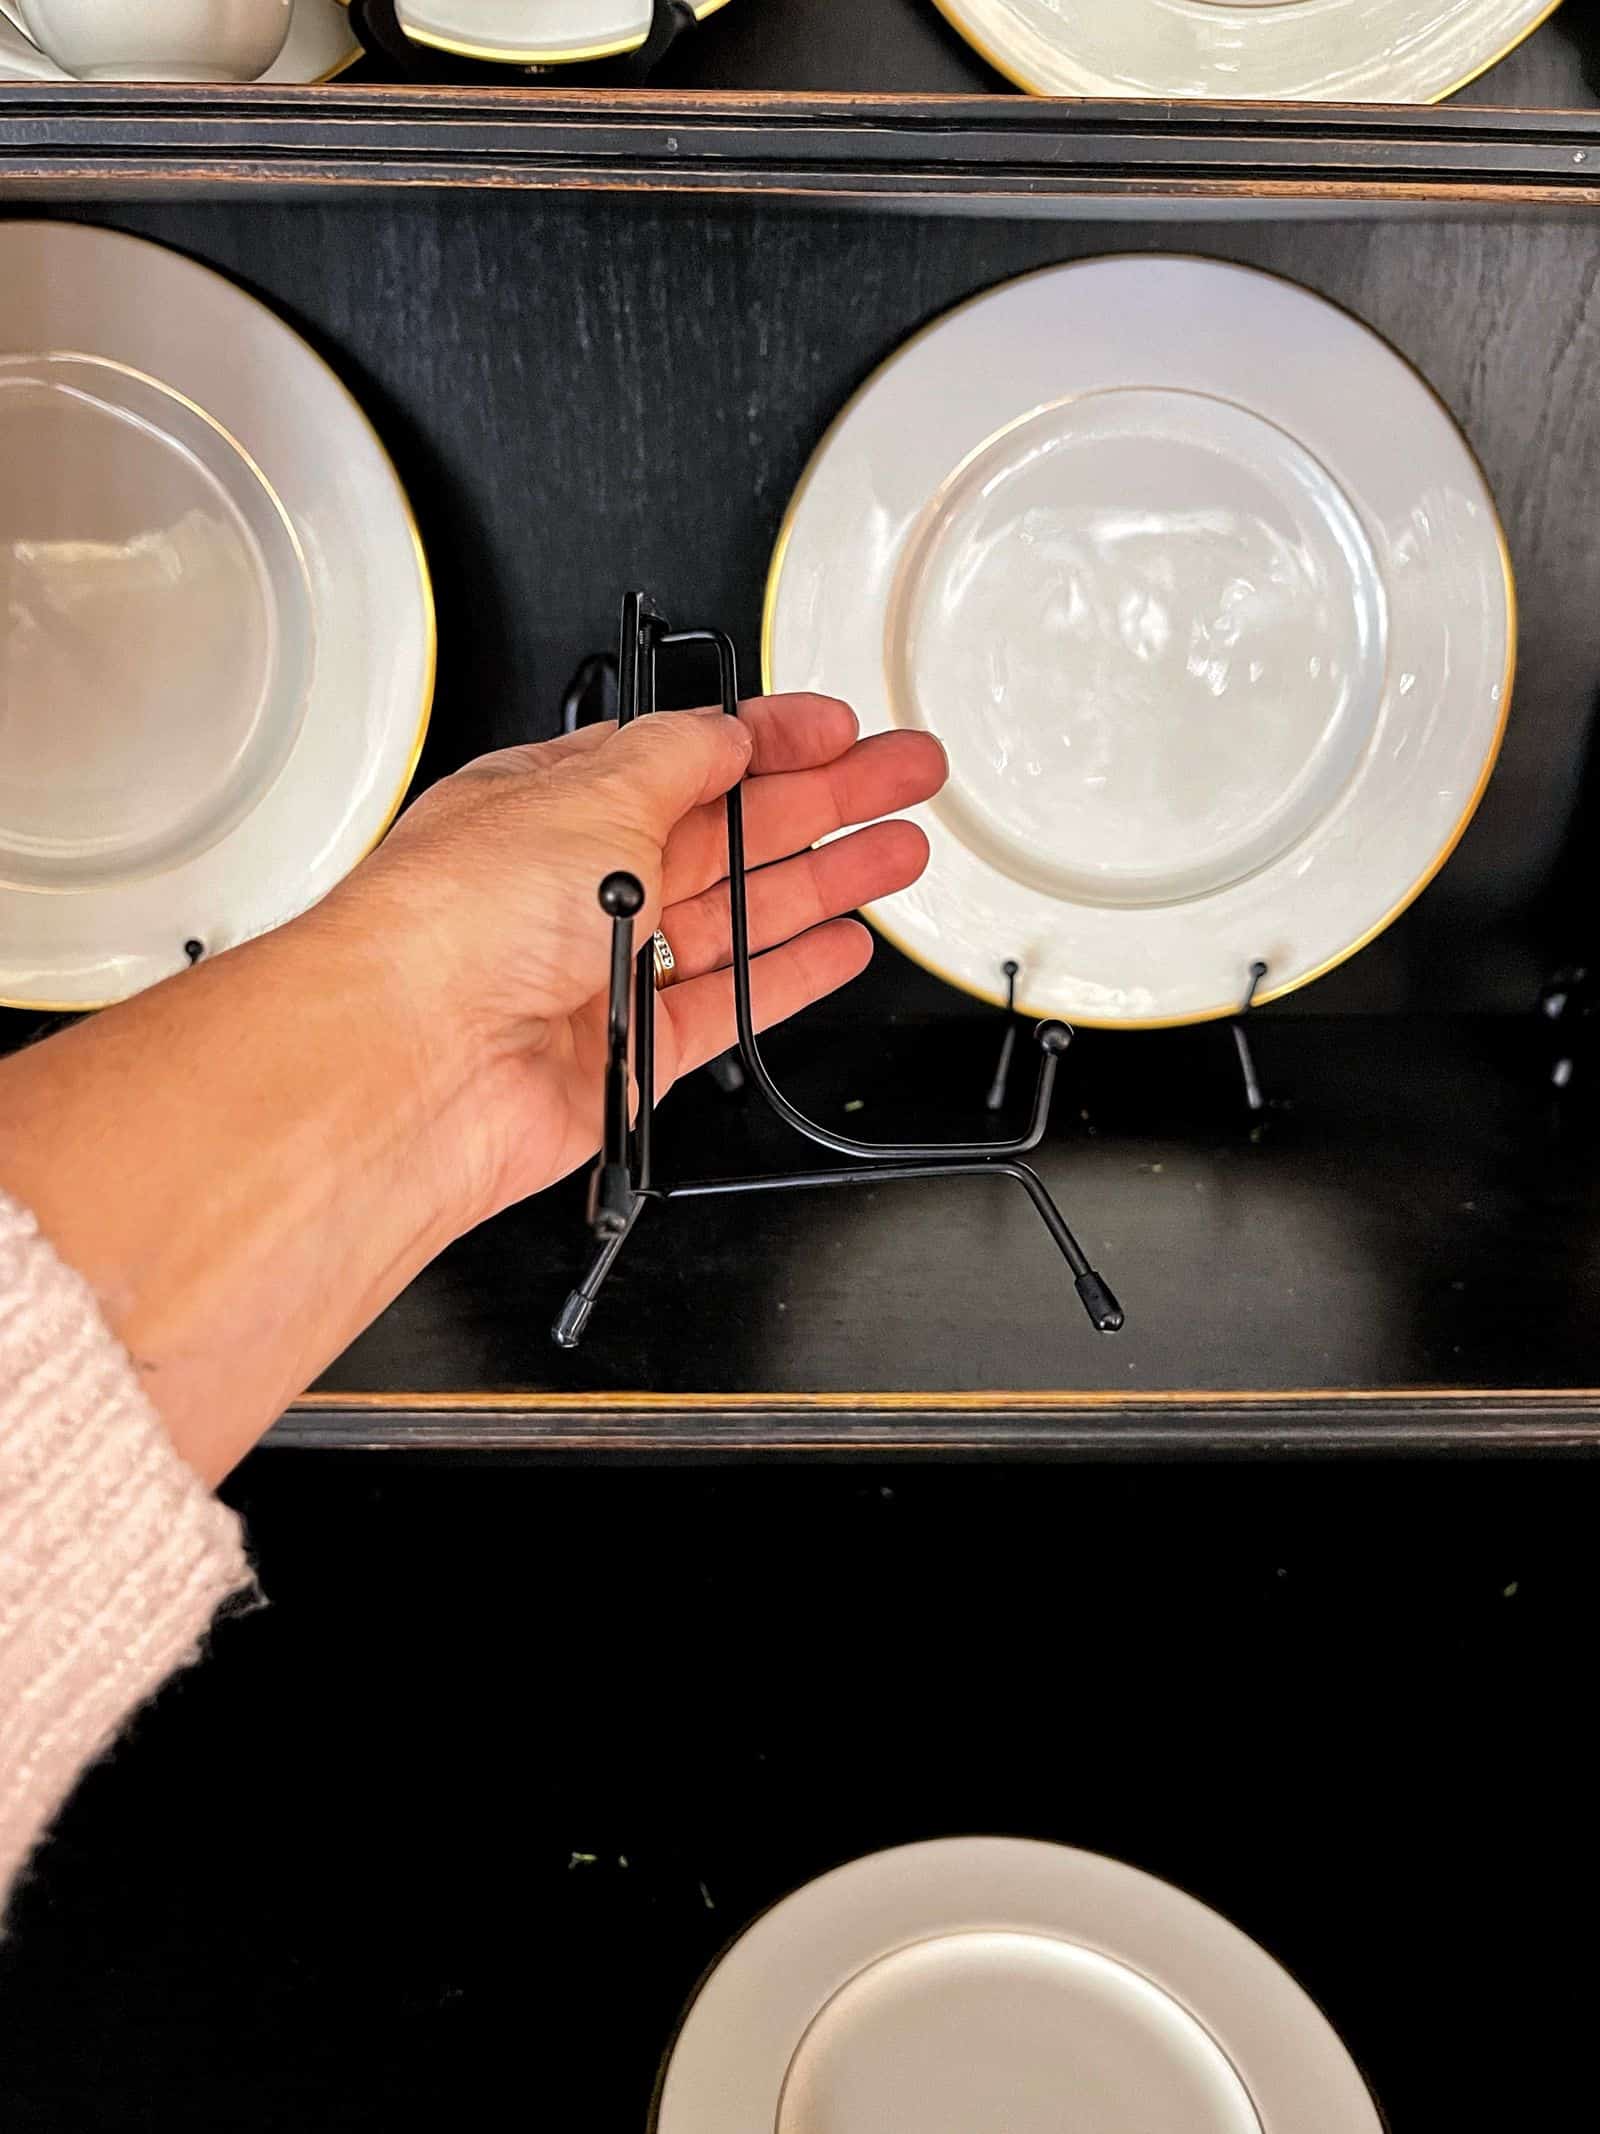
- Use plate stands to display plates vertically, which can be visually appealing and save space.
- Arrange in cozy layers placing larger items like dinner plates at the back of the cabinet and smaller pieces like teacups and saucers at the front. This creates depth and makes all items visible.
- If you want to change up the hutch, you could add wallpaper to create a visually appealing backdrop and contrast to your china.
- Add lighting to enhance your collection or china cabinet display.
- Avoid overcrowding by leaving a little space in between to prevent them from damaging one another.
- Rotate and update the dining room hutch display to any one piece from being exposed to excessive light, which can cause fading and keep it fresh and interesting.
- Secure fragile items.
- Keep away from direct sunlight to prevent fading.
- Use felt pads to protect china from chipping or scratching on hard surfaces.
- Regularly clean the cabinet.

Supplies Needed to Arrange a China Cabinet
Not much is needed to arrange a china cabinet and hutch. But you should take some time to clean everything well before displaying items on open shelving. In general, here’s what you need to arrange open shelves:
- Dining room china cabinet and hutch with shelving
- Dust rag
- Wood cleaner (if applicable)
- Dinnerware or other table decor to display

What Should I Display in My China Cabinet?
I struggled for several years with how to arrange a china cabinet and hutch. And it wasn’t for lack of trying. To put it simply, I was not displaying my best things.
What does that even mean?
You know that fine china you have tucked away for a special occasion that you rarely use because almost no occasion is special enough? Start there.
Many of us have these beautiful collections of things that we keep hidden away. Because we are afraid of damaging them. And for many years, I was guilty of doing that.
So, I’m not sure who needs to hear this today. But get your special things out of storage and display them proudly on your open shelving. Whether it’s in your dining room. Your living room, kitchen, or wherever.
But the point is, don’t keep it stored away because it’s delicate and you are afraid of damaging it. Life’s too short not to enjoy your special things.
Every single day is a special occasion. Use the fine china. Enjoy the ironstone, jadeite, or milk glass. You got this.

How to Arrange a China Cabinet and Hutch for Display
Once you know what you want to highlight, here’s how to arrange your favorite collection with an uncluttered and cozy look in china cabinets and hutches.
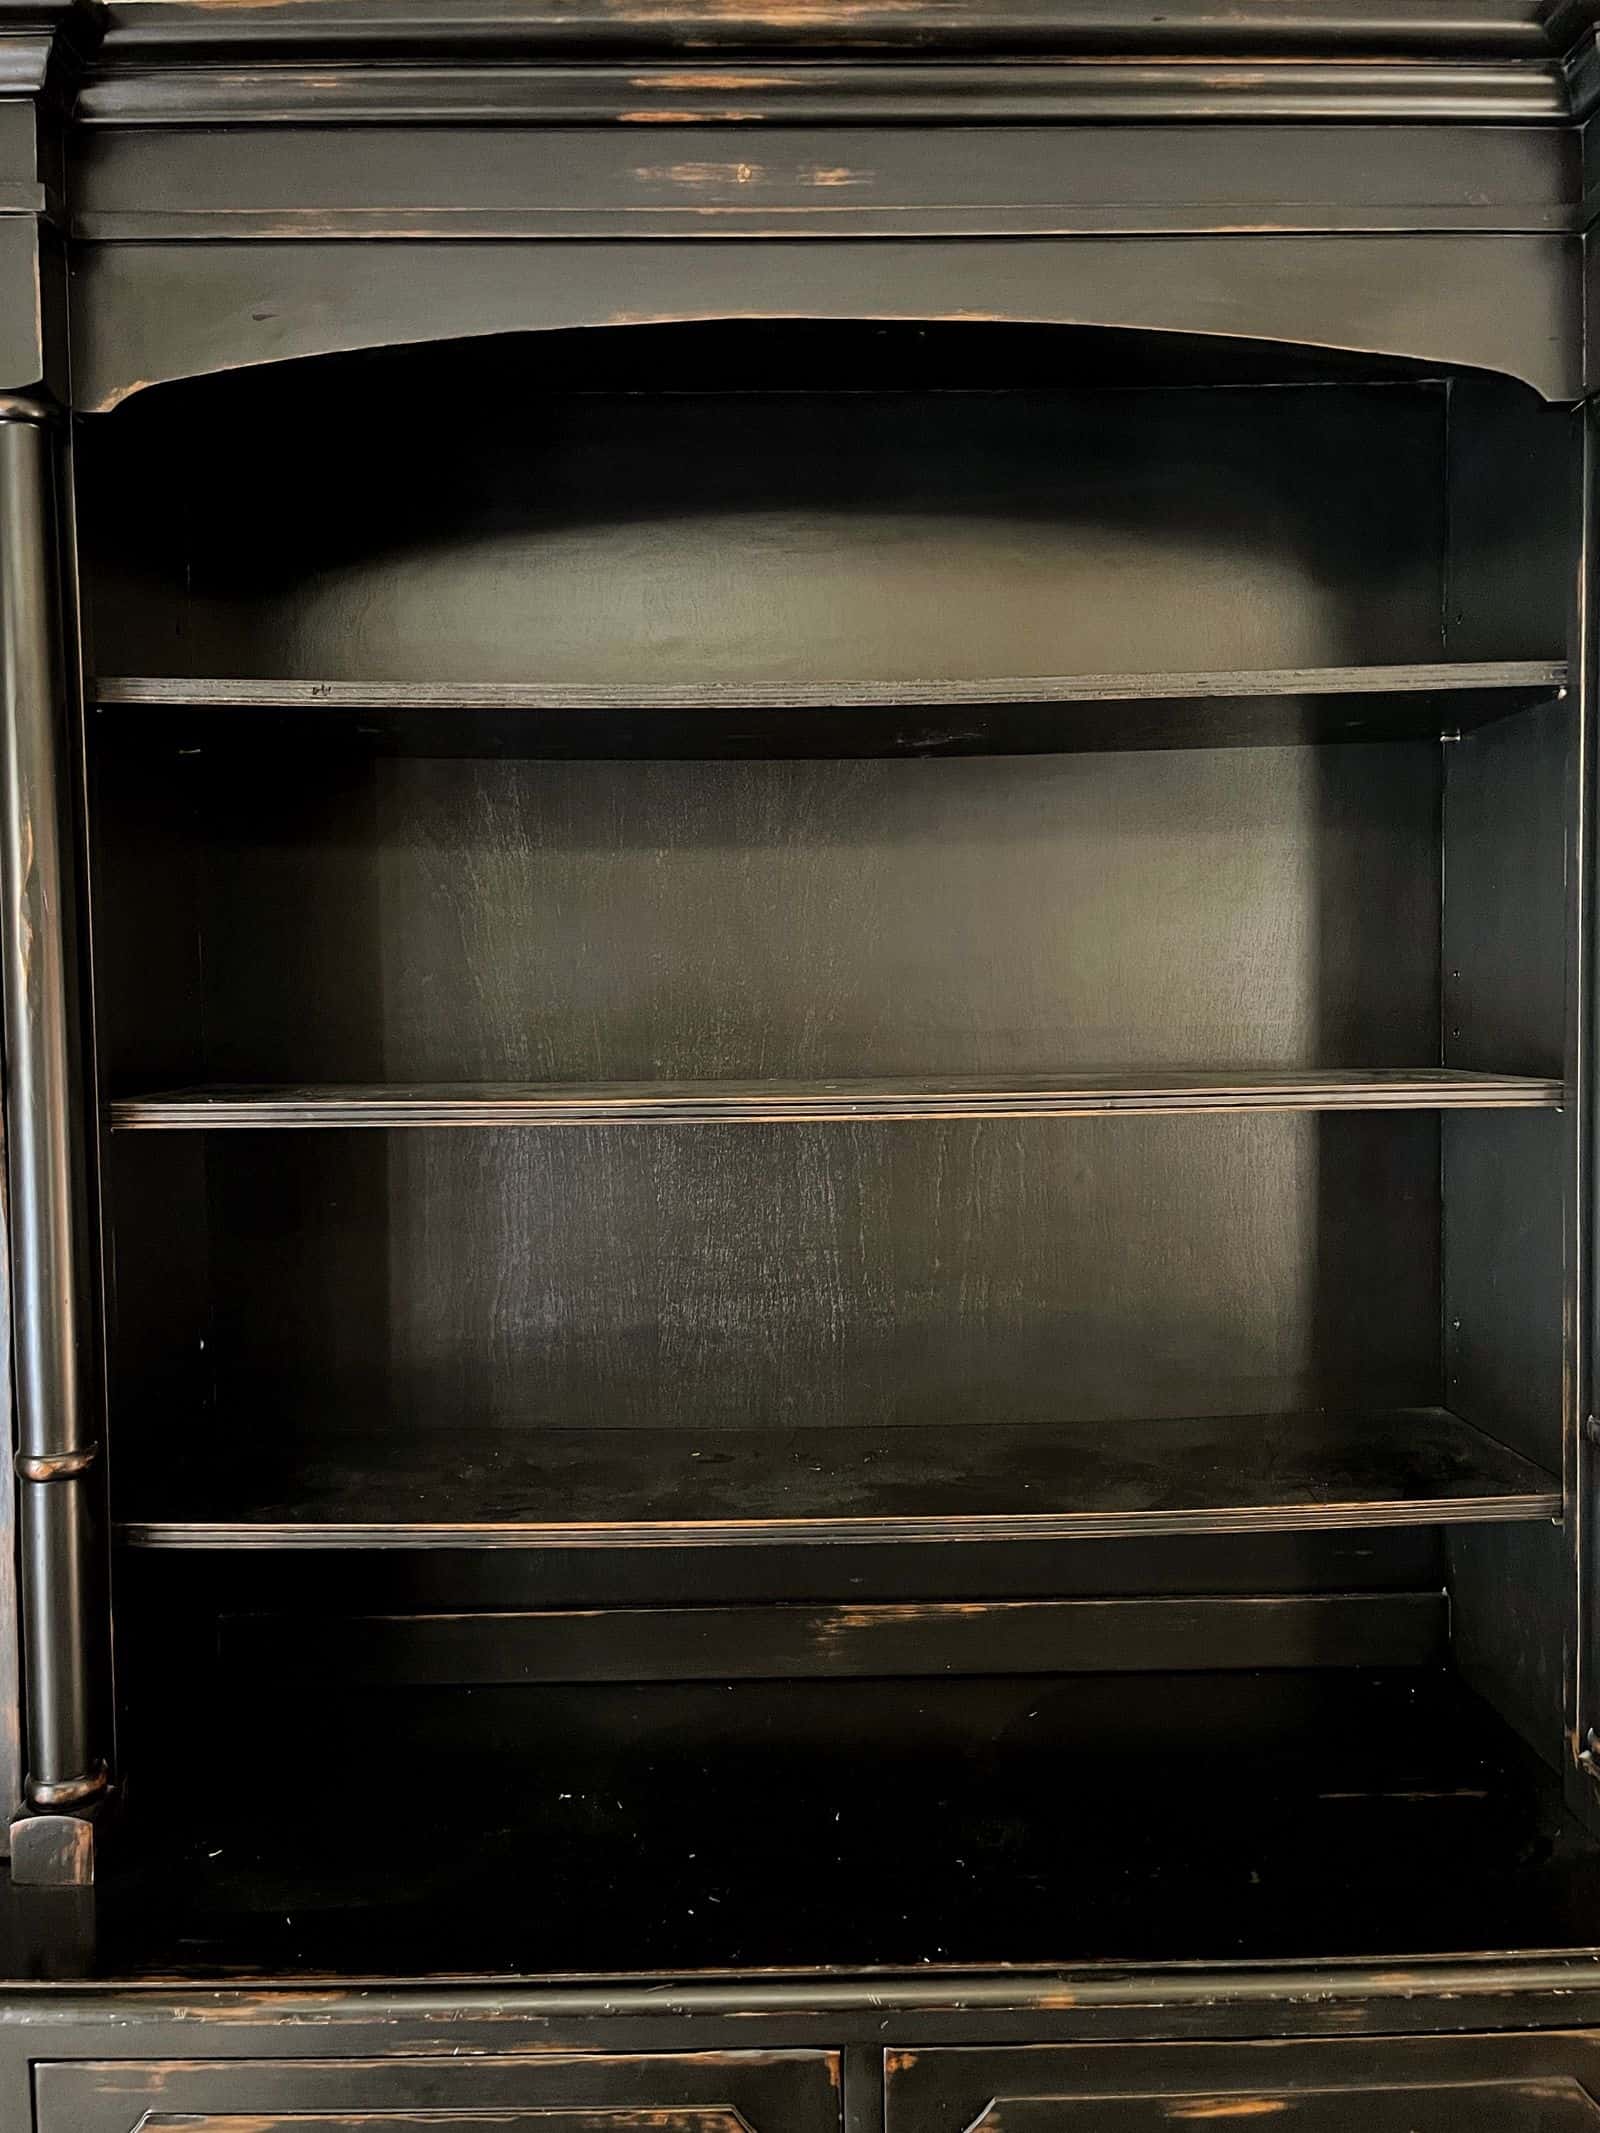
Step 1: Start with a True Blank Canvas for a Better Result
The single biggest mistake people make when rearranging a hutch is trying to work around existing items. To get a professional-looking result, you must start by removing everything from the shelves, so start with a clean slate.
Why is this step non-negotiable?
- It Unleashes Creativity: An empty space forces you to think differently and create entirely new groupings rather than falling back into old habits. You simply can’t re-imagine a space that’s still full.
- It Ensures a Proper Foundation: This is your only chance to give the shelves, corners, and glass a thorough cleaning, ensuring your beautiful pieces are displayed in a sparkling, dust-free environment.
Taking everything out may seem like extra work, but it’s the crucial foundation that makes all the other steps easier and more effective.
Step 2: Curate Your Treasures and Define Your Theme
With your beautiful blank canvas ready, the real fun begins! This step is all about thoughtfully curating the items that will bring your china cabinet to life. Remember, the goal of a hutch is not just storage; it’s to display.
The secret is to tell a story. Before you grab a single plate, ask yourself: What mood or theme do I want to create? Are you aiming for a light and airy spring refresh? A cozy, warm autumn vibe with natural textures? Or a timeless, neutral look that will last all year? Deciding on a general theme or color palette first will guide all your choices and make the final arrangement feel cohesive and intentional.
Here’s how to “shop your home” for the perfect pieces:
- Select Your “Rockstars”: First, choose your “best” pieces. “Best” doesn’t mean most expensive! It means the items you love most—the platter from your grandmother, the pitcher that has the perfect shape, or a stack of plates with a beautiful pattern. These will be the focal points of your display.
- Gather More Than You Need: Collect a variety of items that fit your theme, knowing you won’t use them all. It’s better to have options! Think beyond just dishes—small plants (real or faux), vertically stacked books, baskets, and other decorative objects add personality and warmth.
- Aim for Variety: To create visual interest, you need a mix of shapes, sizes, and textures. Gather tall pitchers, short bowls, round plates, and rectangular trays. Combine smooth, shiny porcelain with the matte finish of terracotta or the rustic texture of a woven basket.
Quick Tip: Don’t try to arrange directly from the cupboard! Lay all of your chosen items out on a nearby dining table or the floor. Seeing your entire curated collection at once helps you spot what works together and makes the next step of grouping and layering so much more intuitive.
Step 3: Build Your Foundation with Weight, Height, and Odds
Now that you have your curated pieces, it’s time to start placing them. This is the architectural step where you’ll create the “bones” of your display. A stylist once gave me an analogy I’ve never forgotten: if you want to fill a large jar, you have to put the big rocks in first. It’s the same with your hutch!
Your largest and heaviest items—like big platters, tall pitchers, or substantial vases—are your “big rocks.” Place these anchor pieces first, spreading them throughout the hutch. Don’t crowd them all on one shelf. Placing them early ensures they have a home and aren’t awkwardly squeezed in later. This creates a balanced foundation for everything else.
Once your anchors are in place, you can start filling in around them. As you do, keep these two classic design secrets in mind:
- Embrace the “Rule of Three”: Have you ever noticed that items grouped in odd numbers—one, three, or five—are more pleasing to the eye? That’s the Rule of Odds in action! An even number of items can feel static and formal, while an odd number creates a sense of casual, dynamic energy that encourages your eye to move around the grouping. So instead of placing two candlesticks together, try grouping three.
- Create a Visual Landscape: The goal is to avoid a flat, boring display where everything is the same height. You want to create “peaks and valleys” that guide the eye on a journey through the cabinet. Place a tall pitcher next to a shorter stack of bowls. Let a cascading plant soften the edge of a shelf. This variety in height is what makes a display feel alive and professionally styled.
Quick Tip: To easily add height and create a beautiful layered backdrop, use simple plate stands (like these!) to prop large dinner plates or platters vertically toward the back of the shelves. It’s a classic trick that adds instant dimension.
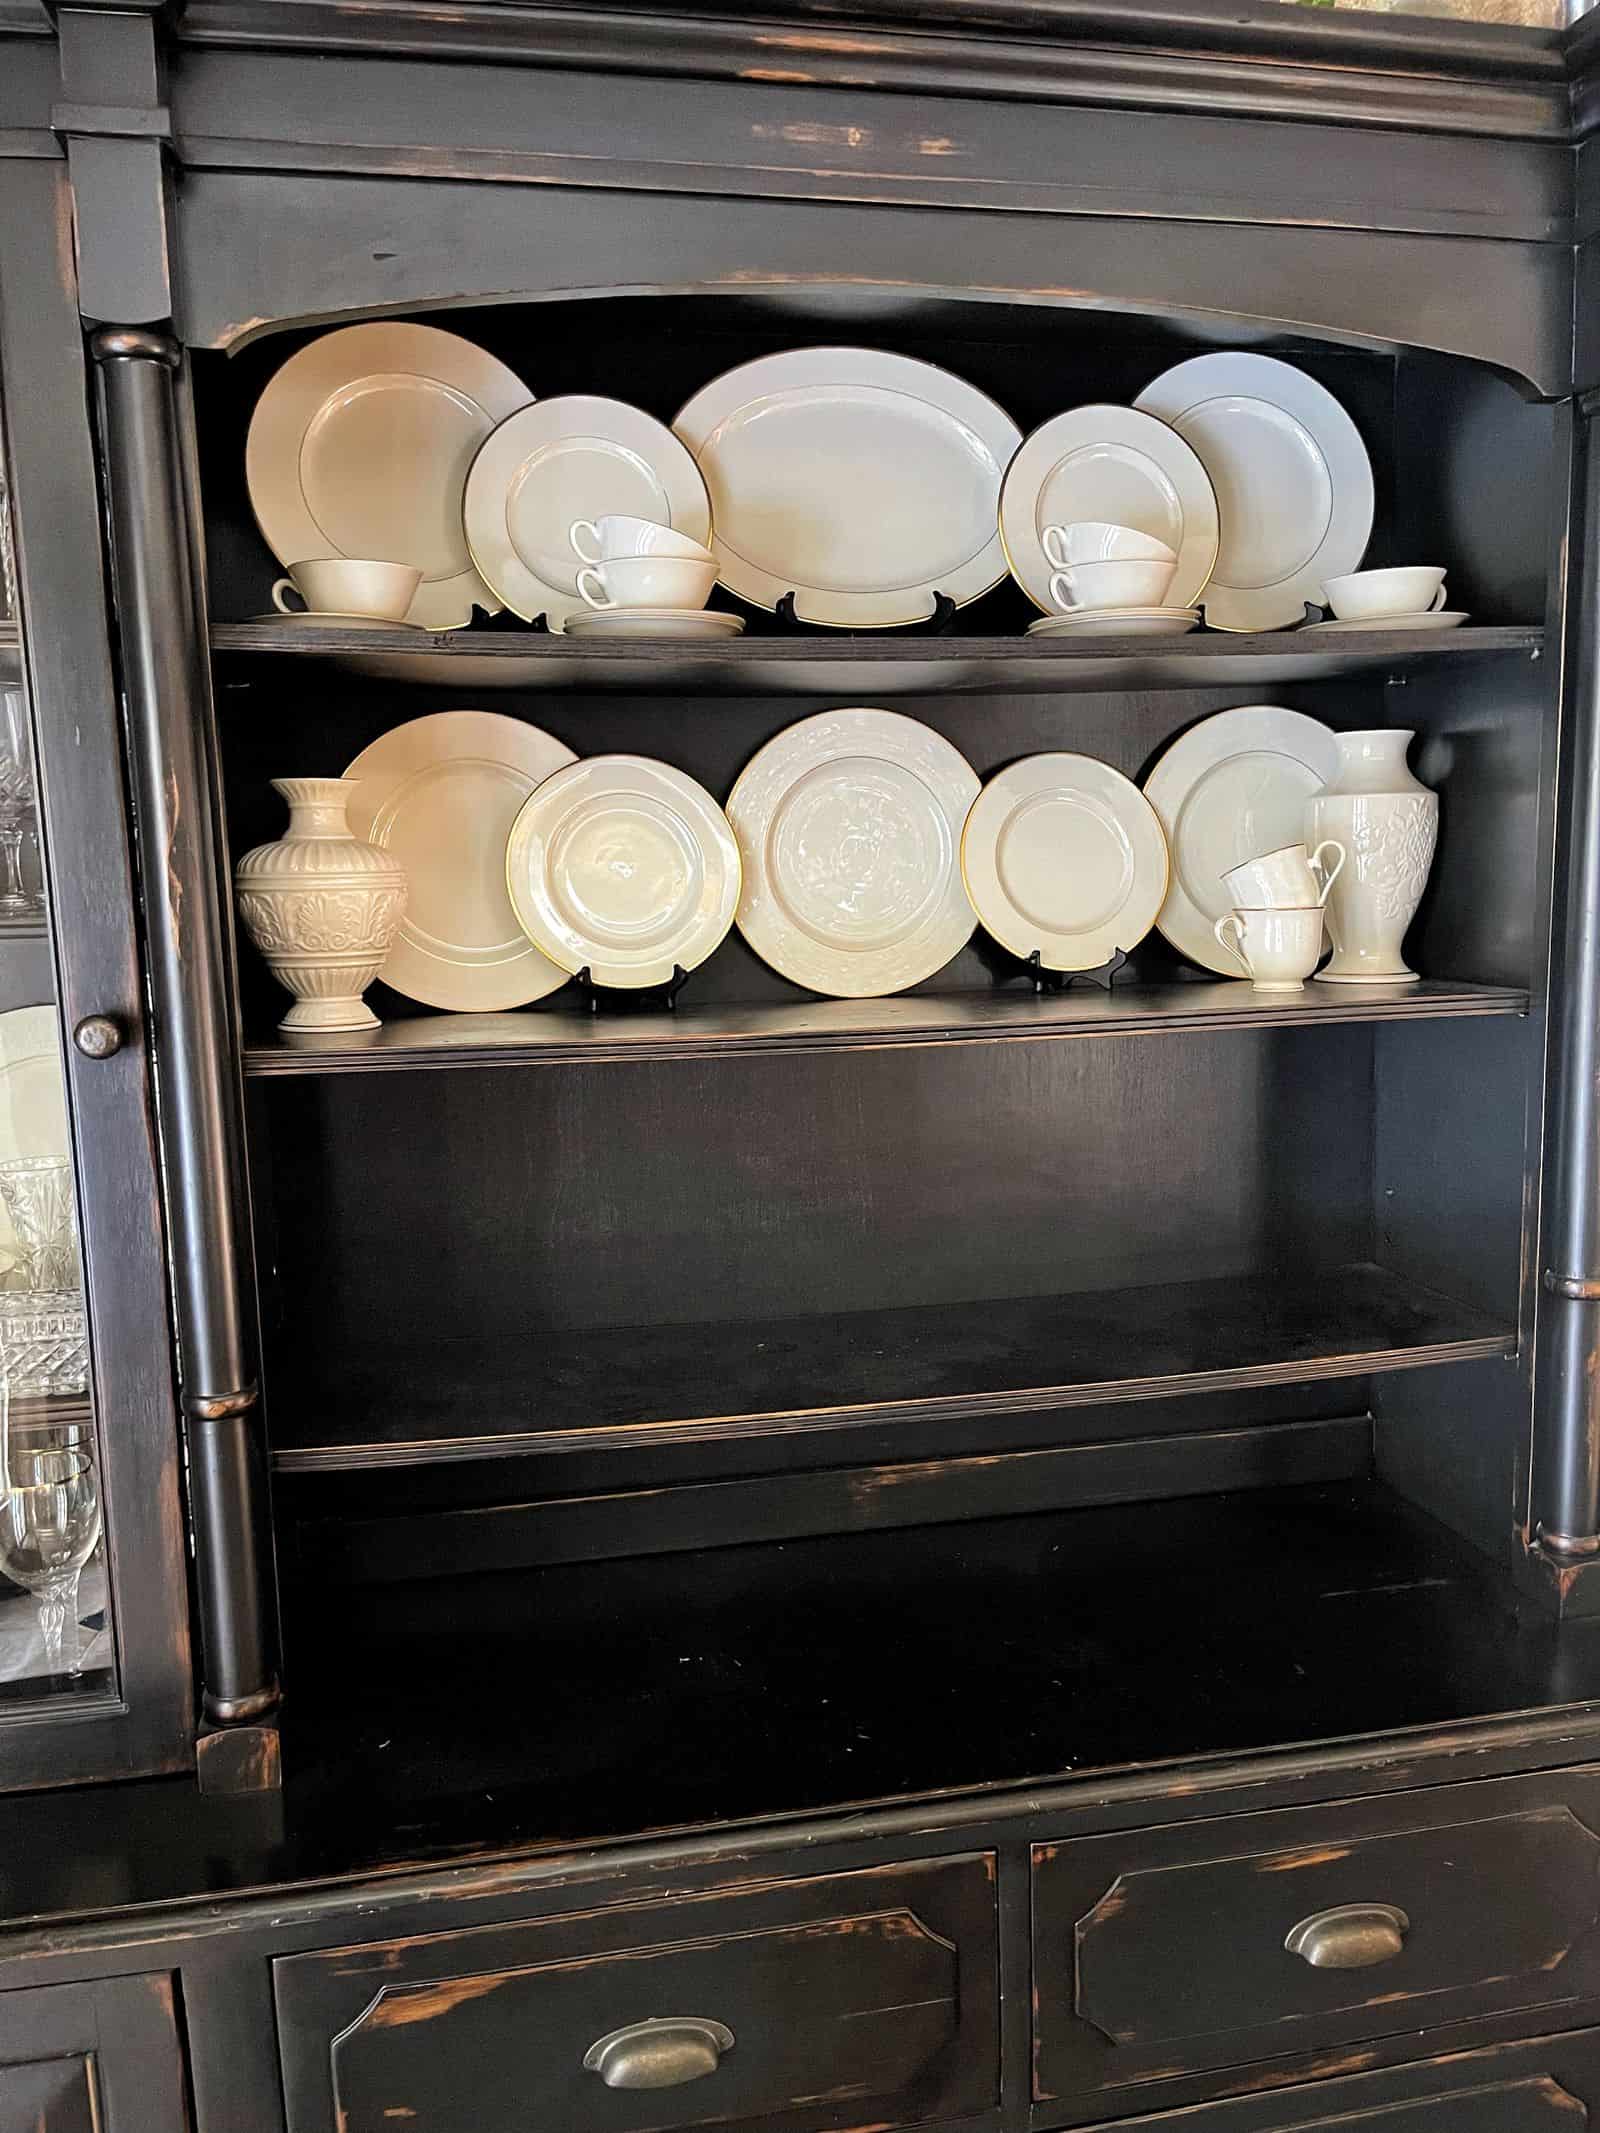
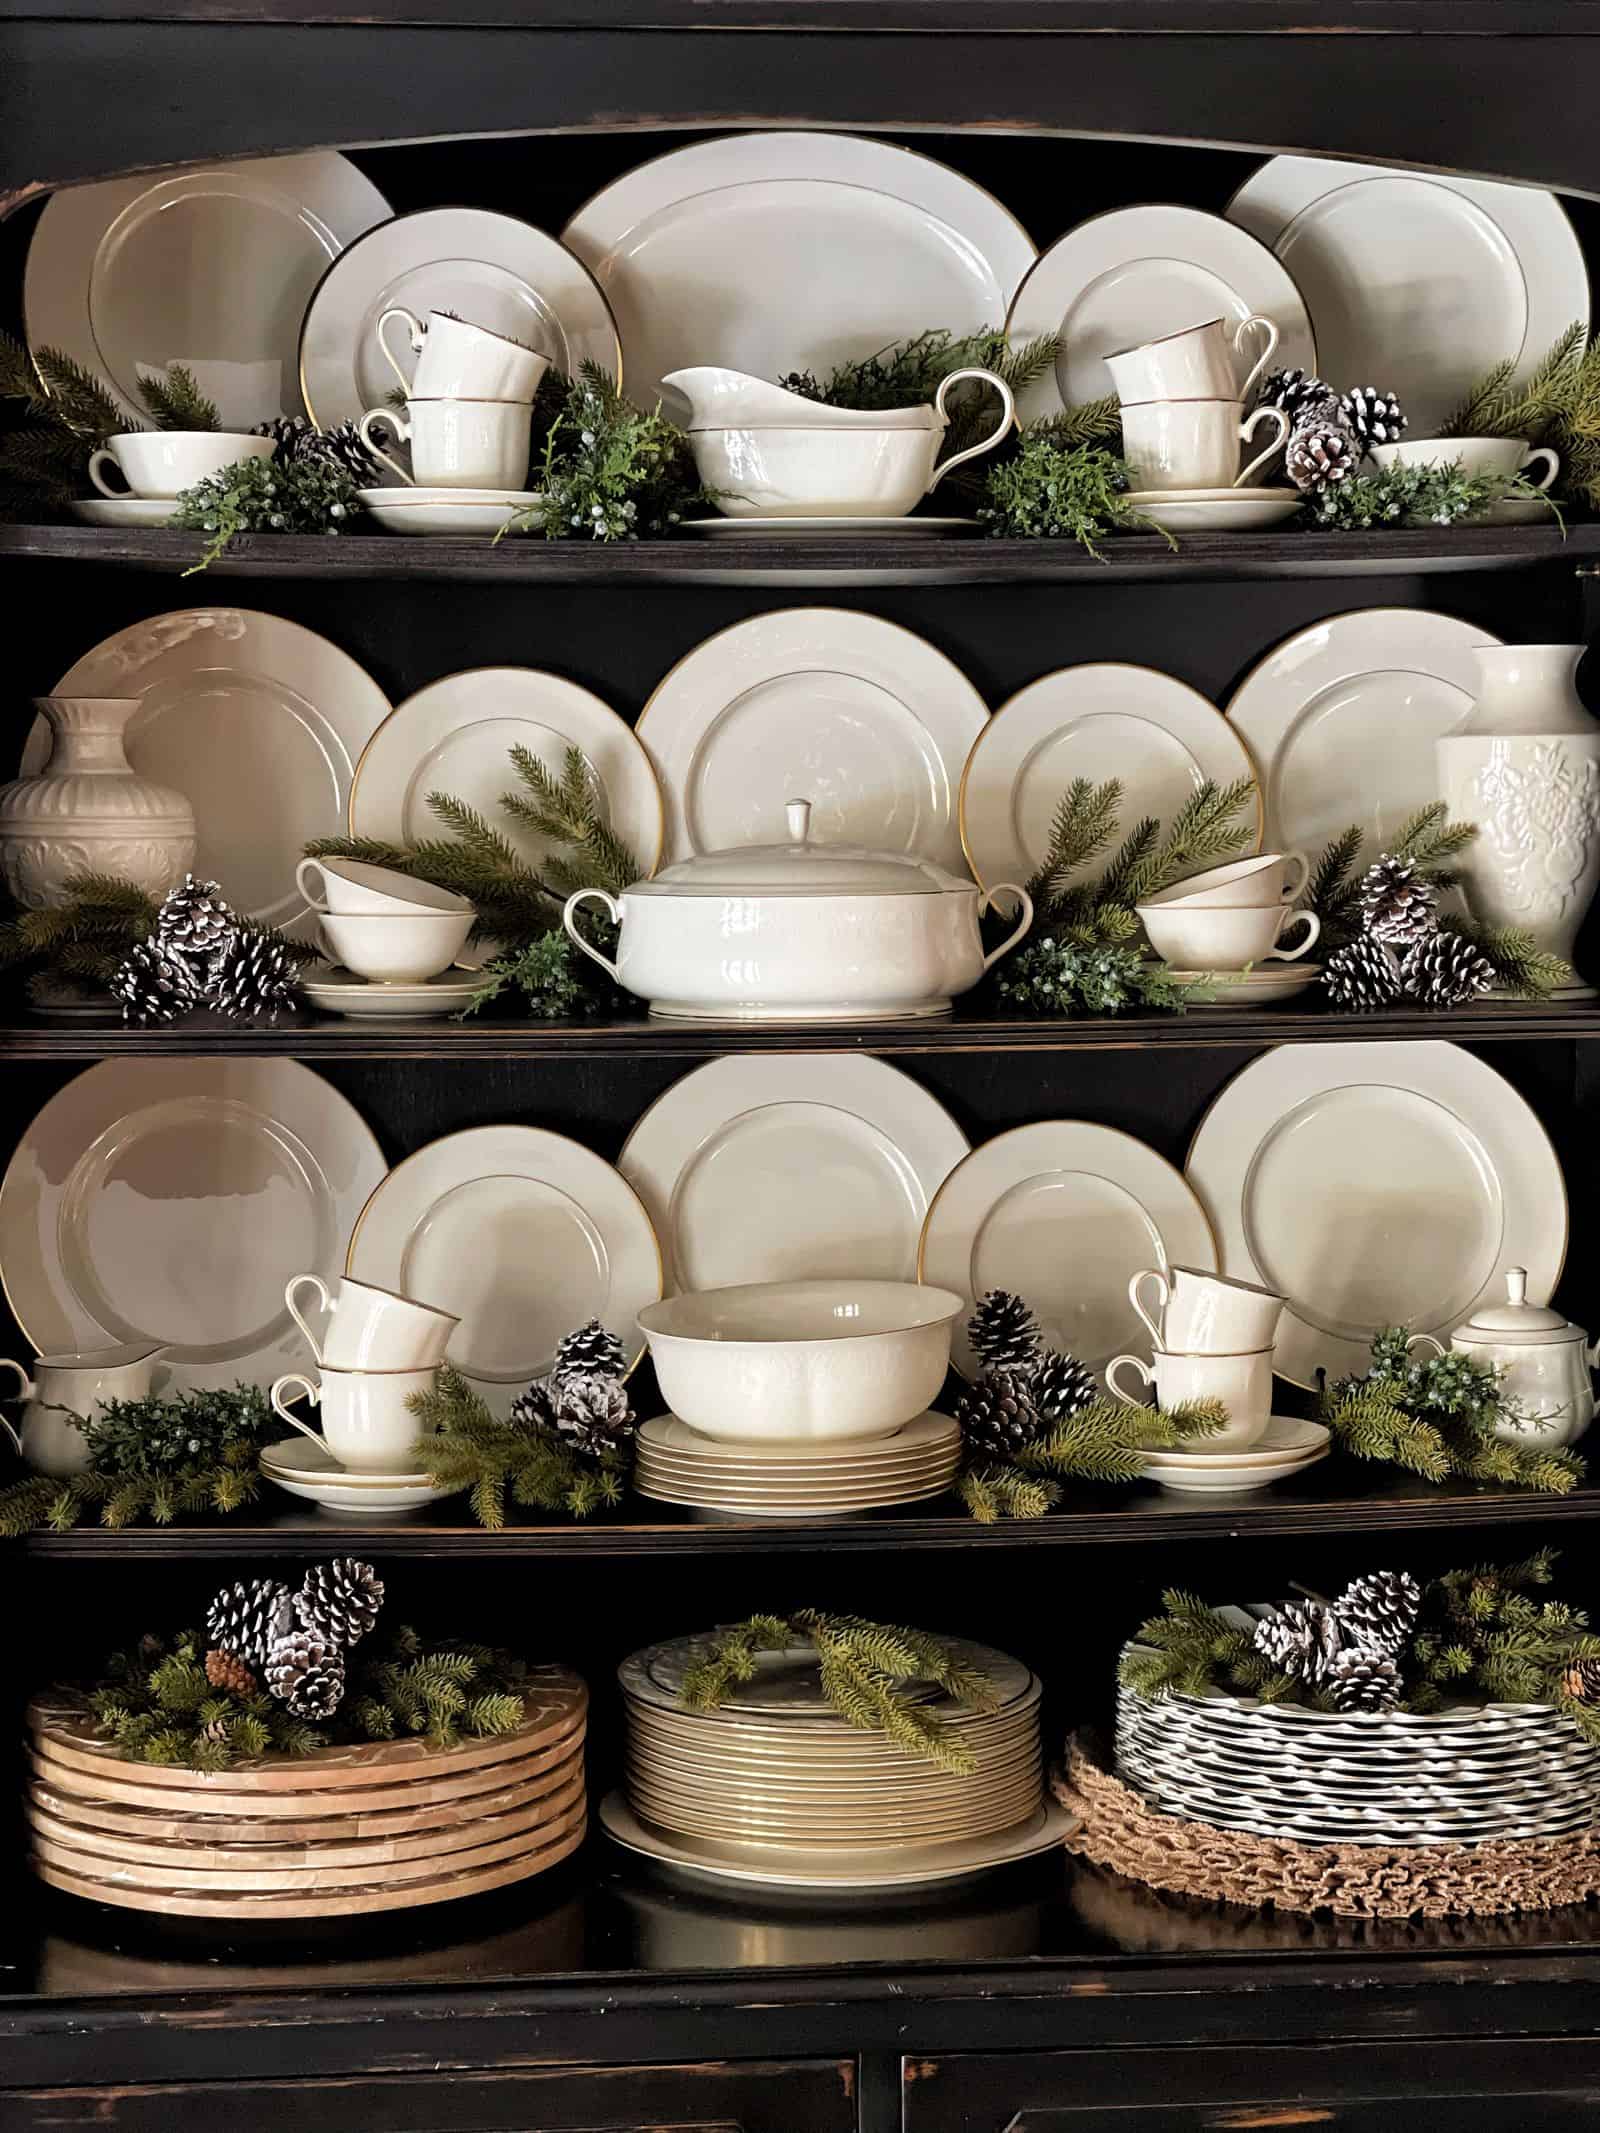
Step 4: Master the Art of Layering in Three Zones
Layering is the single most effective technique for creating a rich, magazine-worthy display. This is what transforms a simple row of items into a dynamic, three-dimensional scene that invites you to look closer. To make it easy, I want you to think of each shelf as a small stage with three distinct zones: a Background, a Midground, and a Foreground.
1. The Background (Your Backdrop): Start at the very back of the shelf. This zone is for your tallest and flattest items, which will serve as the backdrop for everything else. Think of large dinner plates or chargers propped up vertically on stands, tall and slender pitchers, or even small pieces of framed art.
2. The Midground (Your Main Characters): This is the heart of your display where you’ll place your functional, everyday heroes. These are your workhorse items like stacks of soup bowls, clusters of glassware, a favorite teapot, or a gravy boat. These pieces should be shorter than your background items, allowing the backdrop to frame them beautifully.
3. The Foreground (Your Finishing Touches): Finally, the very front of the shelf is where you add the final touches of personality and detail. This is the perfect spot for your smallest and most delicate items. A single, beautiful teacup and saucer, a small creamer, a few seasonal embellishments (like a small pumpkin in autumn), or a sprig of greenery can make the entire vignette feel complete and thoughtfully styled.
Quick Tip: The “peek-a-boo” rule is essential for successful layering! As you place items in the midground and foreground, ensure they don’t completely hide your beautiful background pieces. Shift them slightly to the side so the items behind can “peek” through. That interplay is what truly creates that incredible sense of depth.

Step 5: Style Your Stacks for Beauty and Function
A china cabinet should be more than just beautiful—it needs to work for your life. For many of us, that means storing sets of plates and bowls. But let me share a secret: stacking isn’t just a space-saving compromise; it’s a powerful design technique that can make your hutch feel authentic, organized, and effortlessly stylish.
A well-placed stack provides a sense of order and pleasing repetition. The key is to make the stack feel like a thoughtful vignette, not just a pile of dishes.
Here’s how to do it beautifully:
- Give Your Stack a “Topper”: This is the easiest way to elevate a simple stack. Think of the top dish as a tiny stage. Instead of leaving it bare, place a single object on top—a contrasting bowl in a different color, a small faux plant, a bundle of cinnamon sticks in the fall, or a beautiful teacup. This one move instantly turns the stack into a purposeful design element.
- Vary the Heights: Just like we discussed with creating a “visual landscape,” you don’t want all your stacks to be the same height. Create a tall stack of dinner plates next to a shorter, more casual stack of appetizer plates or bowls. This variation is what creates rhythm and visual interest.
- Embrace the “Perfectly Imperfect” Look: For a relaxed, lived-in feel, don’t worry about making your stacks perfectly straight. A slight, casual offset to each plate can look incredibly chic and inviting.
Quick Tip: If you’re stacking delicate, vintage, or hand-painted china that you don’t use every day, it’s wise to protect it. Place a simple coffee filter or a felt plate liner between each dish. This prevents scratches and chips while still allowing you to achieve that beautiful, accessible, and stacked look.
Step 6: The Art of the Edit: Let Your Treasures Breathe
This step is the secret ingredient that pulls everything together, and it’s where you truly begin to think like a stylist. We’ve spent the last few steps adding all our beautiful things, and now it’s time to refine. Great interior design is often about what you choose to take away.
Give Your Pieces “Breathing Room”
In the design world, we call the empty space around objects “negative space,” and it’s just as important as the objects themselves. Without this “breathing room,” even the most beautiful pieces get lost in a crowd, and the overall look can feel cluttered and overwhelming.
By leaving a little space around your groupings, you give the eye a place to rest and allow each item to have its own moment in the spotlight. It signals confidence and sophistication.
Here’s a little trick: When you think a shelf is perfectly arranged, challenge yourself to remove just one item. Does the whole vignette suddenly feel calmer and more impactful? Nine times out of ten, it will!
Do a Final Check for Scale
Now, take a final look at the variety of sizes and shapes on each shelf. The interplay between large and small items is what creates that engaging visual energy. A tall, elegant pitcher makes a short stack of bowls look even more charming and grounded. Ensure you have a healthy mix—if you notice one shelf is all small, delicate items, try swapping one grouping with a more substantial piece from another shelf to create better balance.
Quick Tip: Don’t feel pressured to get it perfect in one session. It’s often best to “live with it” for a day or two. As you walk past your hutch, you’ll naturally notice things you want to tweak. The best arrangements often evolve over a few days of small, intuitive adjustments.
Step 7: The Finishing Touch: Bring It to Life with Nature
And now for my favorite part—the final, magical step that truly embodies the “blooms” in Bricks ‘n Blooms! Adding a touch of nature is what will breathe life into your entire display. It softens the hard edges of ceramic and glass, introduces beautiful organic textures, and provides that perfect, finishing pop of seasonal color. This is how we bridge the gap between our homes and our gardens.
While a small potted plant is a wonderful choice, think beyond that to get a truly custom, styled look.
Here are some of my favorite ways to incorporate greenery and florals:
- The Cascading Vine: Place a trailing plant, like a real or high-quality faux pothos, on a higher shelf and let its vines drape gracefully down the side of the hutch.
- The Single, Elegant Stem: You don’t need a full bouquet. A single flower or a leafy branch clipped from your yard and placed in a slender bud vase can make a powerful, minimalist statement.
- A Teacup Posy: One of the most charming touches is to place a tiny bouquet of small flowers or a bundle of fresh herbs (like rosemary or mint) into a vintage teacup or creamer.
- A Nest of Greenery: Tuck a small bunch of faux moss or other greens into a bowl to create a beautiful, textured “nest” for a decorative object to sit upon.
- Foraged Finds: Let the current season be your guide! A small bowl of acorns or pinecones in the autumn, a few smooth stones in the summer, or some budding branches in the spring can be just as beautiful as a flower.
Quick Tip: Don’t forget to consider the container! The pot or vase holding your greenery is a key part of the decor. Make sure its style fits your overall look—a rustic terracotta pot, a classic ironstone pitcher, or a simple glass jar all contribute to the final story.
Want more shelf styling tips? CLICK HERE.
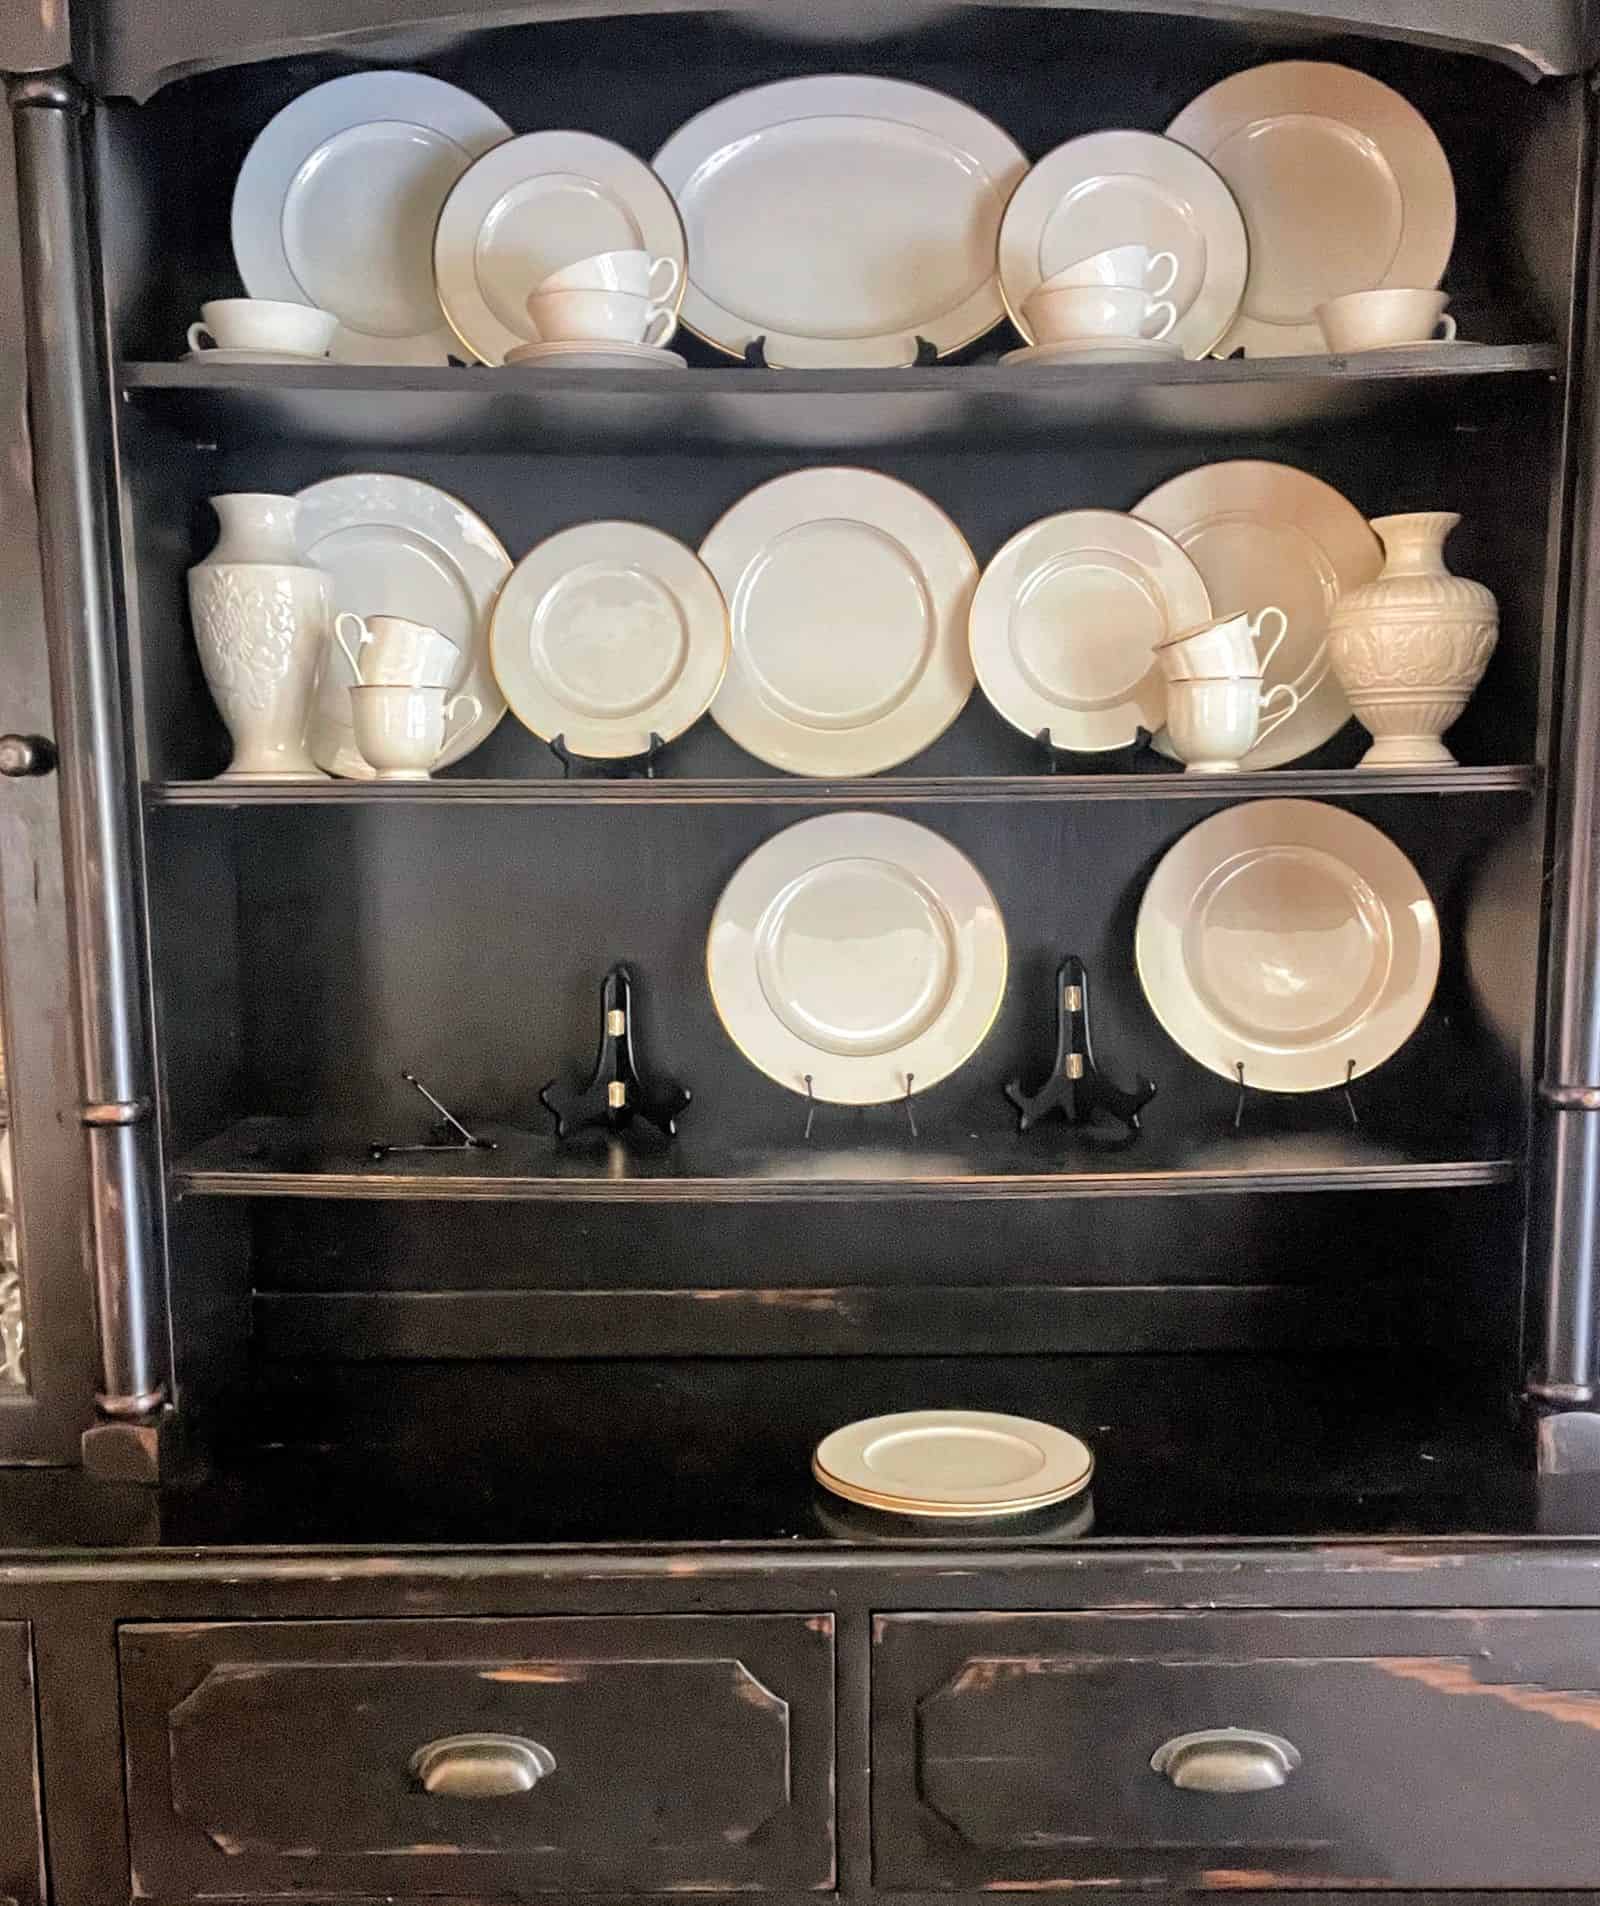
How Do You Hold Dinnerware on a Shelf?
If you want to learn how to display china in a china cabinet, I like to use plate holders. Especially when I am arranging open shelves in the dinning hutch with dinnerware. These plate holders are pretty inexpensive and you can find them almost anywhere. They come in a variety of sizes and you can usually buy a few in a pack.
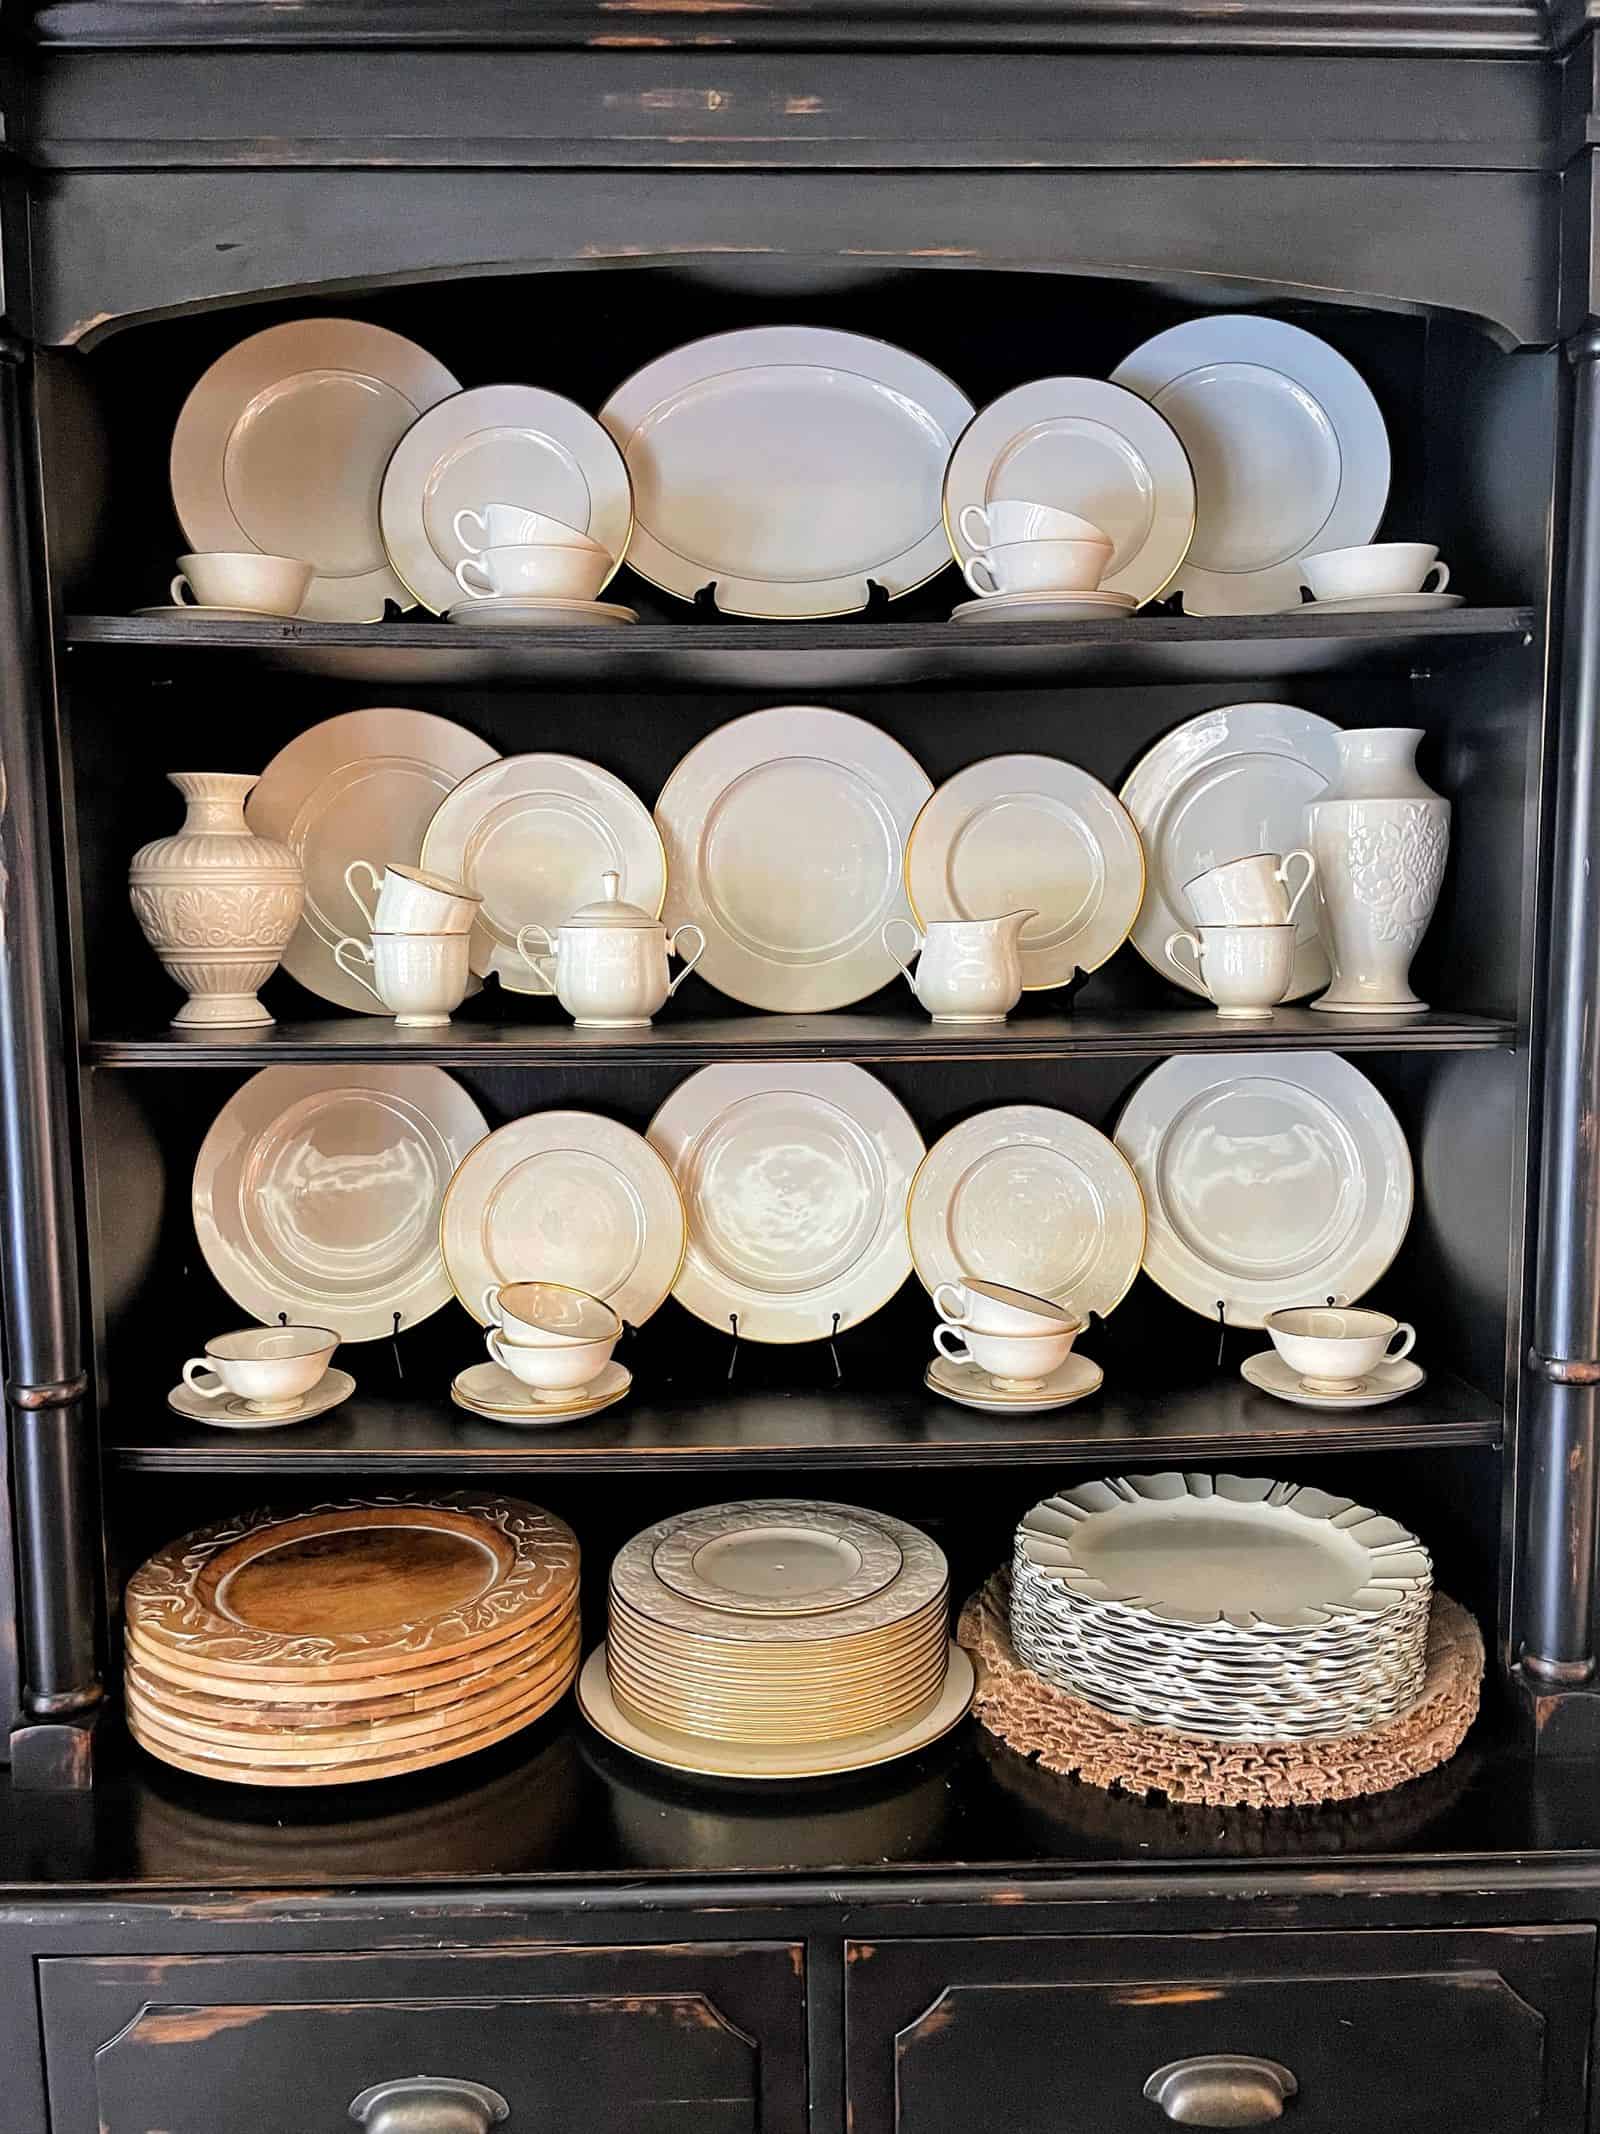
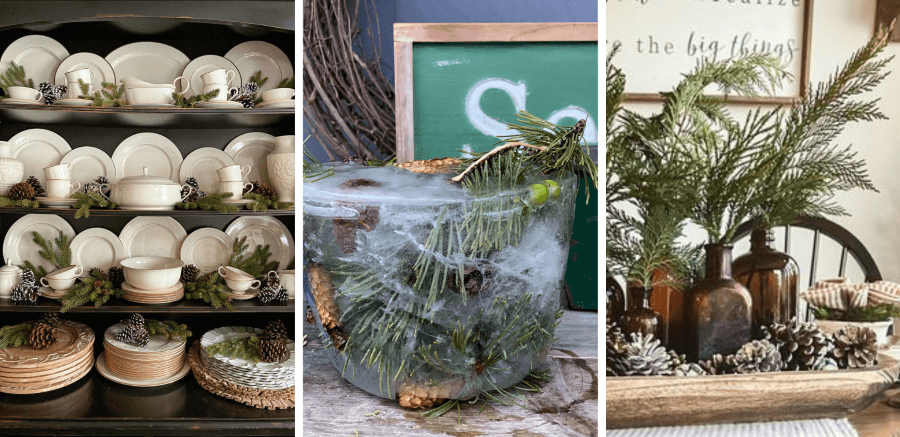
How I Arranged My China Cabinet and Hutch Shelves
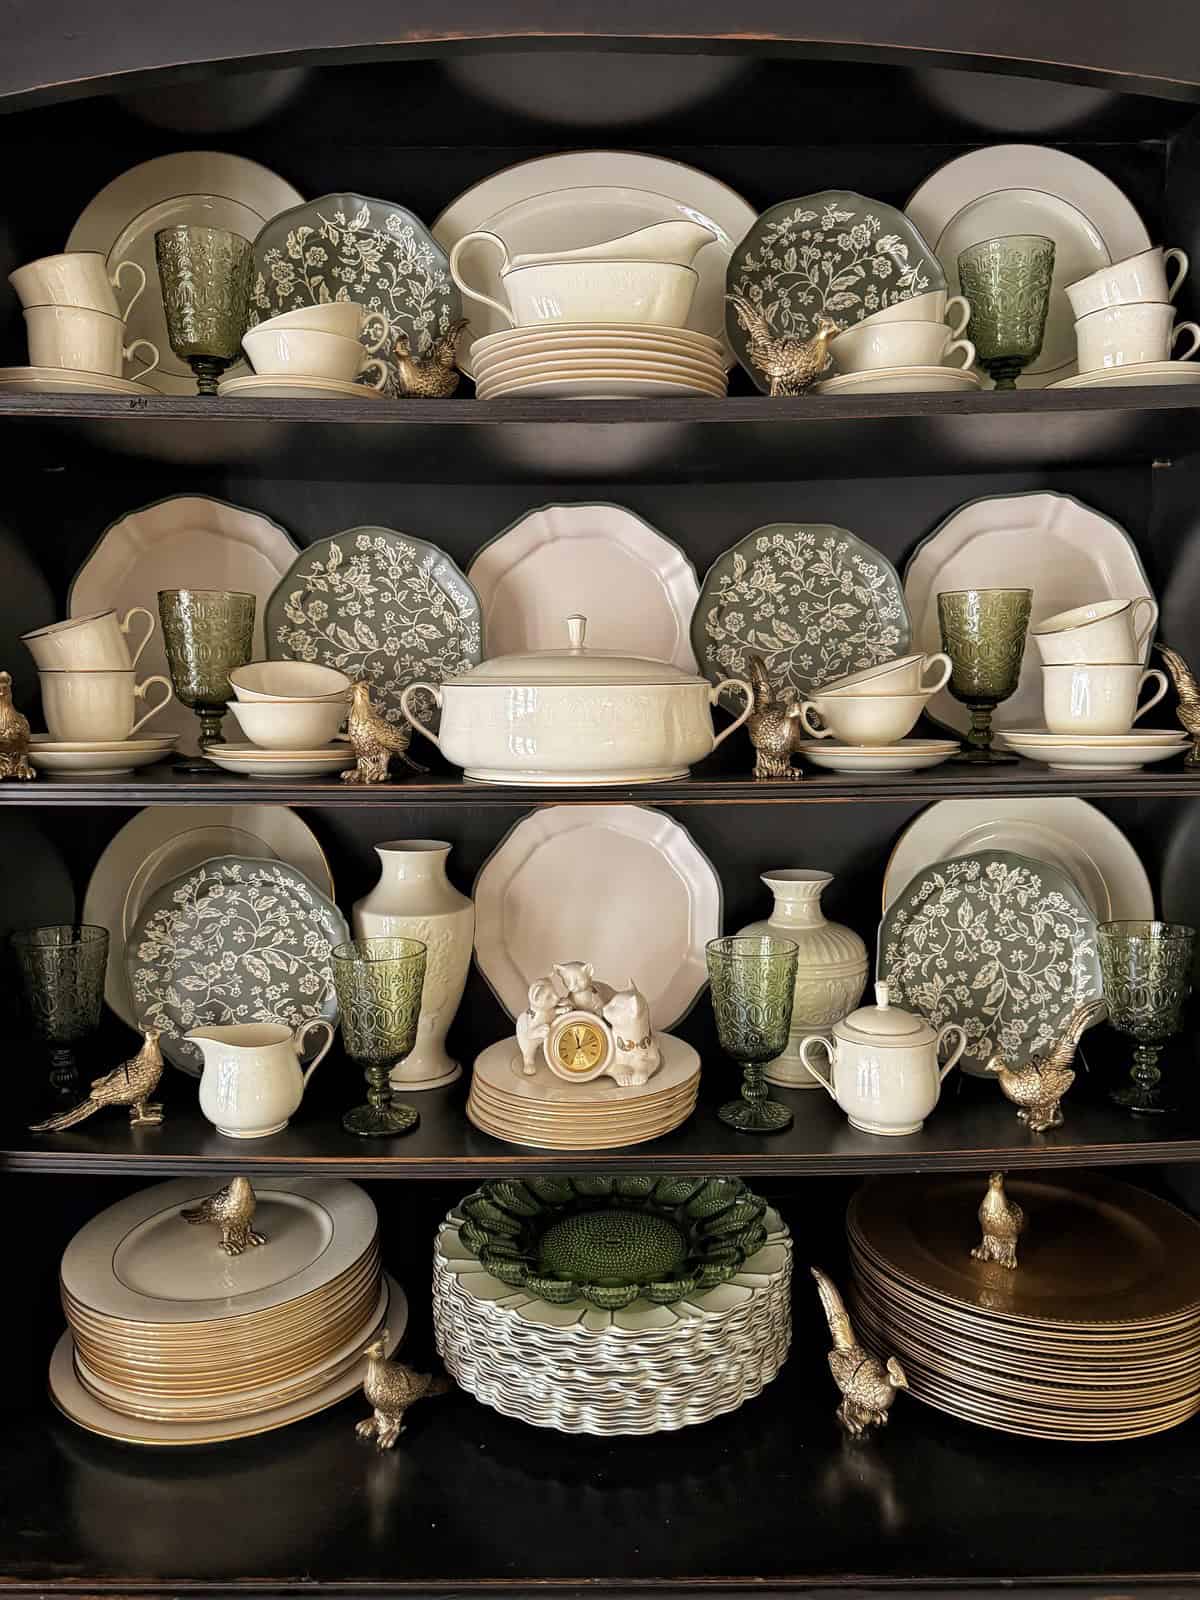
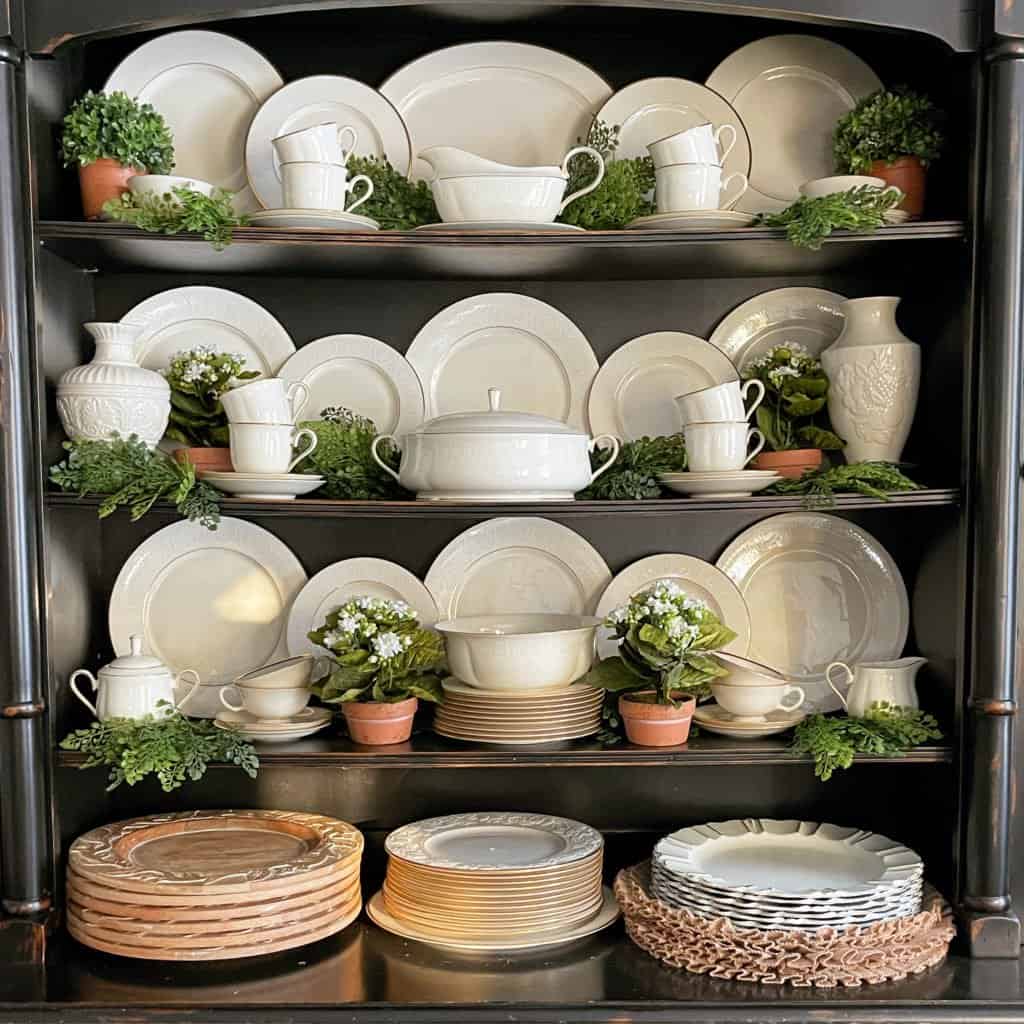
I like to decorate my china cabinet shelves with a mix of my Lenox. Since I have two sets, one from my wedding and the other from my grandmother, I like to incorporate both in the design and get more storage out of the display. Layering items from front to back adds more visual interest, texture, and dimension.
So I started with platters, dinner, and salad plates for the back row, then layered mugs with saucers in front. When I was done, I felt like it looked a little boring. I added a gravy boat, soup tureen, and a bowl stacked on dishes to add a little more interest.
Doesn’t the china display cabinet look a little better than it did without those items?
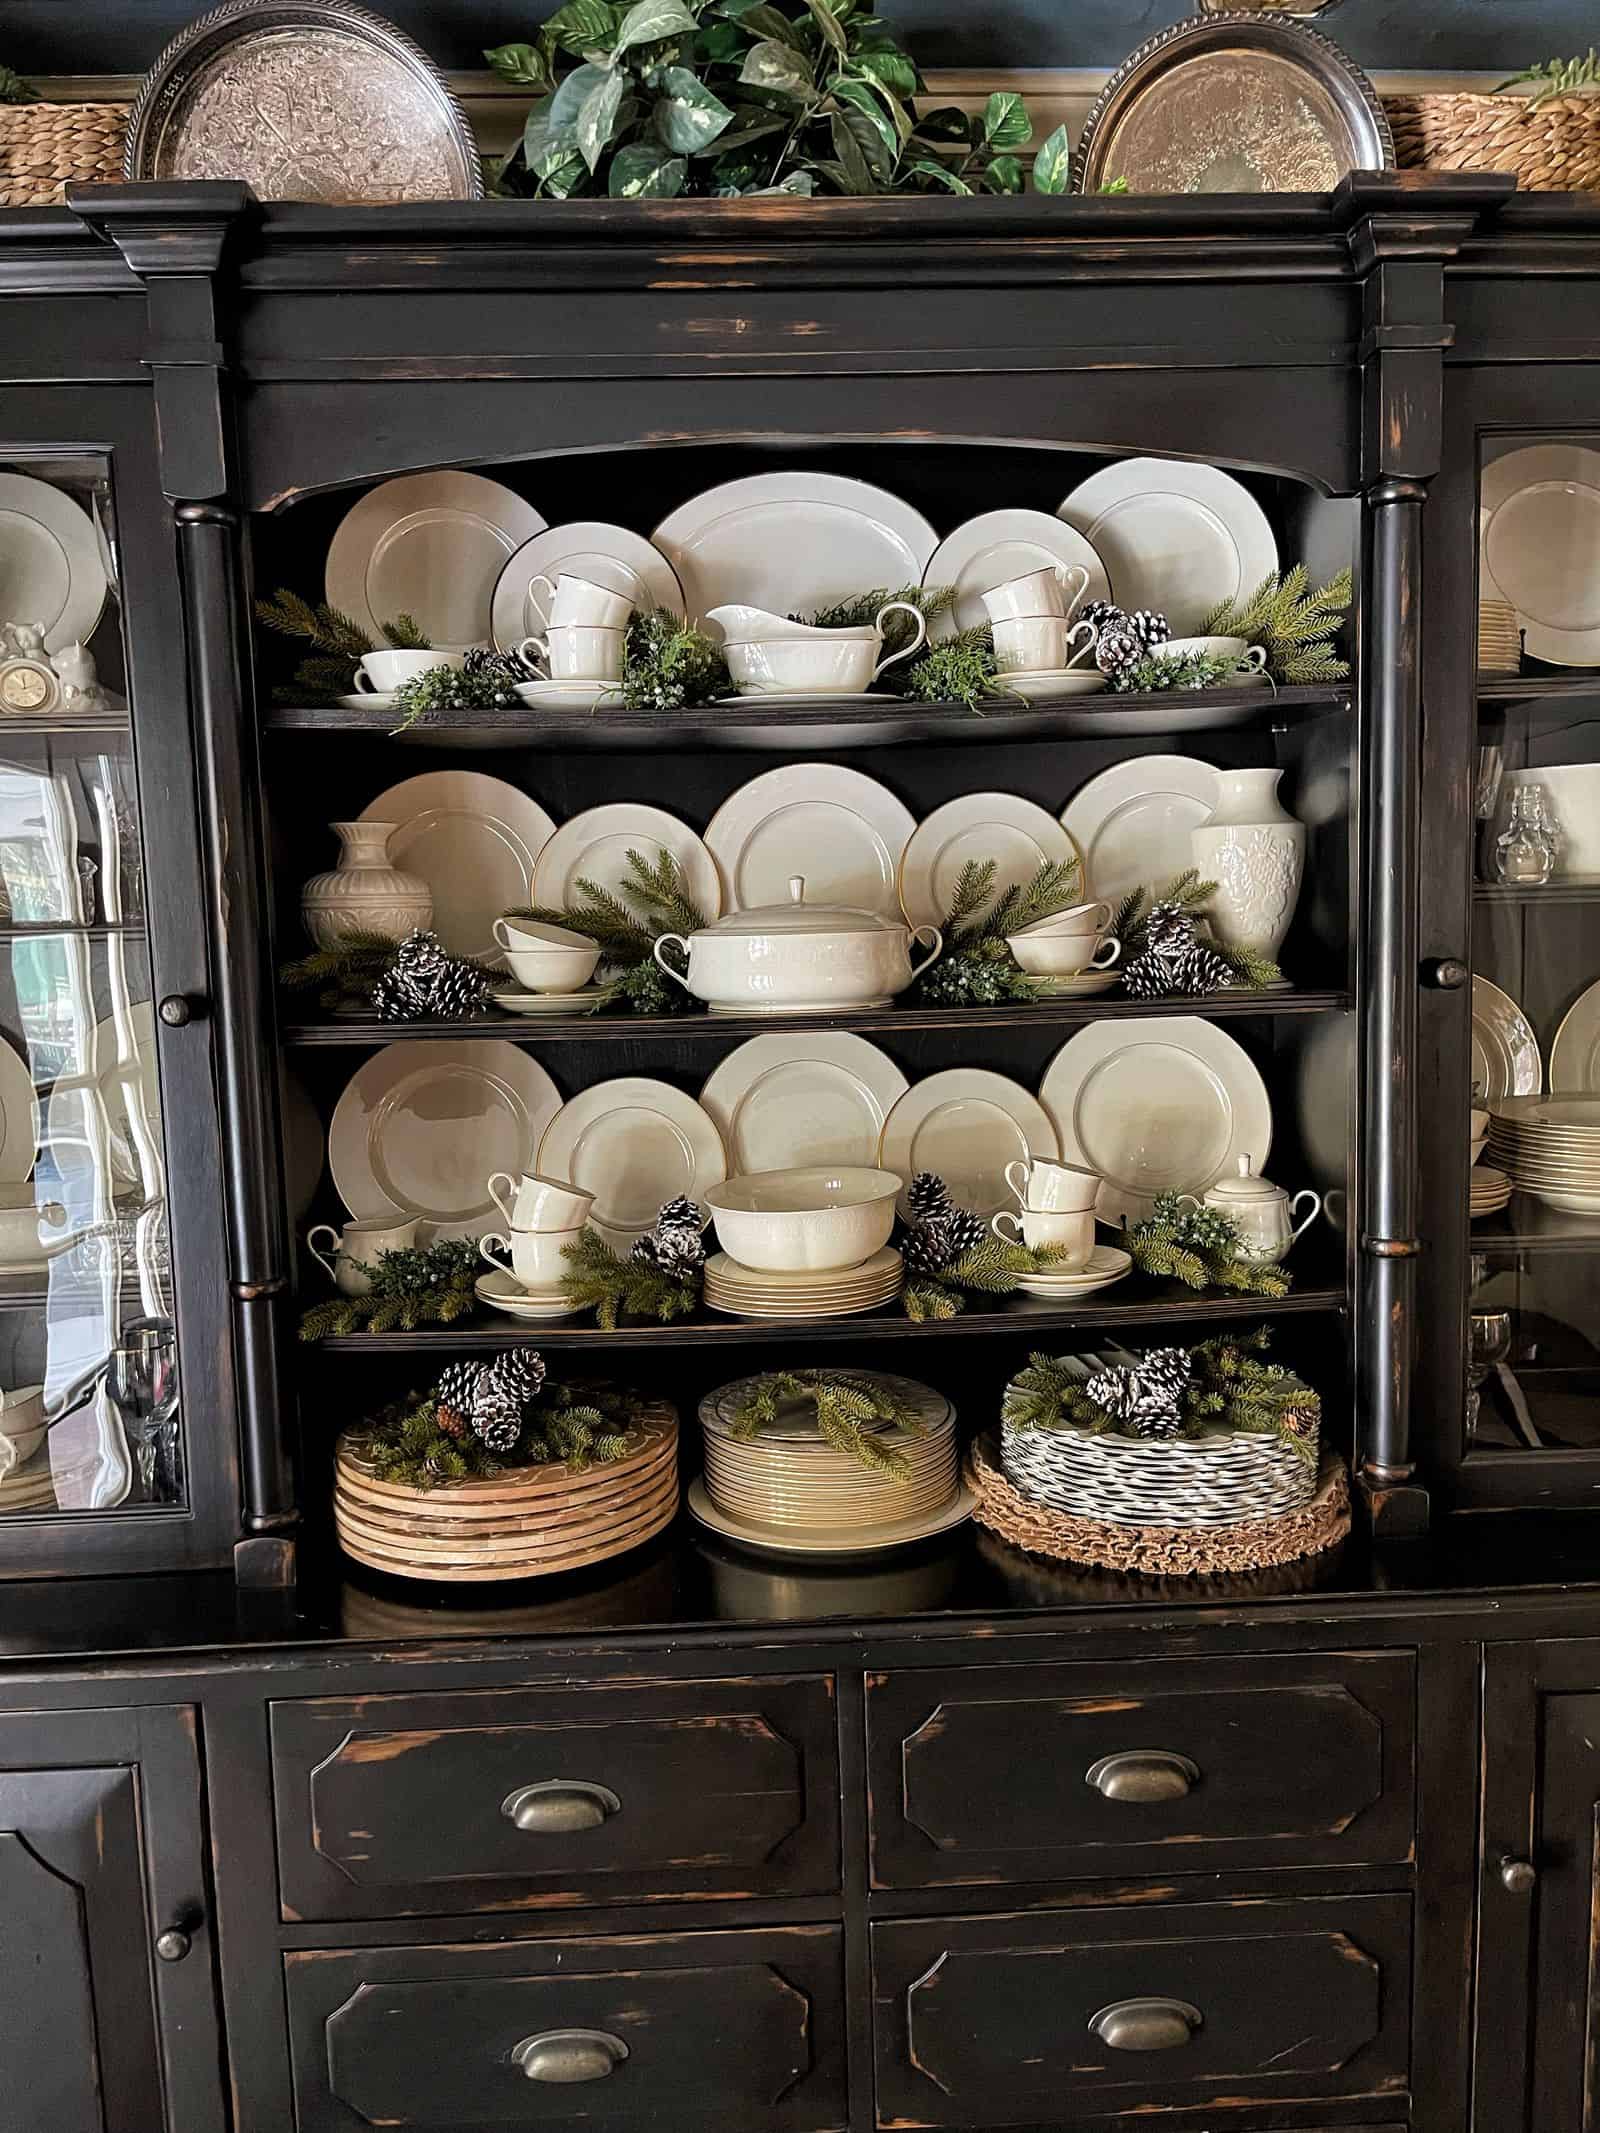
How to Decorate the Prettiest China Cabinet Display for the Seasons
Once the dining room china cabinet shelves are arranged to your liking, add organic decor for seasonal touches. For example, in winter I love to add pinecones or berries to winter greens for a cozy look. And for the holidays, I’ll ramp it up with reds or other baubles.

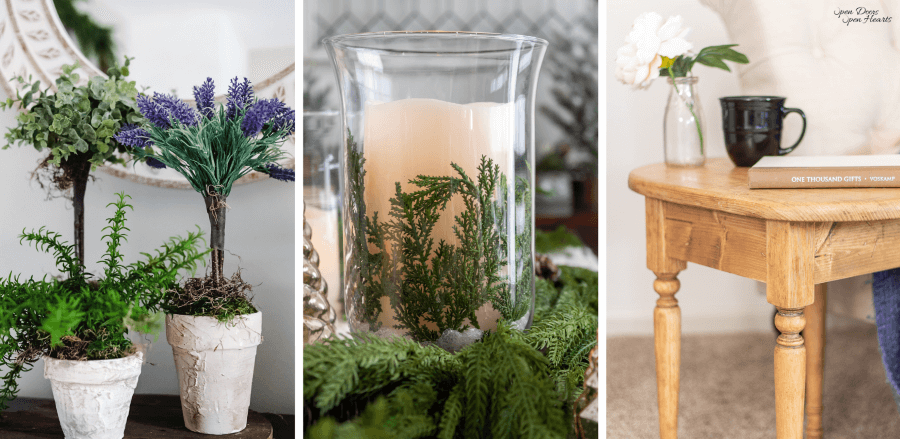
For spring and summer, I tuck in a few terracotta pots with faux kalanchoe plants and these pretty artificial fern stems for a rustic elegant farmhouse look. I prefer to use fake flowers and plants on my dining room hutch shelves to avoid any potential water damage.
But these are just a few of the things I love.
If you enjoy other things, tuck in some of those items to bring your personality to the display. To learn more about what I used to decorate the china cabinet hutch for spring, CLICK HERE.
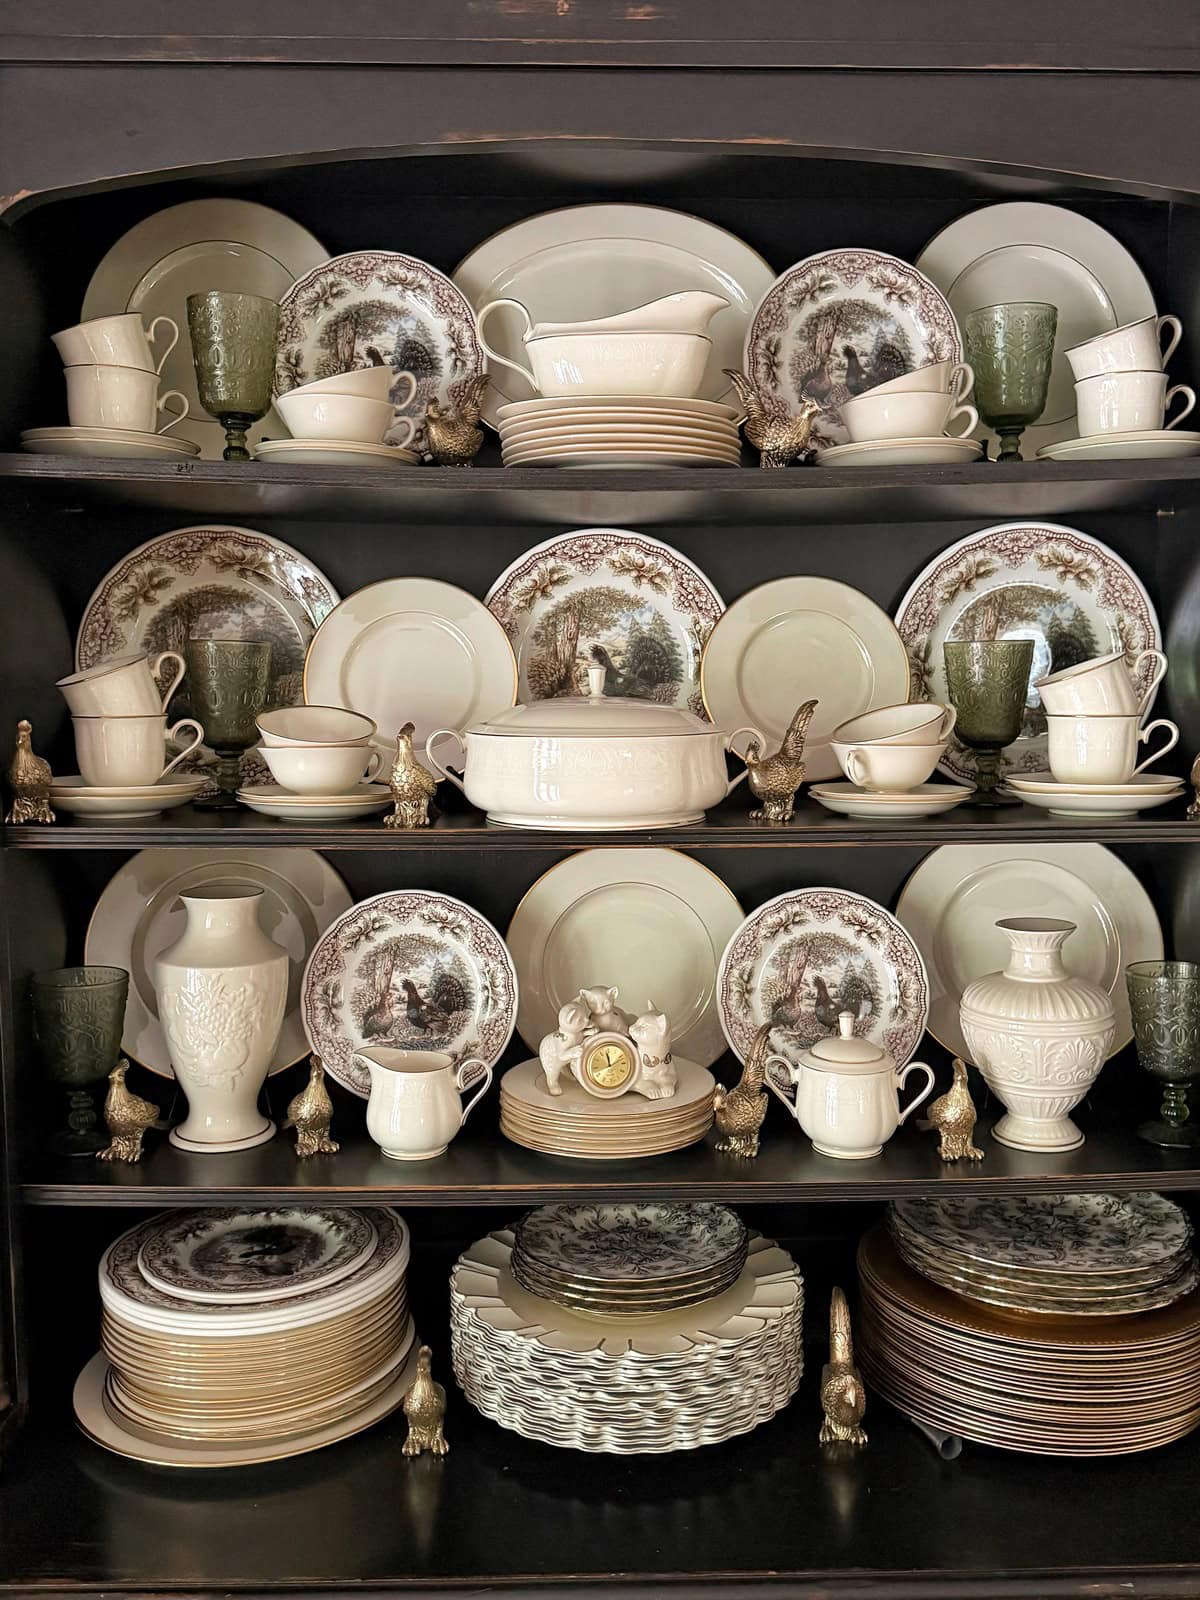
And for fall, I swapped out some of my fine china for some vintage inspired spode turkey plates. Doesn’t it look so elegant and beautiful? Get the details on how I mixed and matched china for fall here.
Frequently Asked Questions
- What do you put in the back of a china cabinet? Larger, flat items like platters and chargers create a beautiful backdrop.
- How do you display plates standing up in a china cabinet? Use clear plastic or decorative plate stands for stability and visibility.
- Should you mix things other than china in a hutch? Absolutely! Mixing in items like stacked books, small plants, or sentimental objects adds personality and visual interest.
- How often should you rearrange a china cabinet? It’s a matter of personal preference, but a good practice is to do a light dusting and tidying seasonally, with a full rearrangement every year or two.

Final Thoughts About Decorating a Hutch China Cabinet
And that’s it! I love how clean and organized the china cabinet display looks, don’t you?
Arranging your china cabinet hutch is truly a reflection of your personal style and the stories you want to tell. Don’t be afraid to curate a collection of items you genuinely love, and let them shine. Shop your home, use what you have, and tuck in new items that will help pull your design aesthetic together.
Remember, layering creates that inviting, cozy feel, and seasonal touches keep your display fresh and engaging. More than just a piece of furniture, your hutch becomes a visual diary of your life and passions.
Thanks so much for joining me on the blog today. I hope you are inspired to decorate your own china cabinet too! And I’d love to chat more about decorating your cabinet hutch in the comments below.
Thank you for visiting the blog today!
Enjoy your day! xo


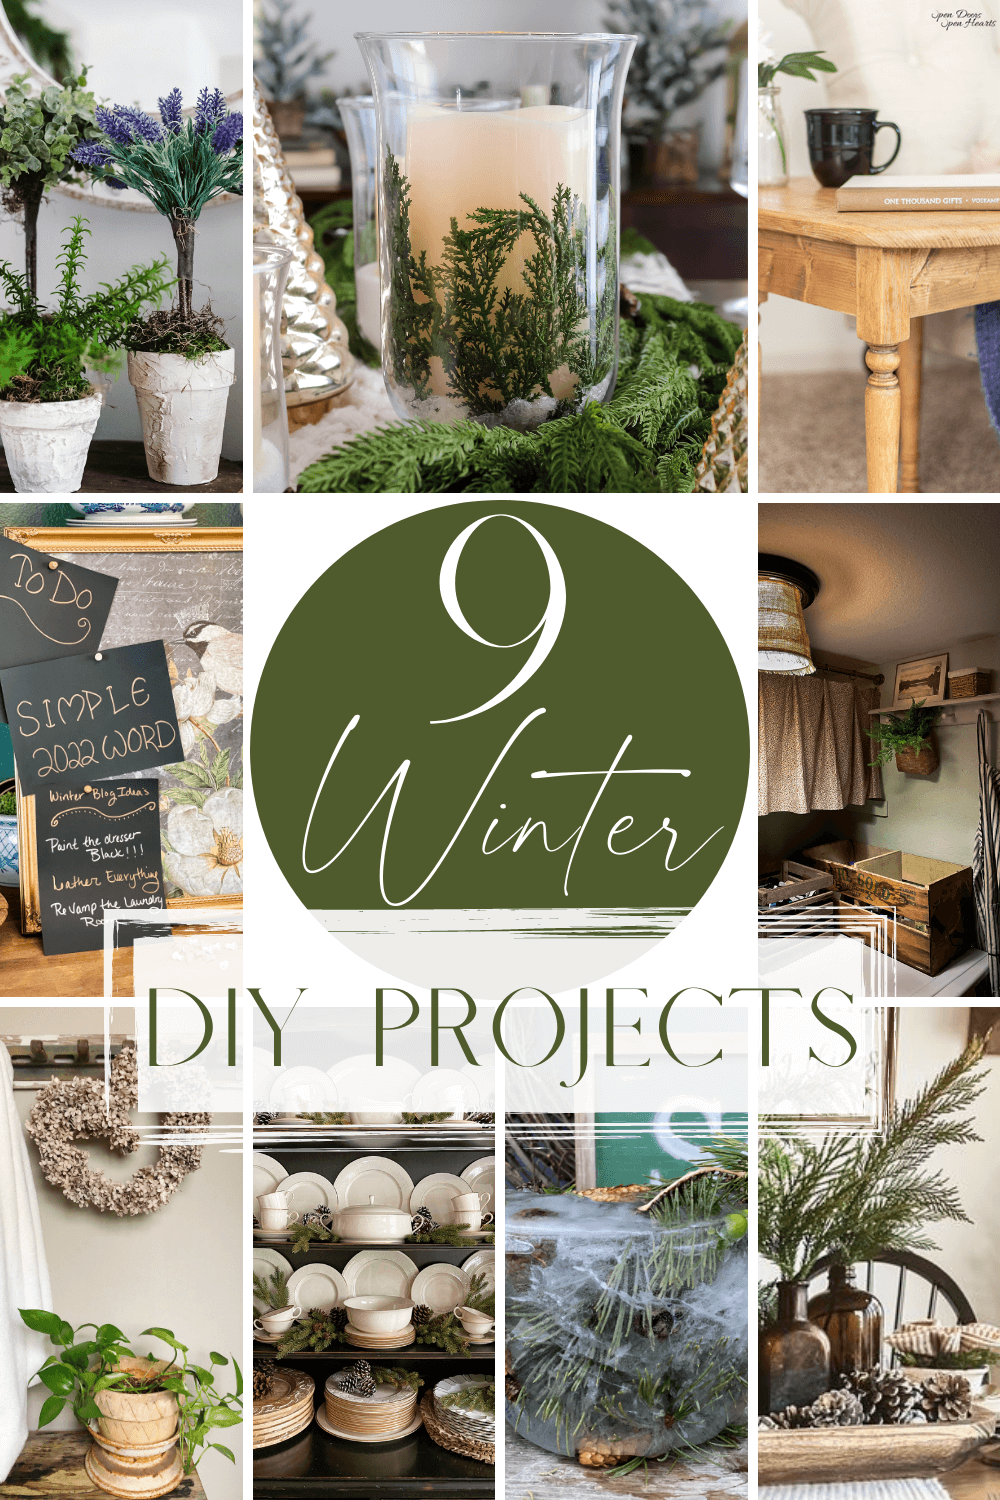
Winter DIY Home Decor Blog Hop
Cottage On Bunker Hill | Midwest Life And Style | Open Doors Open Hearts
Vintage Home Designs | Loving Grace Home | Amy Sadler Designs
Bricks ‘n Blooms | The Tattered Pew | Simply2Moms
I love your explanation! Makes so much sense. I use the good china! Life is too short for sure!
Thank you so much Amy! xo
Your hutch looks so beautiful! You gave me lots of ideas. I also have a collection of old milk bottles different sizes and styles I use in curio cupboard. Any inspiration for helping me arrange them? Would love any ideas. Thank you!
That would be beautiful! I’d love to see a photo when you are done arranging it!
Stacy
Your cabinet looks beautiful! Love the white dishes.
Thank you Rachel! xo
So pretty, my friend. Happy Friday.
Thanks Renae! Happy Day!
What is the size of your cabinet? Width, depth and height? I’m trying to figure out what size I need and I love your arrangement! Help a girl out ! Please!
Hey Sara! My cabinet is really big! I will measure it because I’m not sure of the dimensions. I’ll touch back!
Where’s the red Spode? I was hoping to see how you made it work for you.
I’m dying to know where you got your white and green dishes from! Your set up is gorgeous!