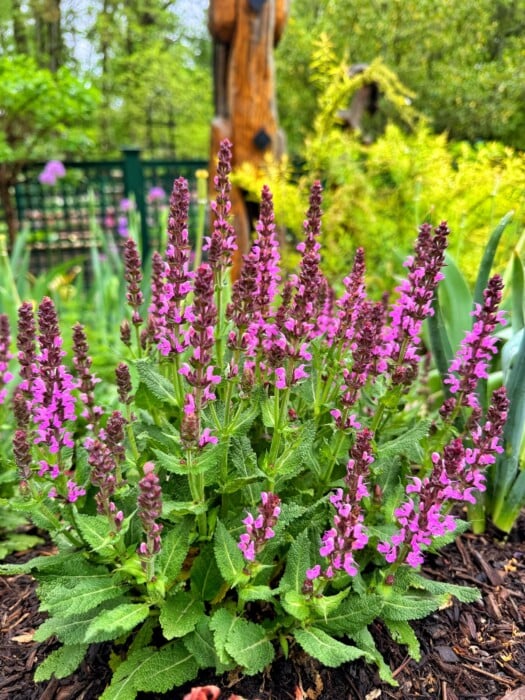
Want to extend the bloom time of your May Night Salvia? Learn how to deadhead the flowers to get more blooms! This easy guide will show you how to extend the flowering season and create a non-stop flower show in your garden.
The May night salvia (Salvia nemorosa) is a beloved perennial prized for its stunning, vibrant blue flowers. But did you know that with a little TLC, you can extend its blooming season and keep those gorgeous flowers gracing your garden all summer? The secret lies in a simple technique called deadheading.
Deadheading involves removing spent flowers from a plant, redirecting its energy towards producing new blooms.
By deadheading your May Night Salvia (or any other salvia really), you can enjoy a continuous display of color throughout the season, extending its blooming period and promoting a healthier, bushier plant.
(Posts on stacyling.com may contain affiliate links. Click HERE for full disclosure.)

Why Deadhead May Night Salvia?
When flowers fade and start to die, the plant focuses on seed production rather than creating new blooms. Deadheading removes these spent flowers, signaling to the plant that it’s time to focus its energy on producing more flowers instead of seeds. This results in a surge of new blooms, keeping your May Night Salvia the star of the garden for weeks to come.
And I know it might seem counterintuitive, but it actually benefits your plant because you’ll get even more flowers and enjoy a healthier plant that looks beautiful for longer. Um…yes please!
When to Deadhead May Night Salvia
The best time to deadhead your May Night Salvia is when the individual flowers or the entire flower stalk starts to fade. The vibrant purple blooms will lose their color and become dull. The best time to deadhead is when individual flowers on the bloom spike start to wilt and lose their vibrant blue color. Don’t wait for all the flowers to fade – aim for about 70% to get the best results in encouraging new blooms.

How to Deadhead May Night Salvia
Deadheading May Night Salvia is a simple process that takes just a few minutes. All you need is a sharp set of pruners or garden snips that have been cleaned and sterilized. I like to use 1:10 bleach to water solution, but sometimes also just grab some Clorox wipes so I can clean them as I go.
To give you a frame of reference as to when you deadead. Here in my zone 6b garden, May Night Salvia generally blooms at the end of May into the end of June and requires some deadheading once July and August approach. Here’s how to do it.

Step 1: Identify the Spent Blooms
Grab a set of clean pruners and carefully examine your May Night Salvia. You’ll see individual flowers fading at the bottom of the flower stalk first, gradually moving upwards.
Step 2: Make a Clean Cut
Using your sterilized pruners or garden snips, make a clean cut just above a healthy set of leaves. This is where new growth will emerge, giving rise to fresh blooms. Aim to remove the spent flower stalk where it meets the main stem.
Step 3: Entire Flower Stalk or Individual Blooms?
If the entire flower stalk has faded, you can remove the entire stalk by cutting it at its base. However, if only some flowers on the stalk have faded, focus on removing just those individual flowers, leaving the healthy ones intact. For smaller flower heads, you can simply pinch off the spent blooms with your thumb and forefinger.
Step 4: Deadheading Frequency
Consistency is key! Regularly deadhead throughout the blooming season to maximize flower production.

Benefits of Deadheading May Night Salvia
By consistently deadheading your May Night Salvia, you’ll reap several rewards:
- More Blooms, More Beauty: Enjoy a continuous display of vibrant purple flowers throughout the growing season. Cutting the plant back after the first flush of blooms typically brings on a second set which extends your bloom time.
- Bushier and Healthier Plant: Deadheading encourages the plant to focus its energy on growth, promoting a bushier and healthier May Night Salvia.
- A Tidy Garden Aesthetic: Removing spent flowers keeps your May Night Salvia looking neat and polished, enhancing the overall beauty of your garden.
Additional Tips for a Thriving May Night Salvia
Make deadheading a regular part of your gardening routine throughout the growing season for a constant show of blooms. While this post focuses on deadheading May Night Salvias, you can apply the same technique to other salvias too.
Keep in mind that deadheading is a little different from shearing. Shearing involves cutting back a significant portion of the plant’s foliage, which is not recommended for May Night Salvia. Stick to removing spent flowers to promote new blooms.
At the end of the growing season, cut the plant back to the ground so it can produce healthy new growth in spring. And if you are feeling lazy about it? It doesn’t hurt the plant to wait to cut it back until spring.
With consistent deadheading, your May Night Salvia will reward you with a stunning display of flowers all season long.

More About Deadheading Salvia Plant
Are you growing May Night Salvia and do you cut it back after it blooms? I would love to know more in the comments below.


